I recently got asked to participate in a Project Run & Play mini season…..and must have forgotten how much the full season stressed me out because I heartily agreed to jump in! Kidding aside, I knew it would be only one week and also knew that PR&P really pushes me to try new things and work beyond my normal sewing so I was happy to join.

The theme was “Copy that Look- where designers aim to replicate fashion inspiration” and so I immediately asked my oldest daughter if she wanted me to sew a PR&P look for her (which is a rare occasion these days, because preteens are picky). She said YES and immediately started drawing what I was going to make her. I had to politely interrupt her to explain the theme…..at which point she sneered at me and said nevermind. She did not want to be restrained in her design I suppose. Back to the (literal) drawing board.

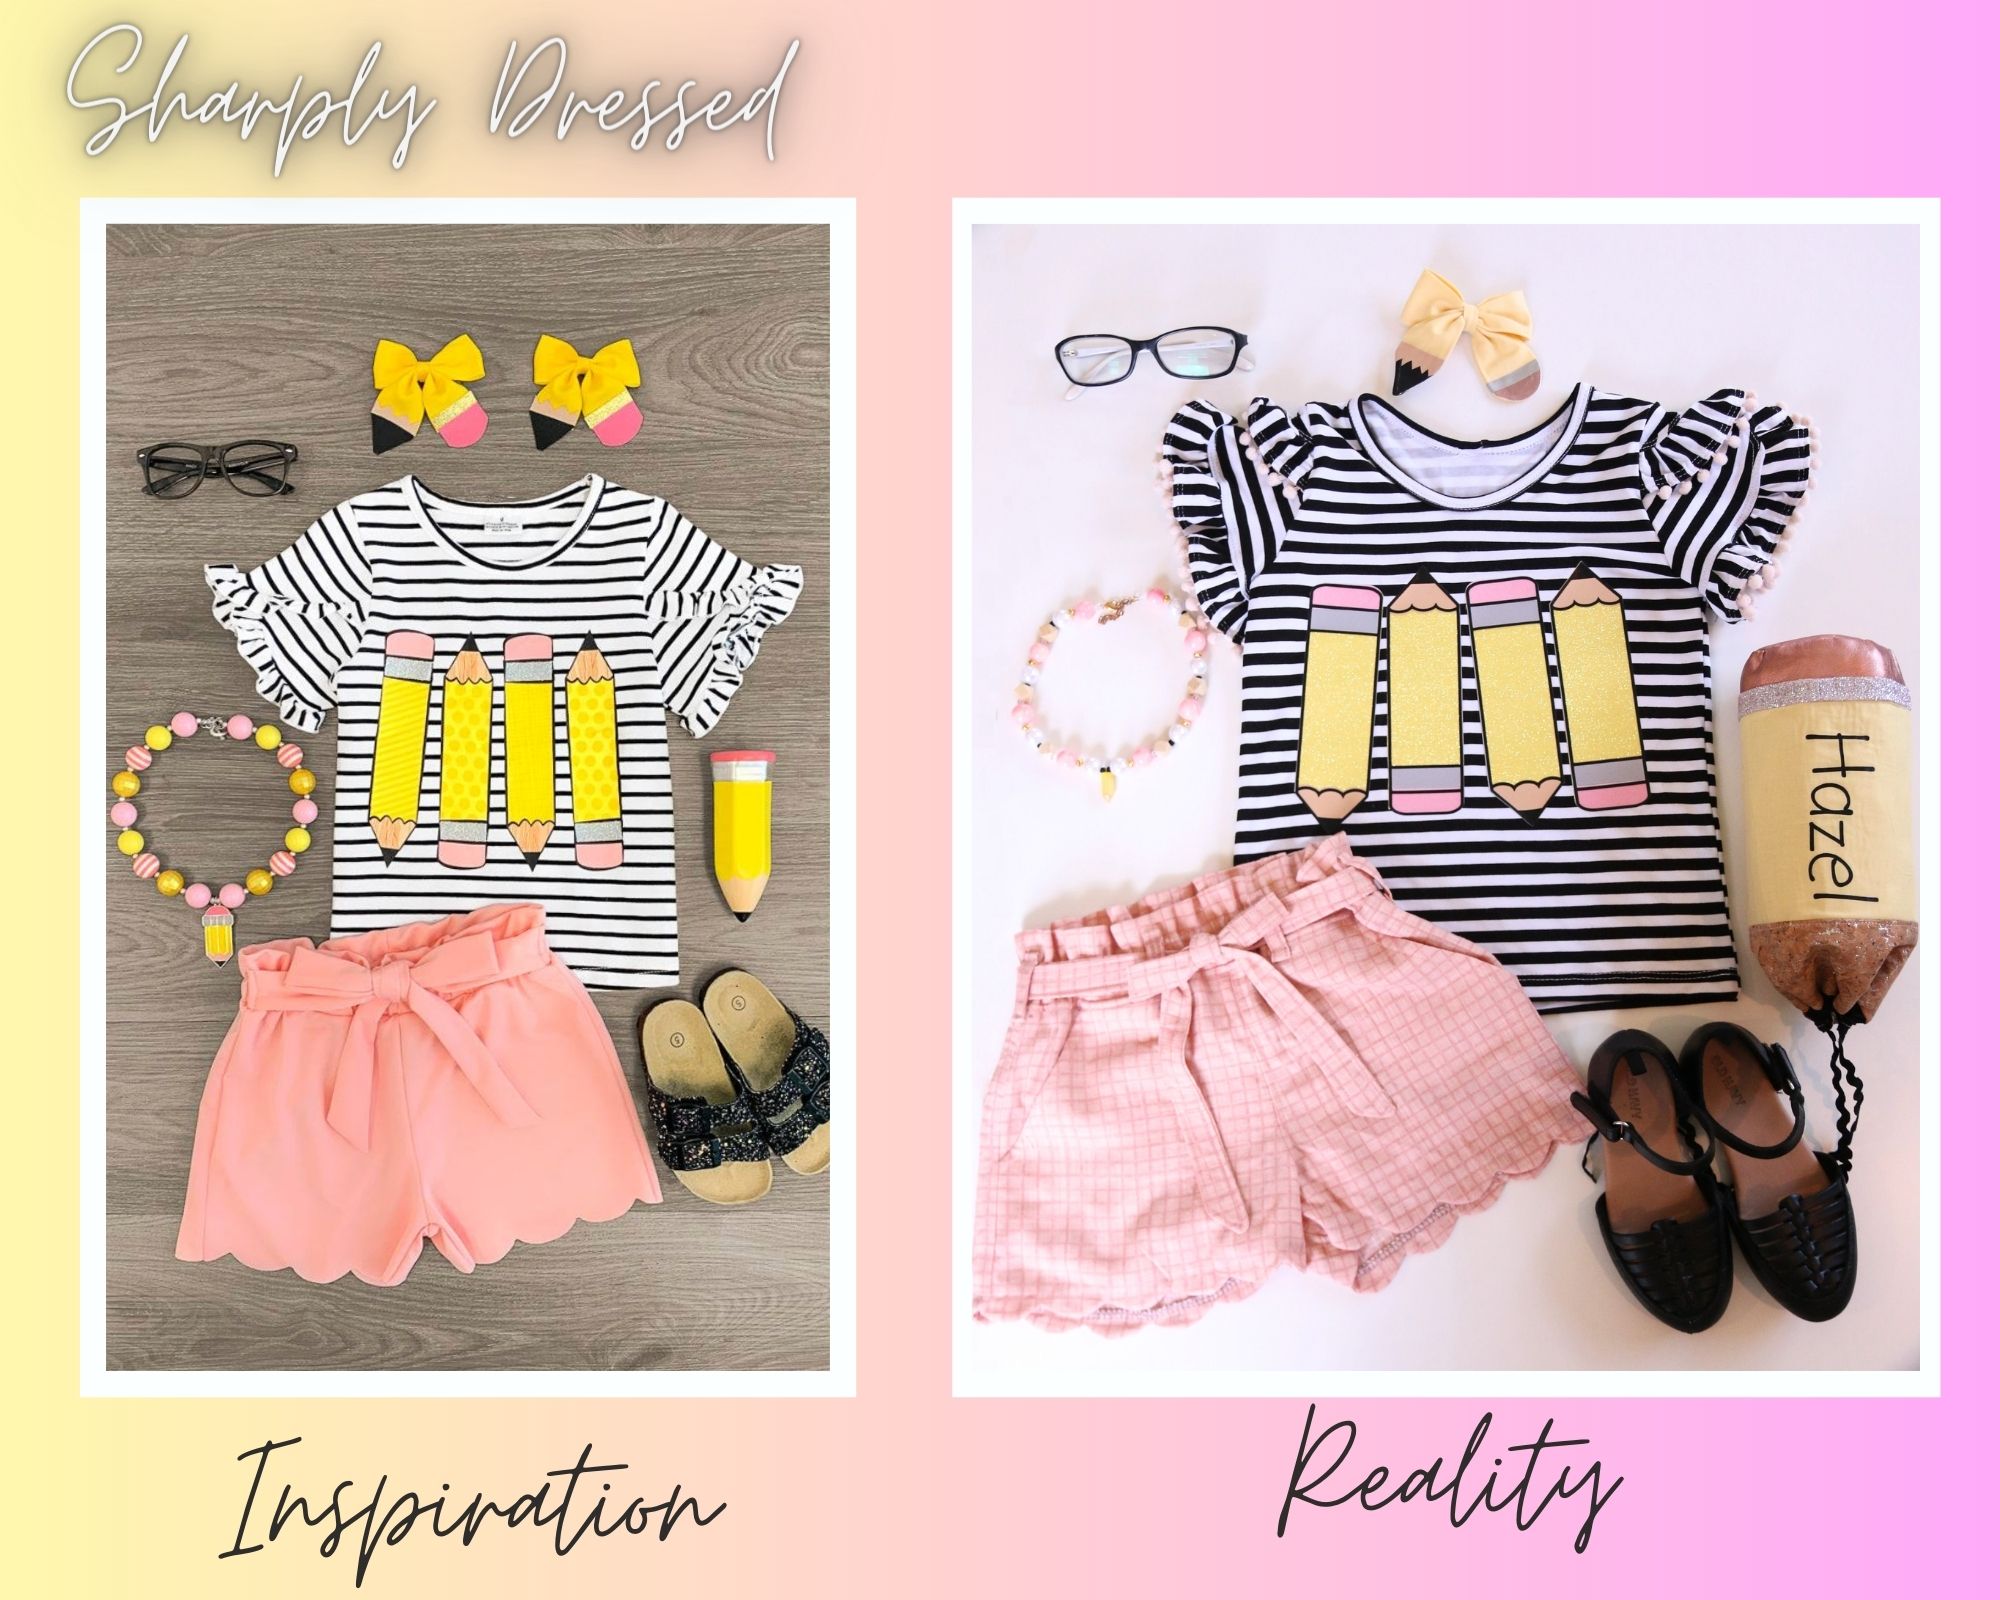
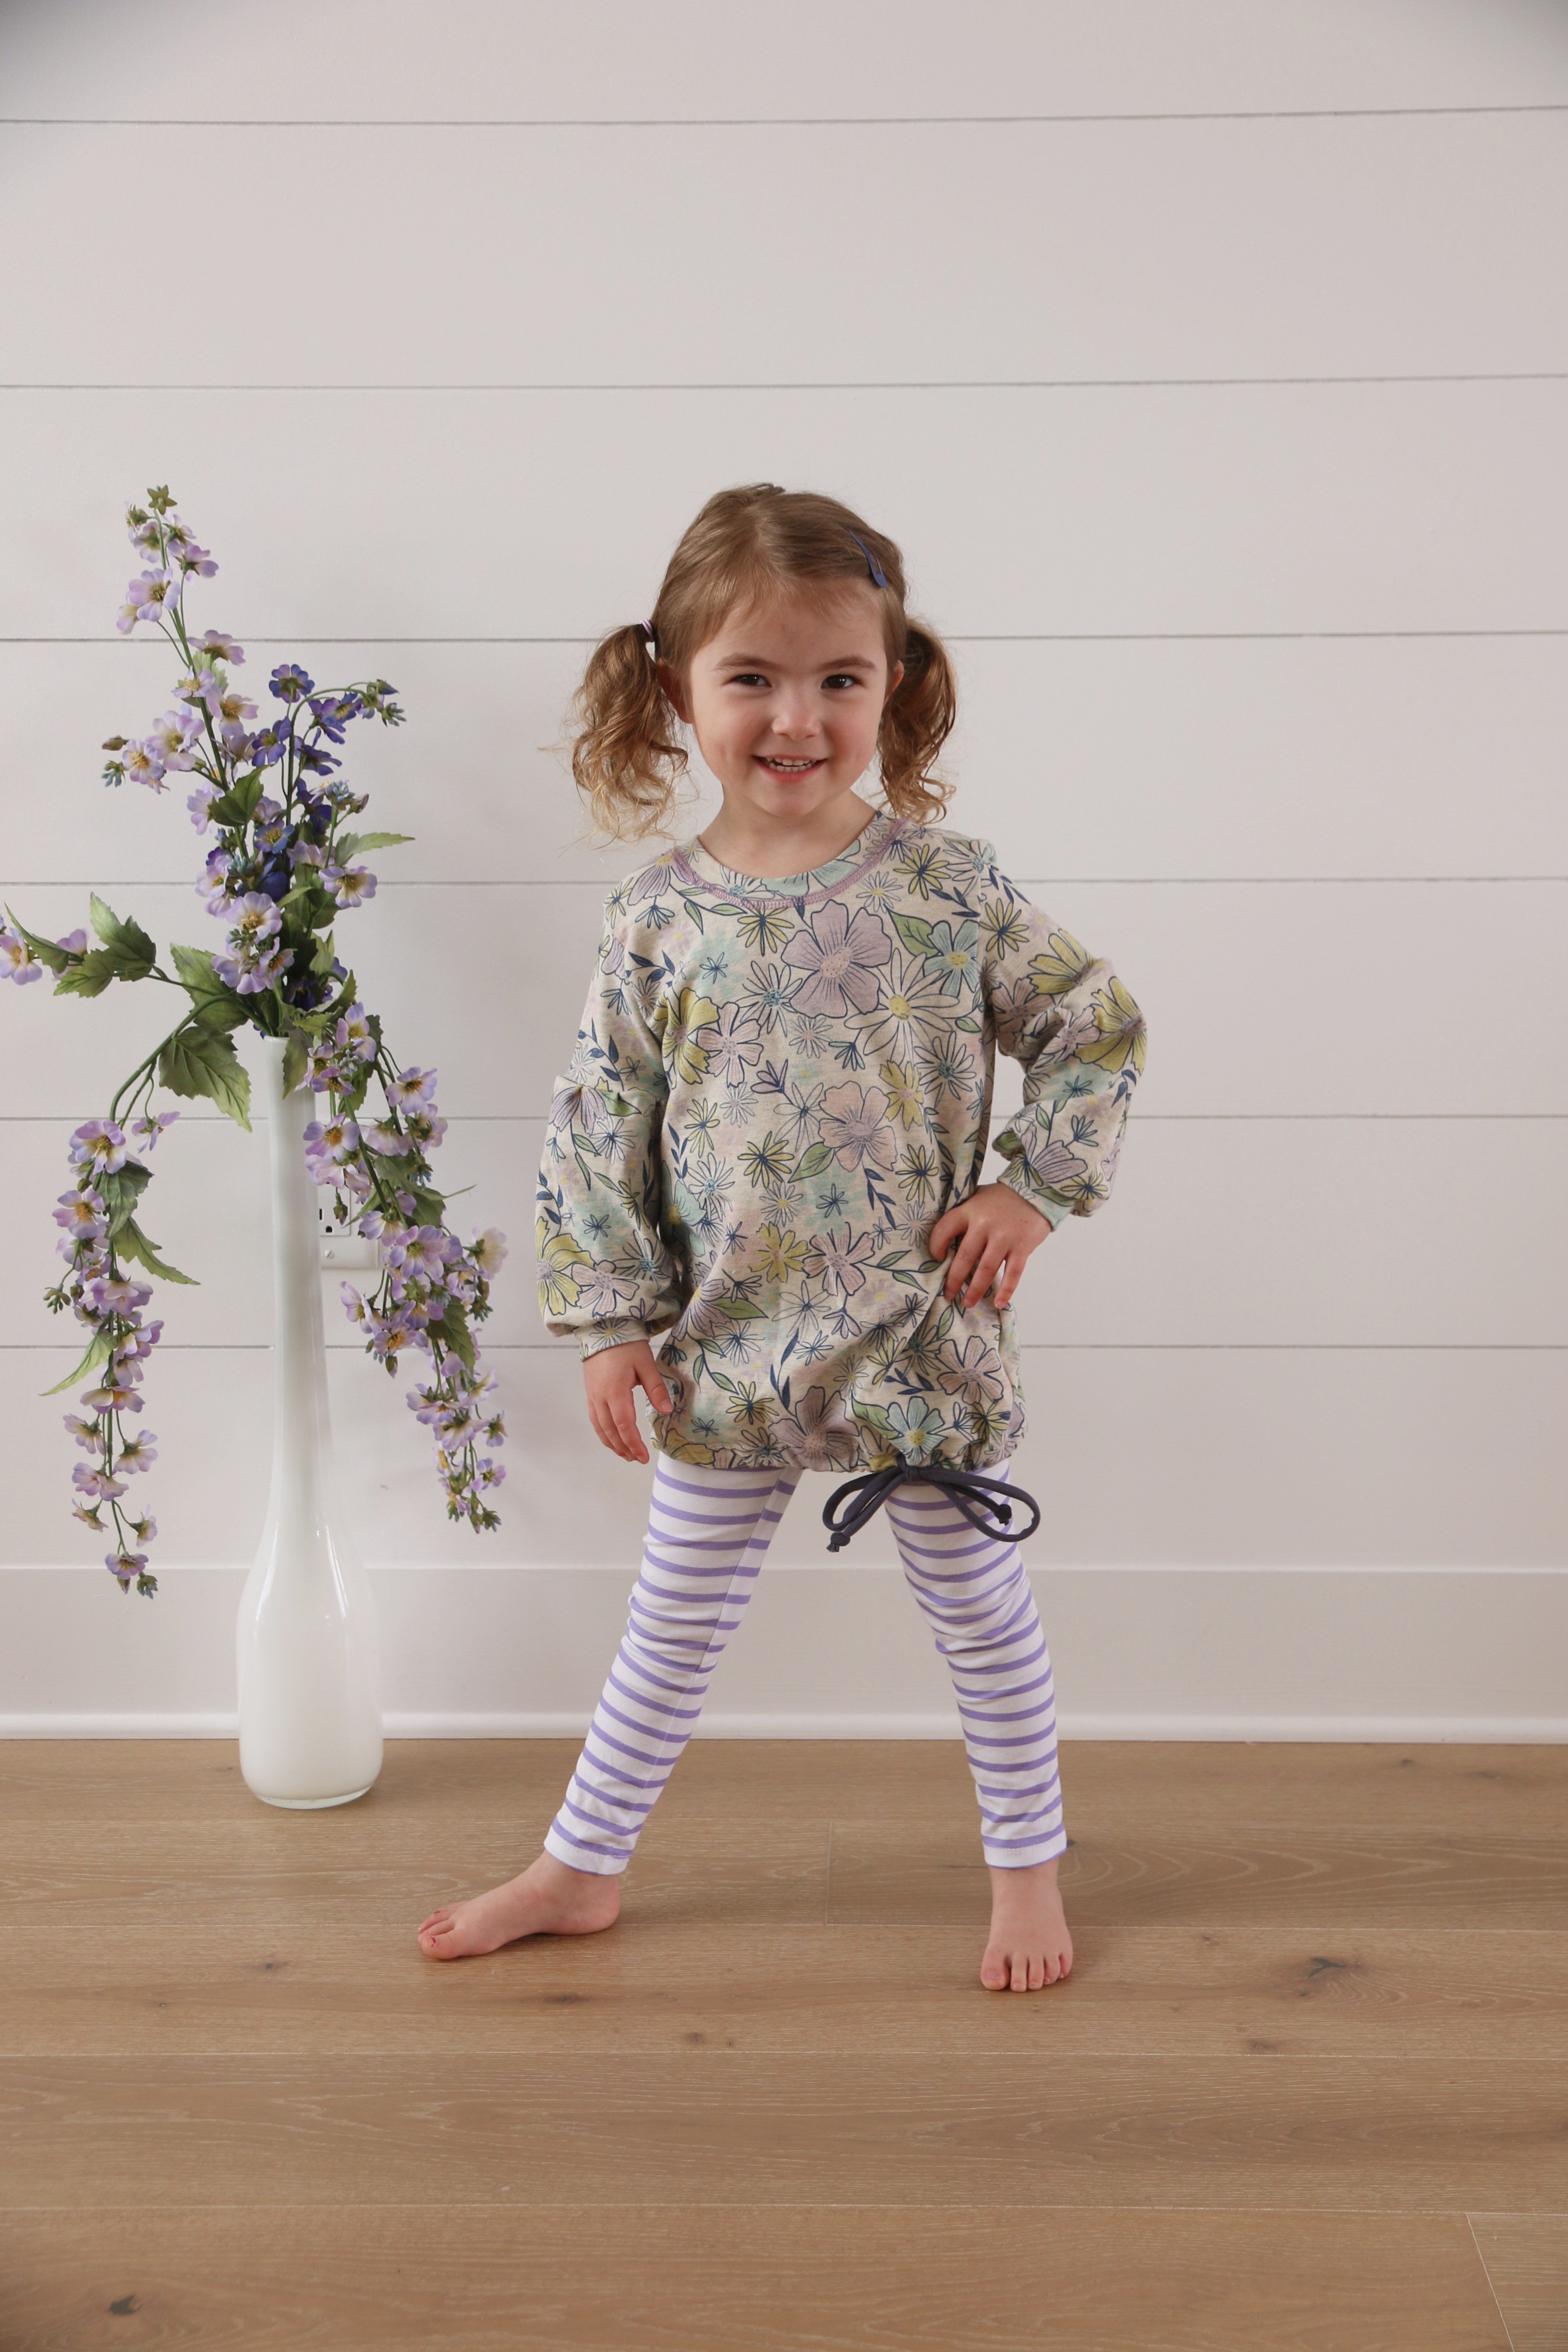
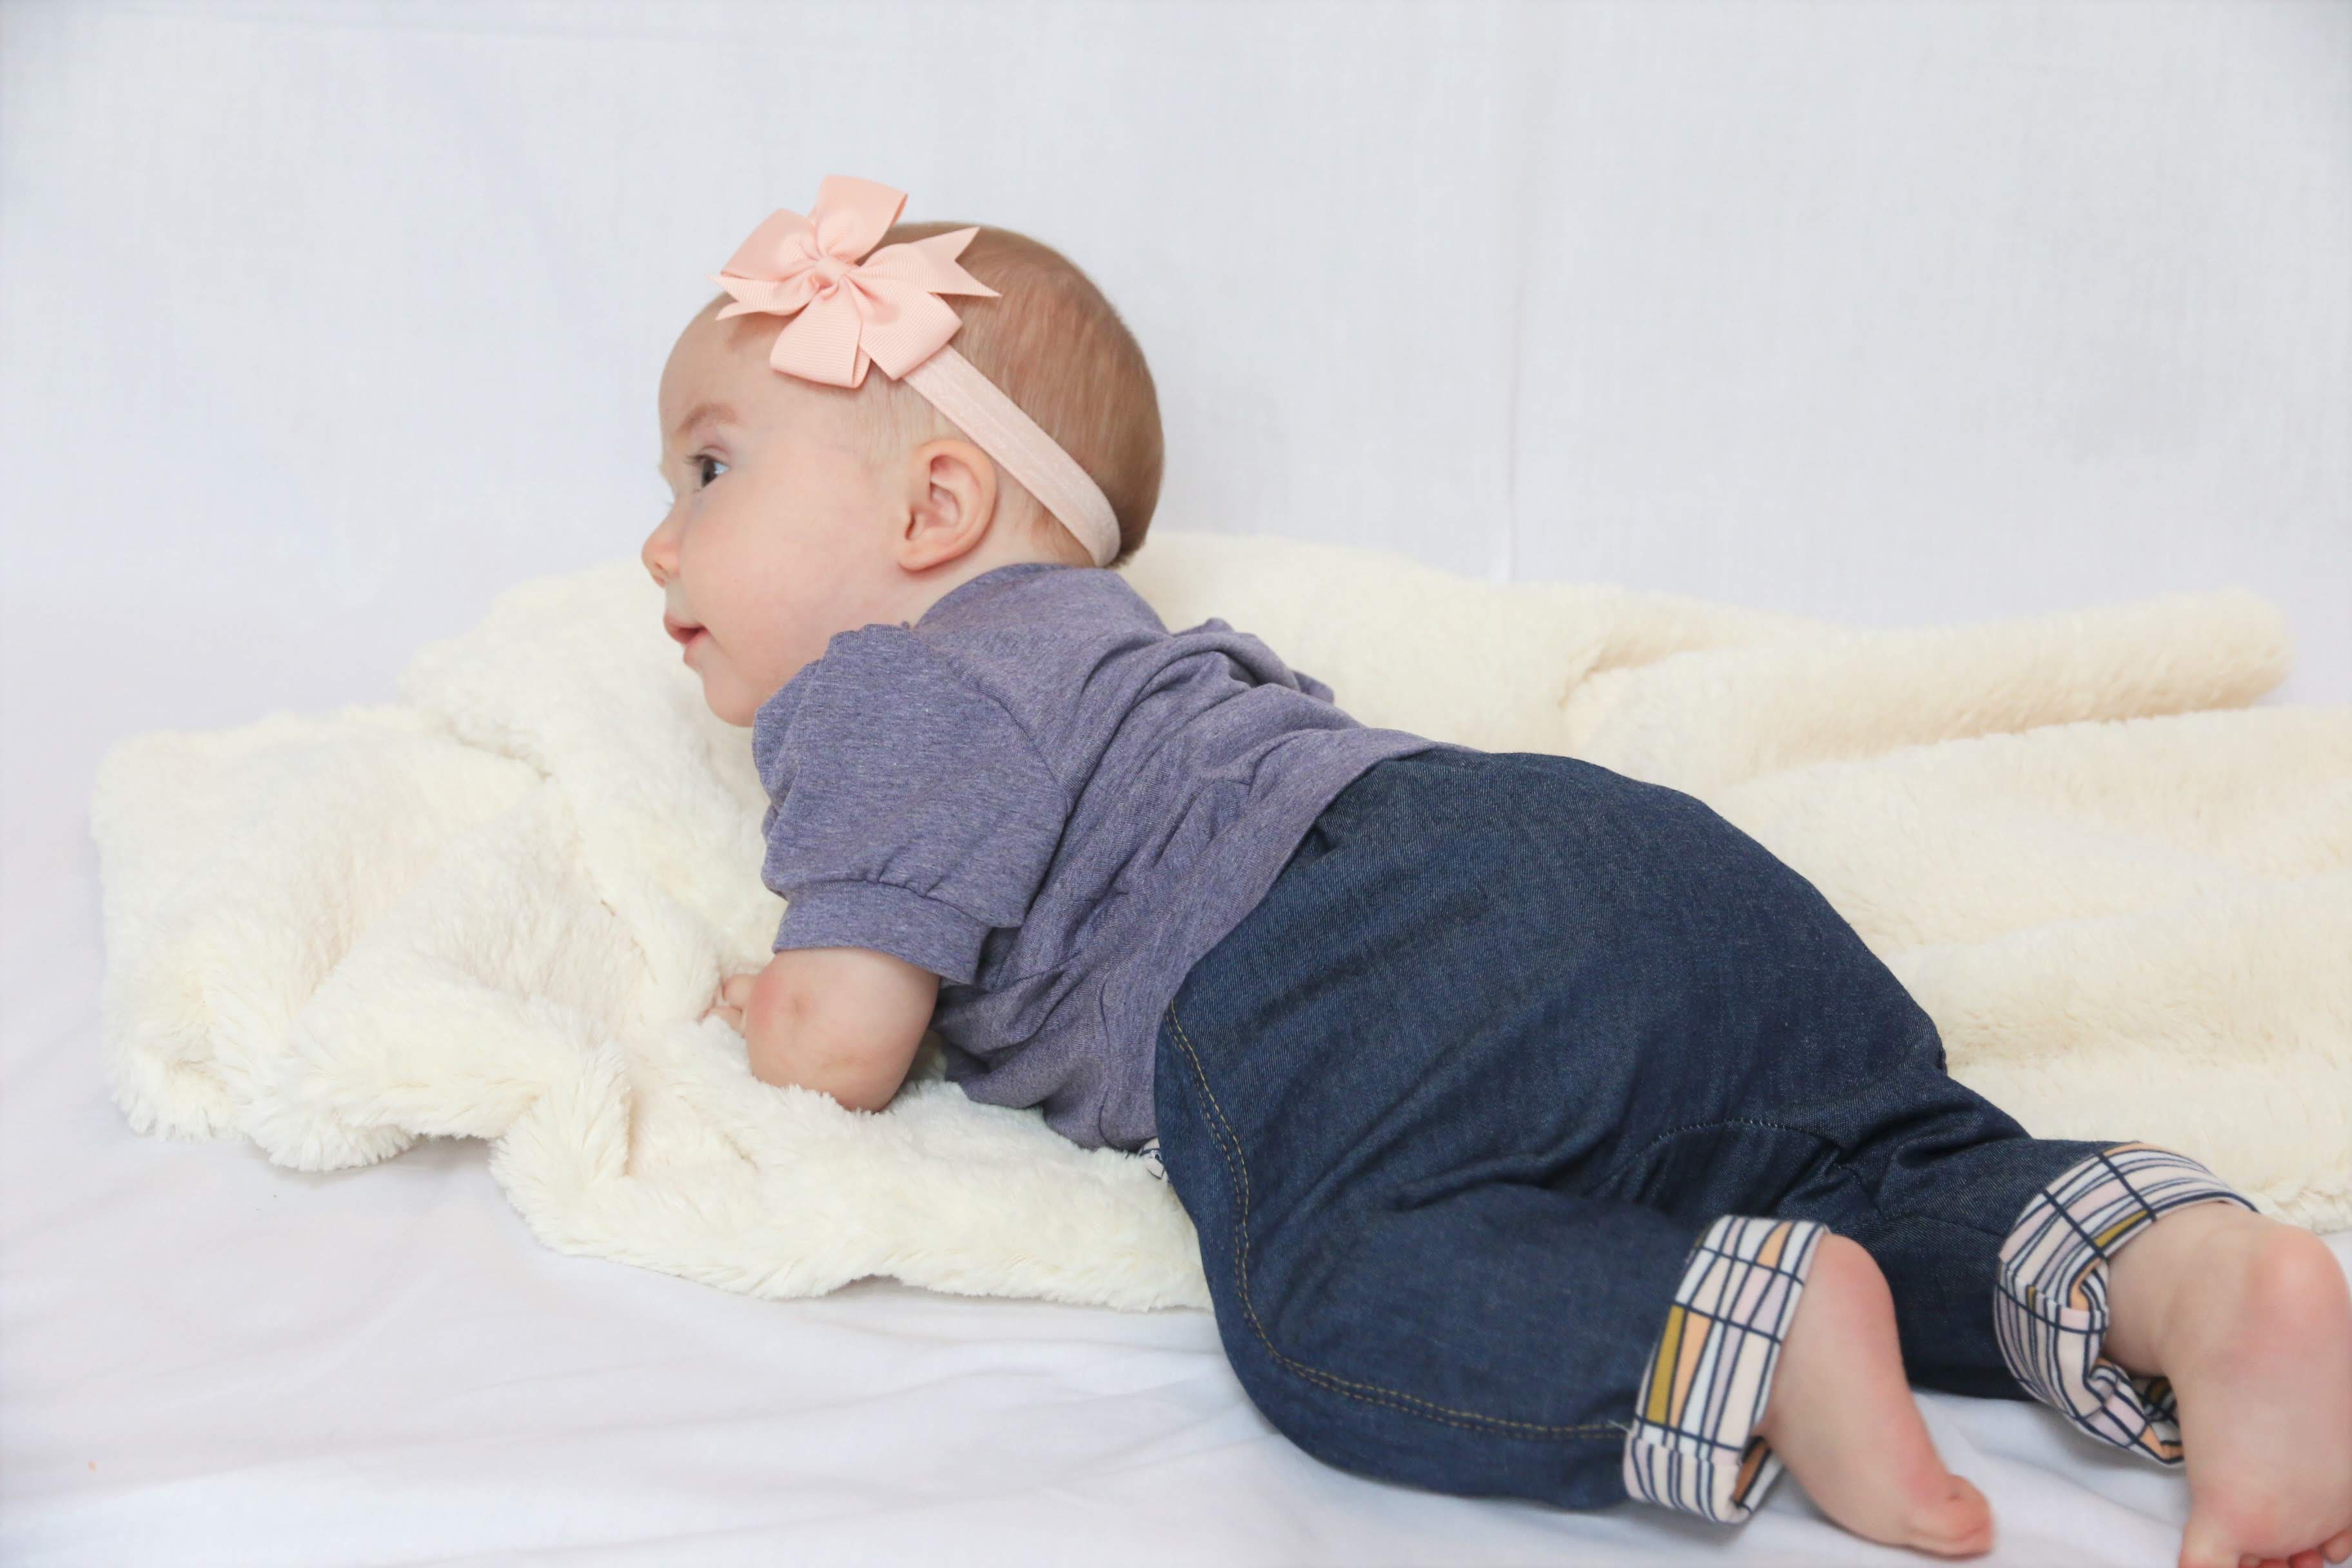
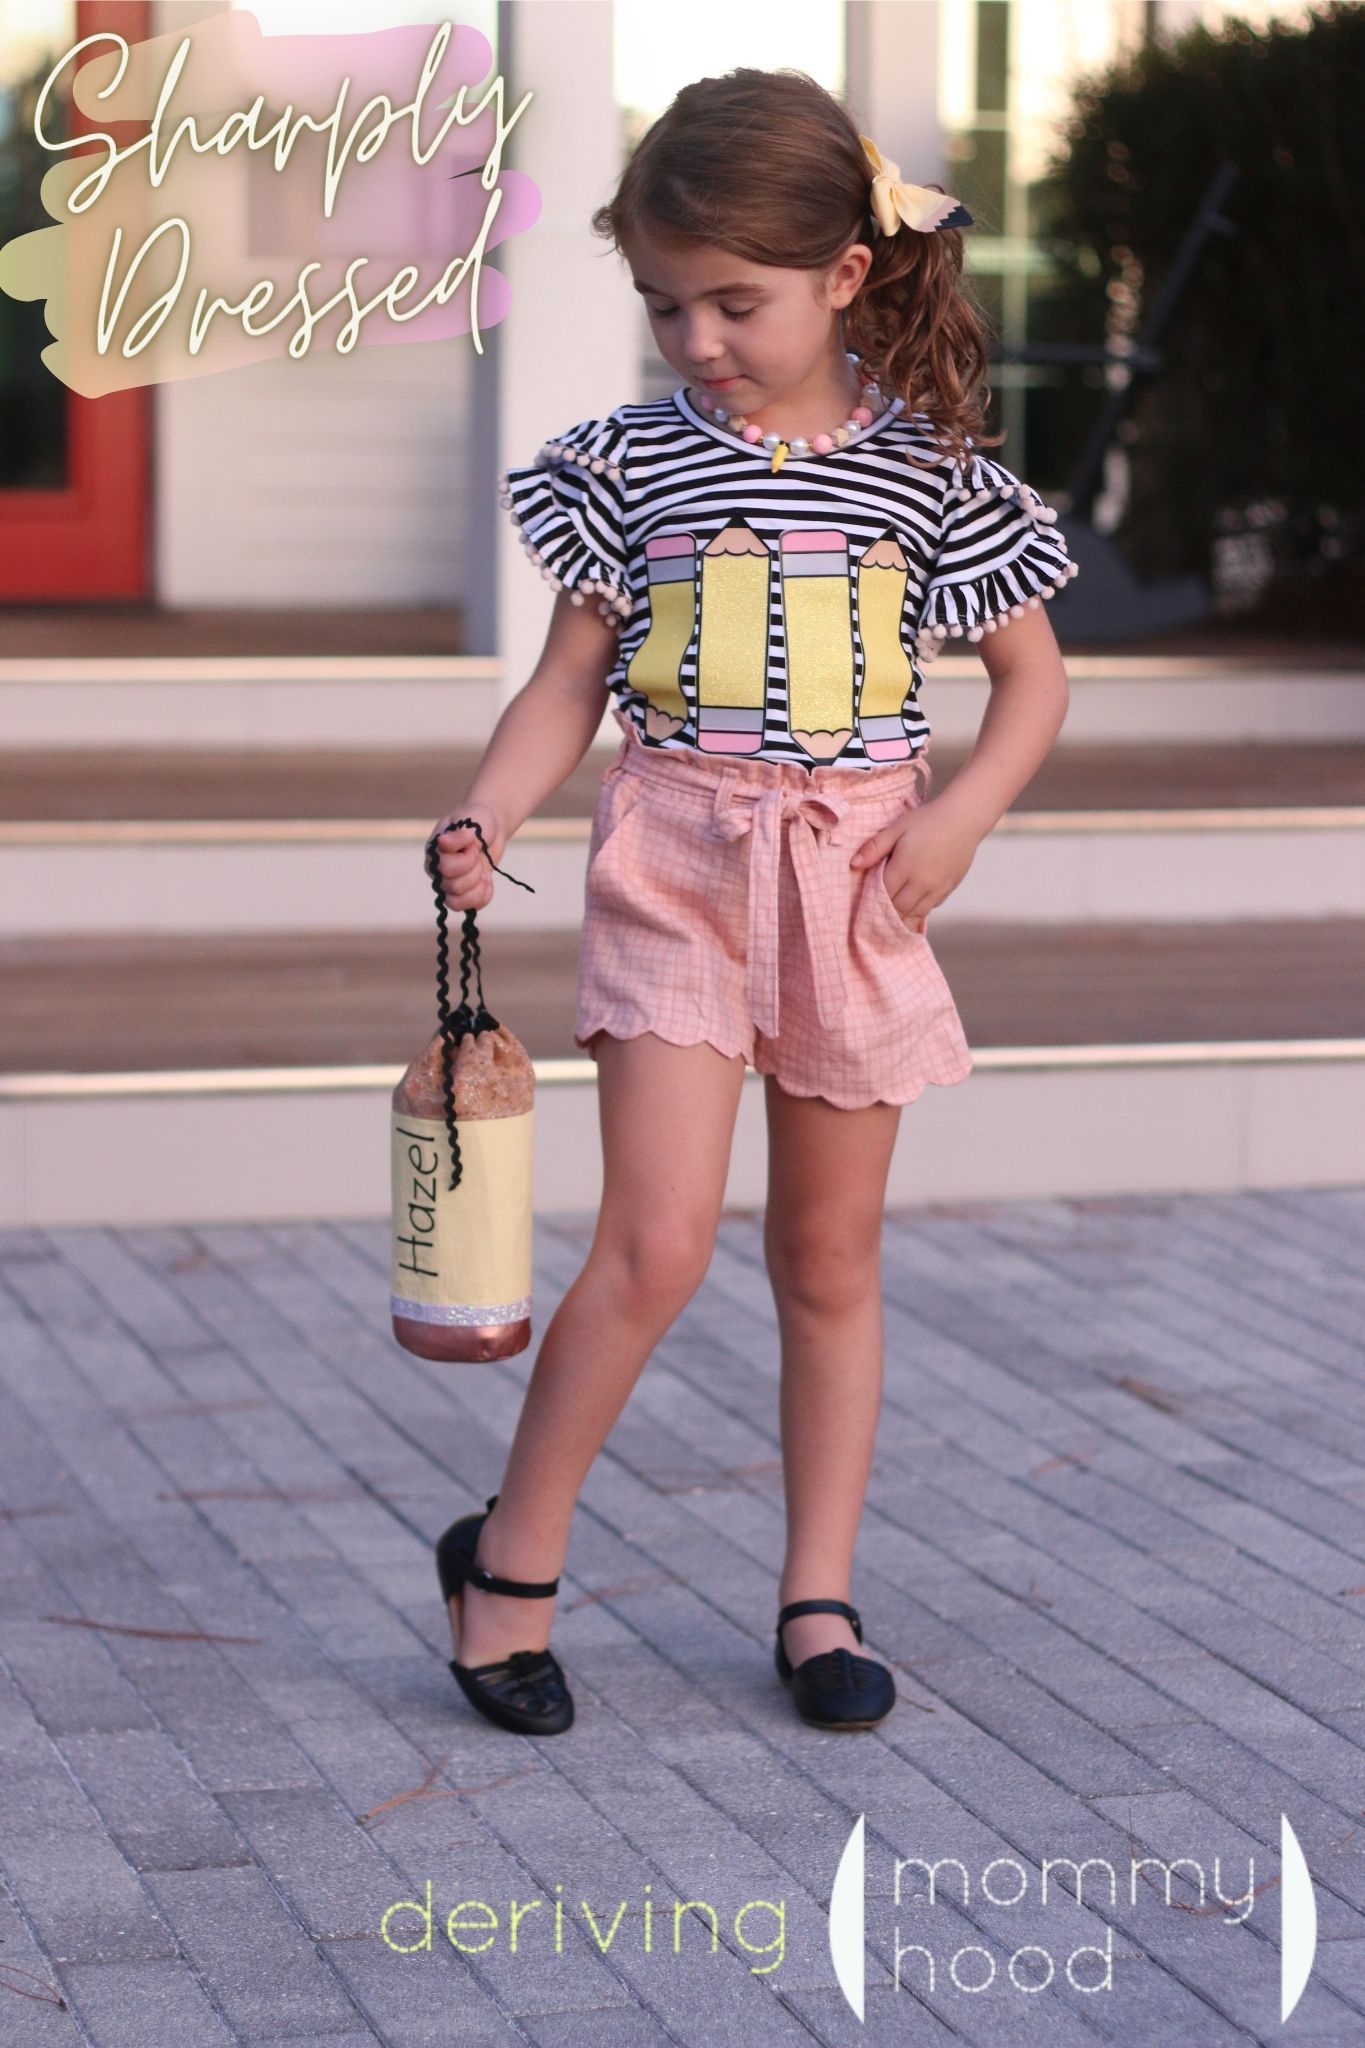
I have a giant pinterest board of ideas to sew up but most if not all are for me. Not for kids. So I looked at some inspiration on past Copy that Look posts on the PR&P site and found Sparkle in Pink Clothing. All super ridiculously cute outfits for little girls with surprisingly low price points….which to me usually means the quality of fabric and workmanship might not be what I would like to see. I wanted to create something super wearable for my youngest daughter because this year she starts KINDERGARTEN and needs to have practical clothes that work for recess and PE but are still cute….so shorts and a tee was a must.

I did struggle a little in choosing that it seemed everything was too basic. Nothing particularly innovative for me to try. But ultimately, I tried to push myself to incorporate as much as I could to jazz this one up while keeping with the inspiration.

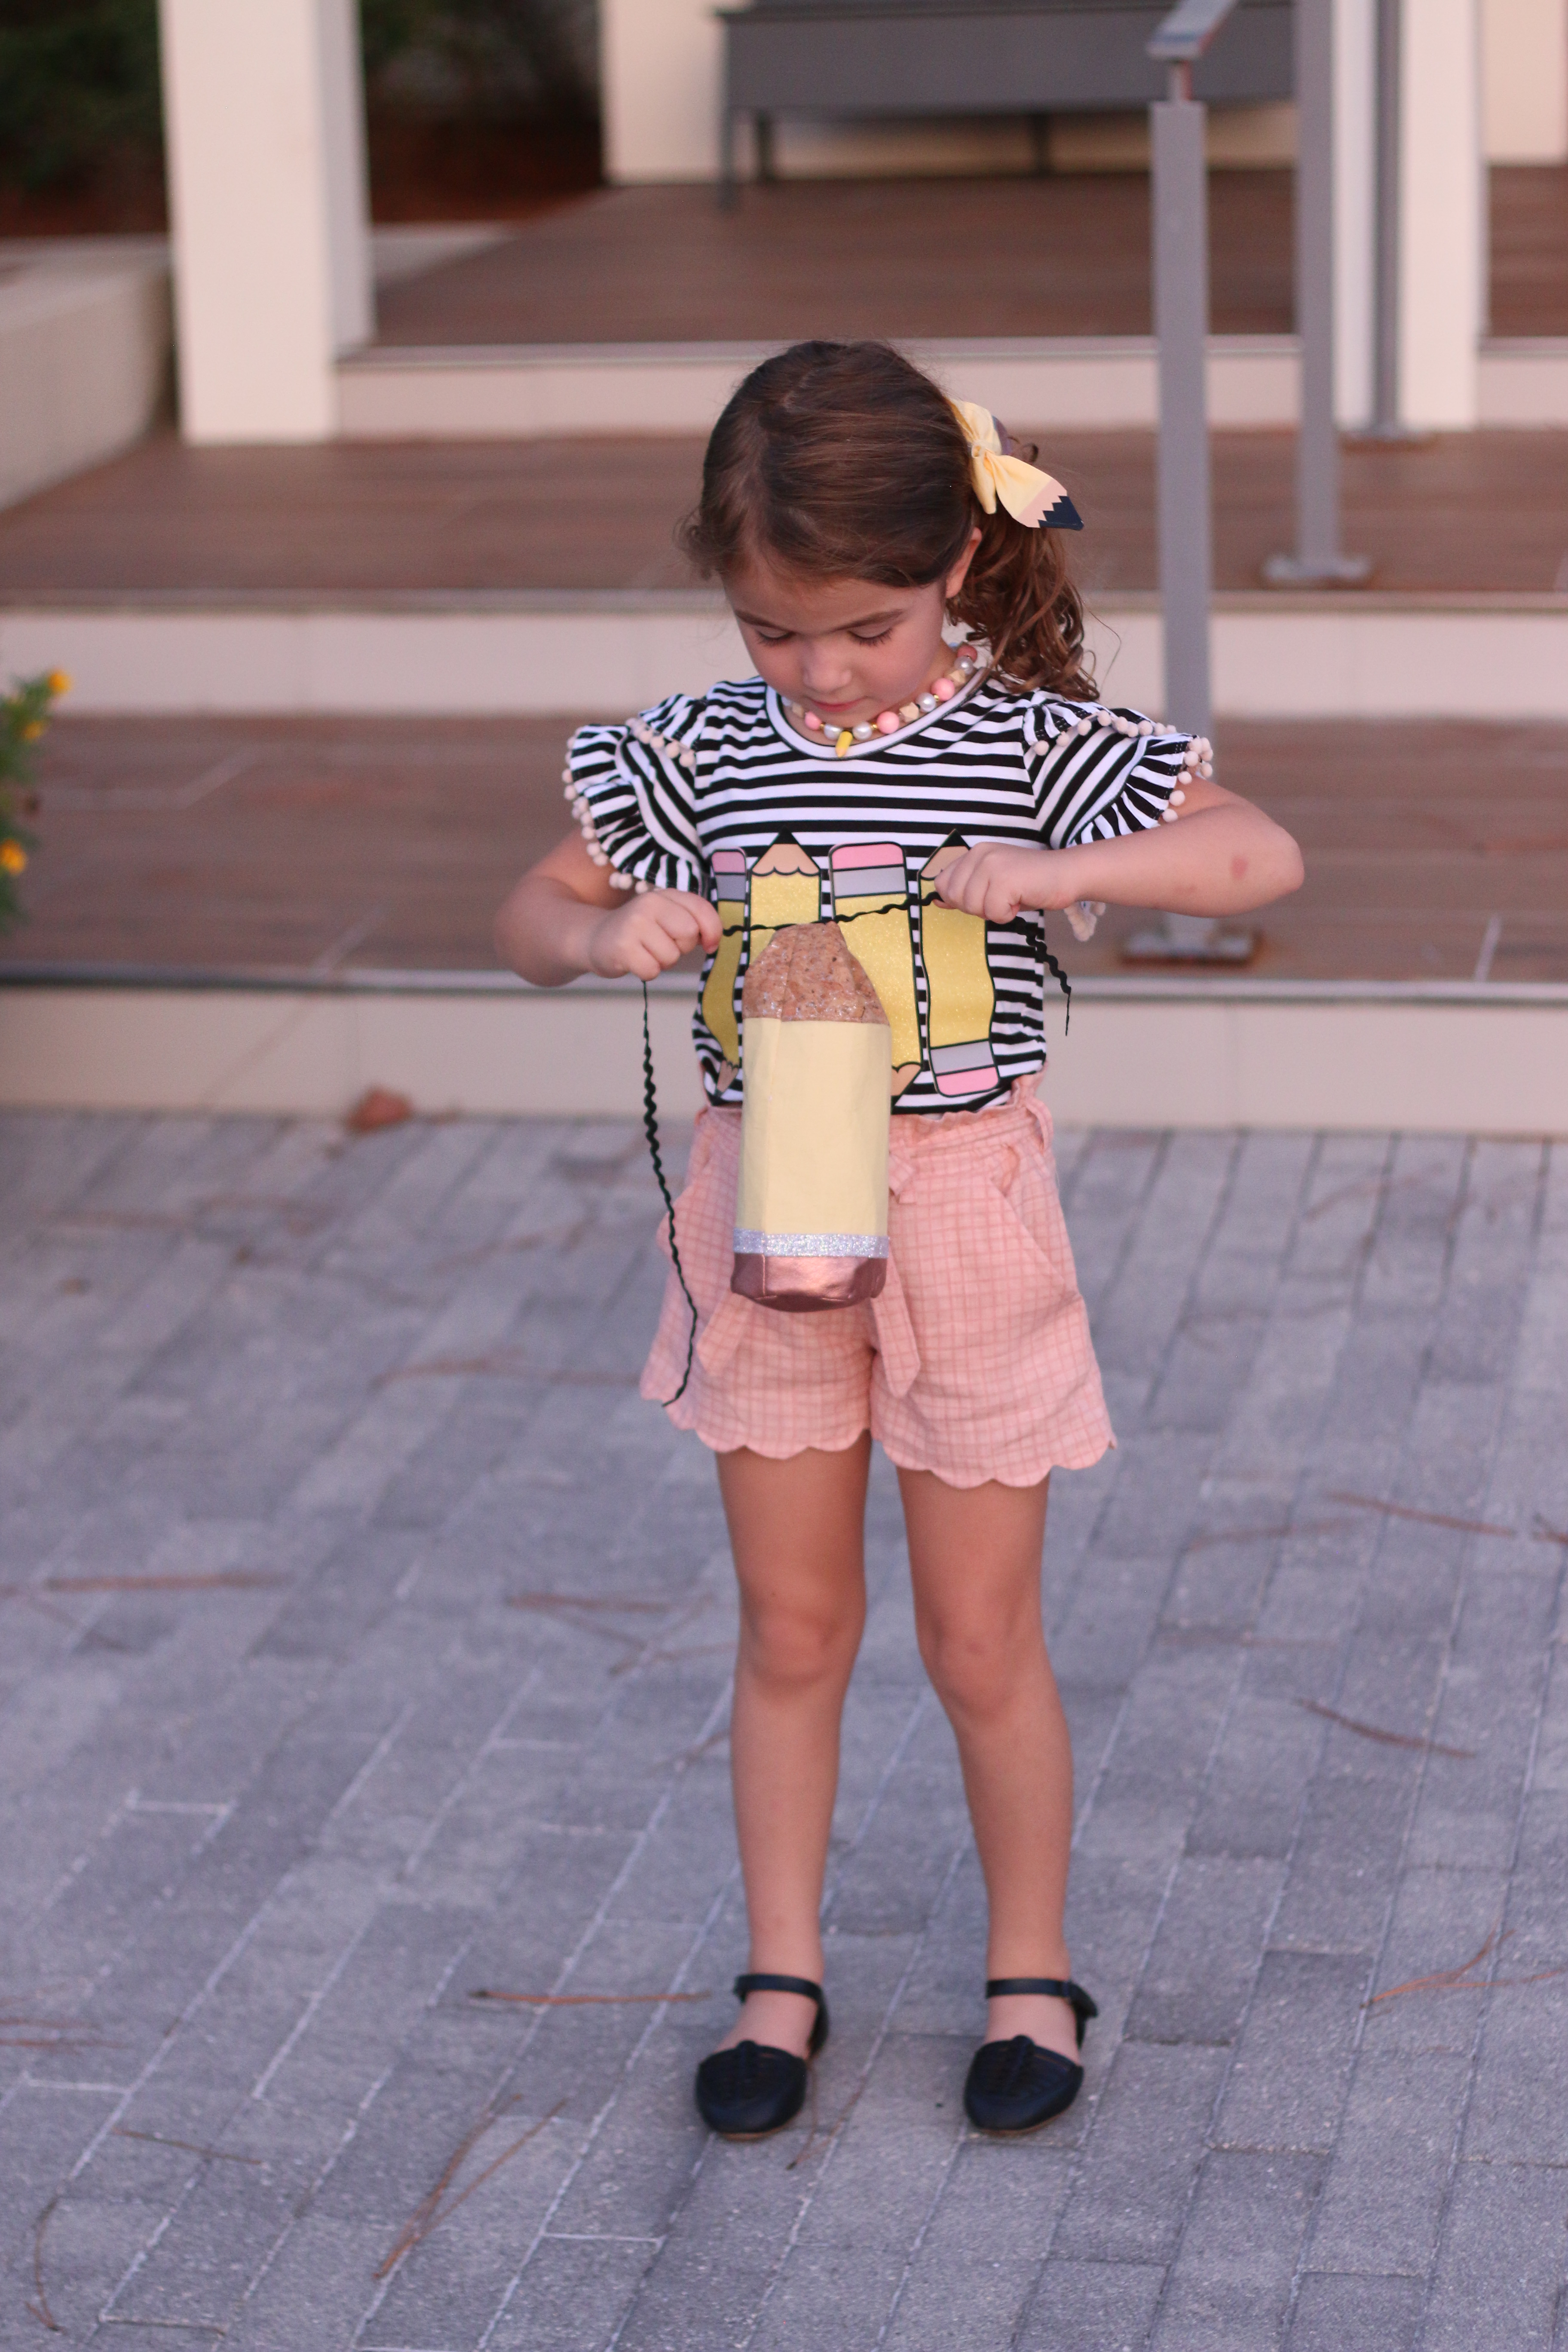
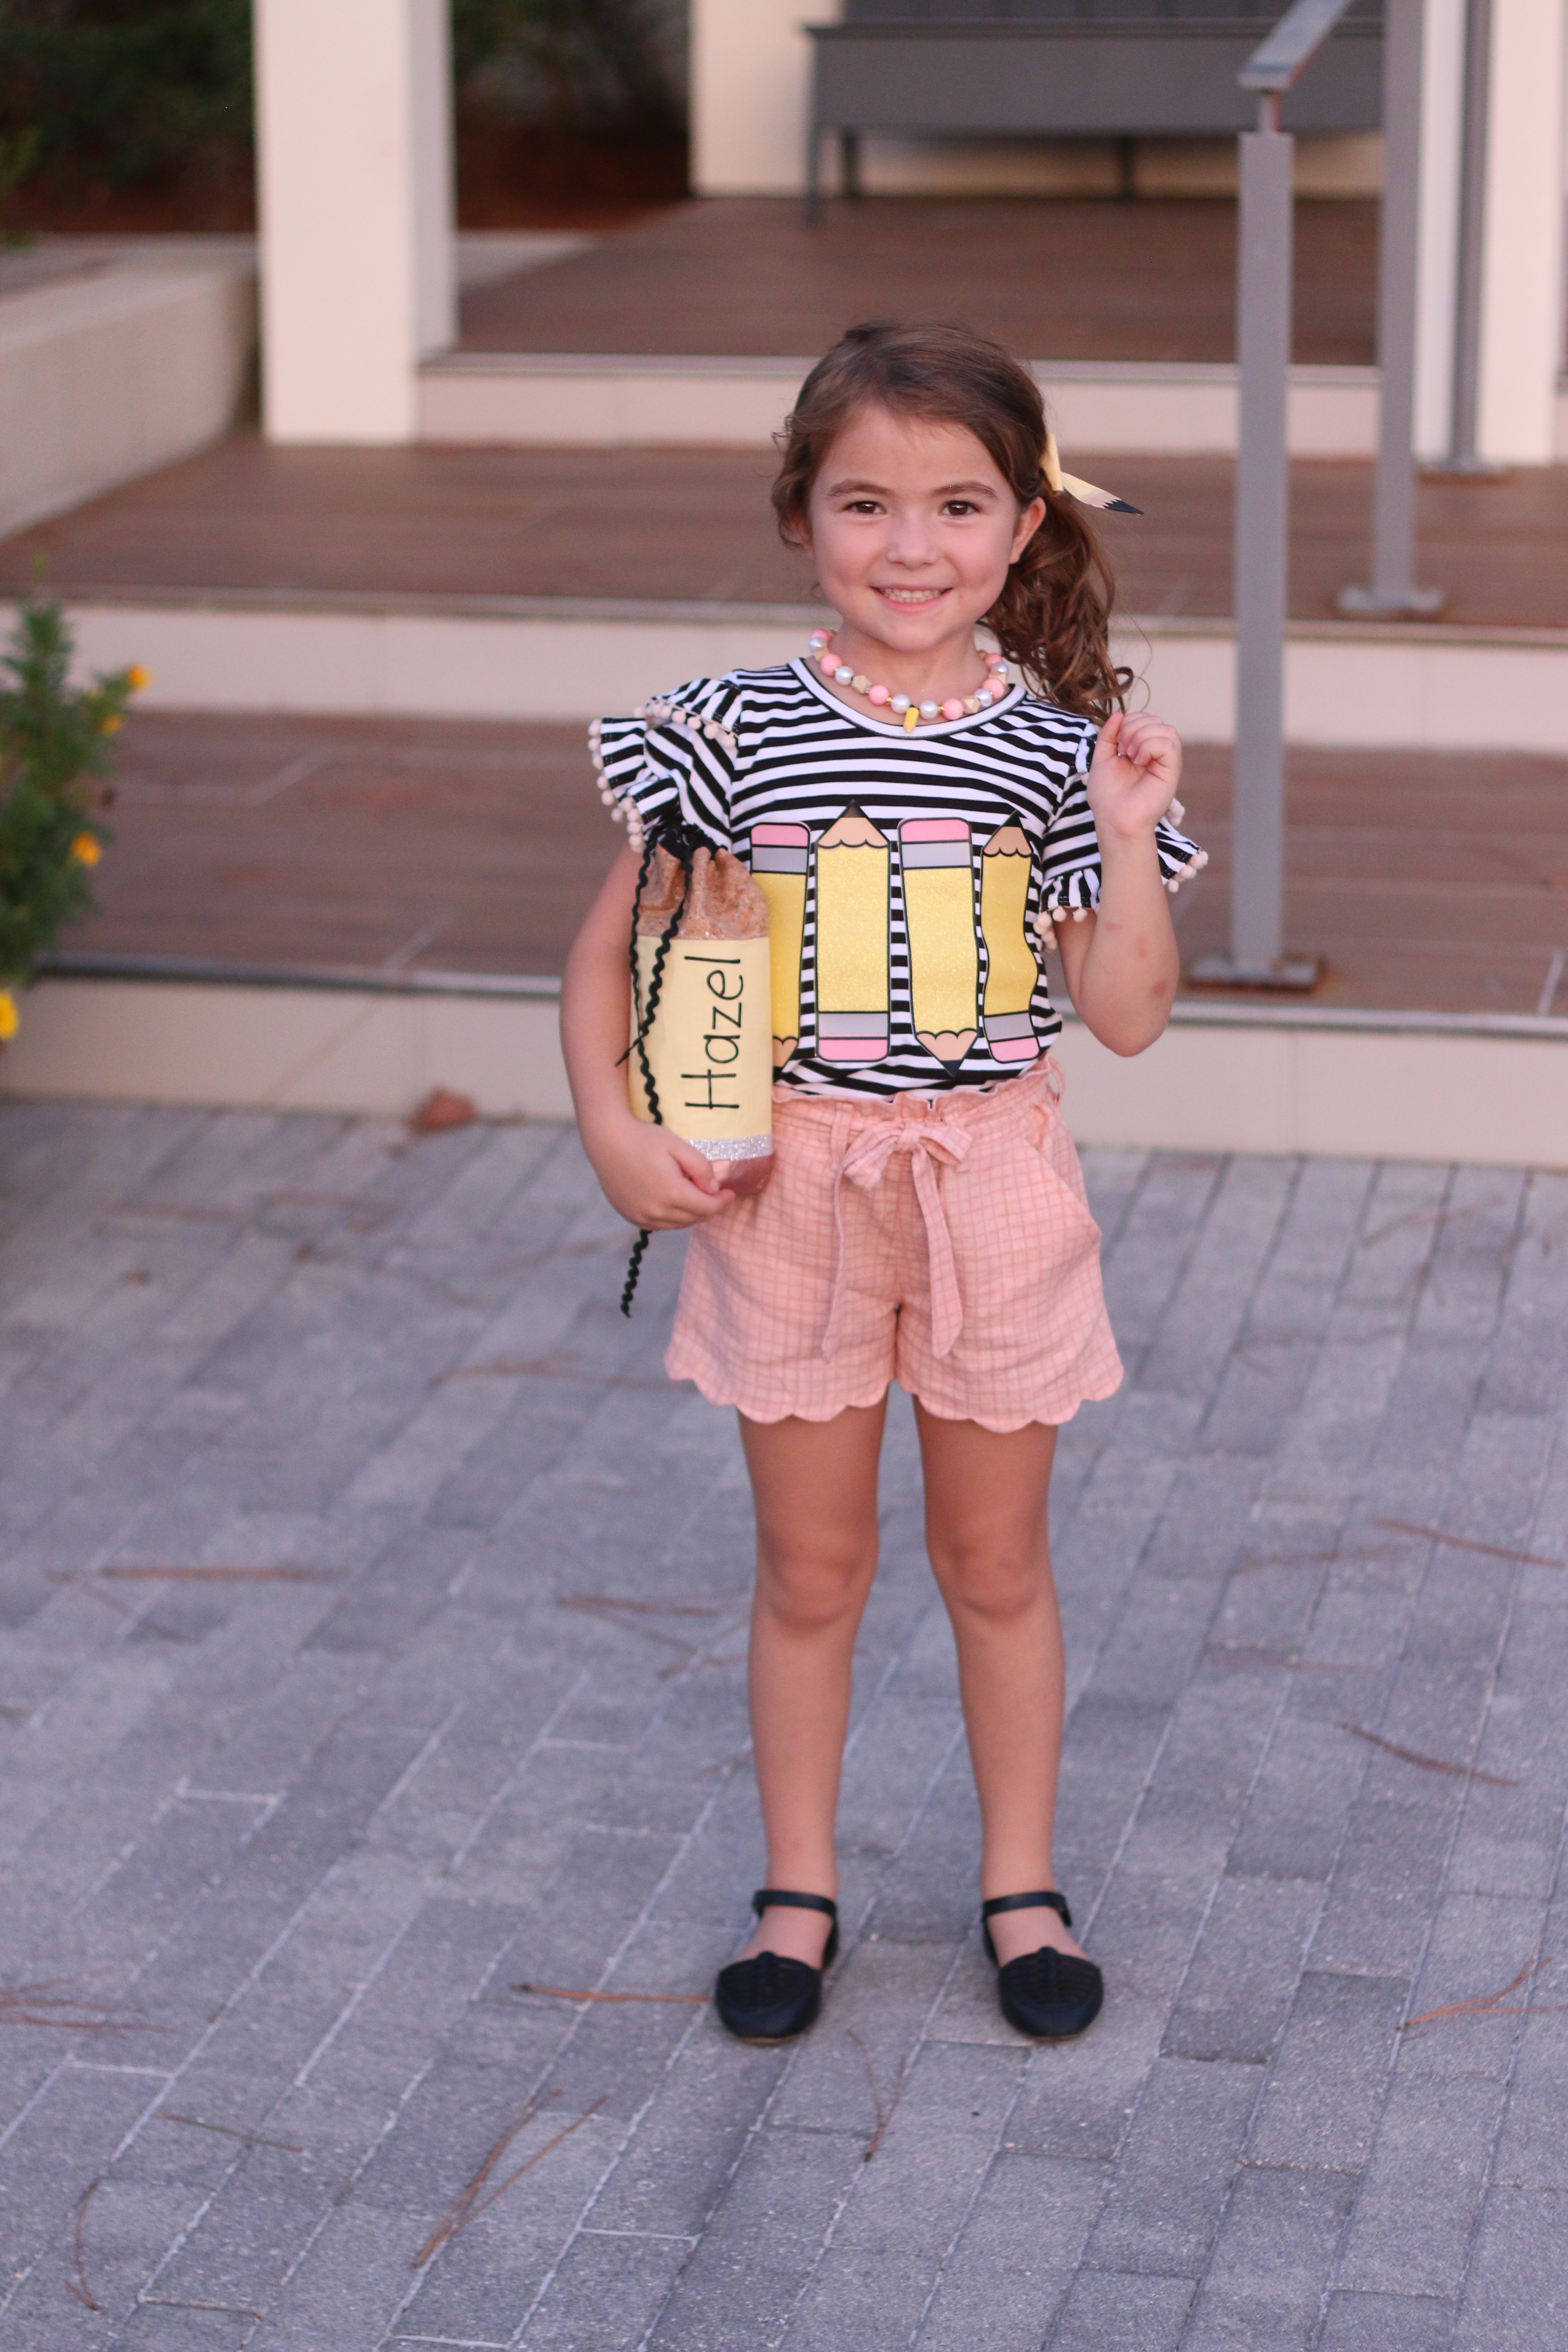
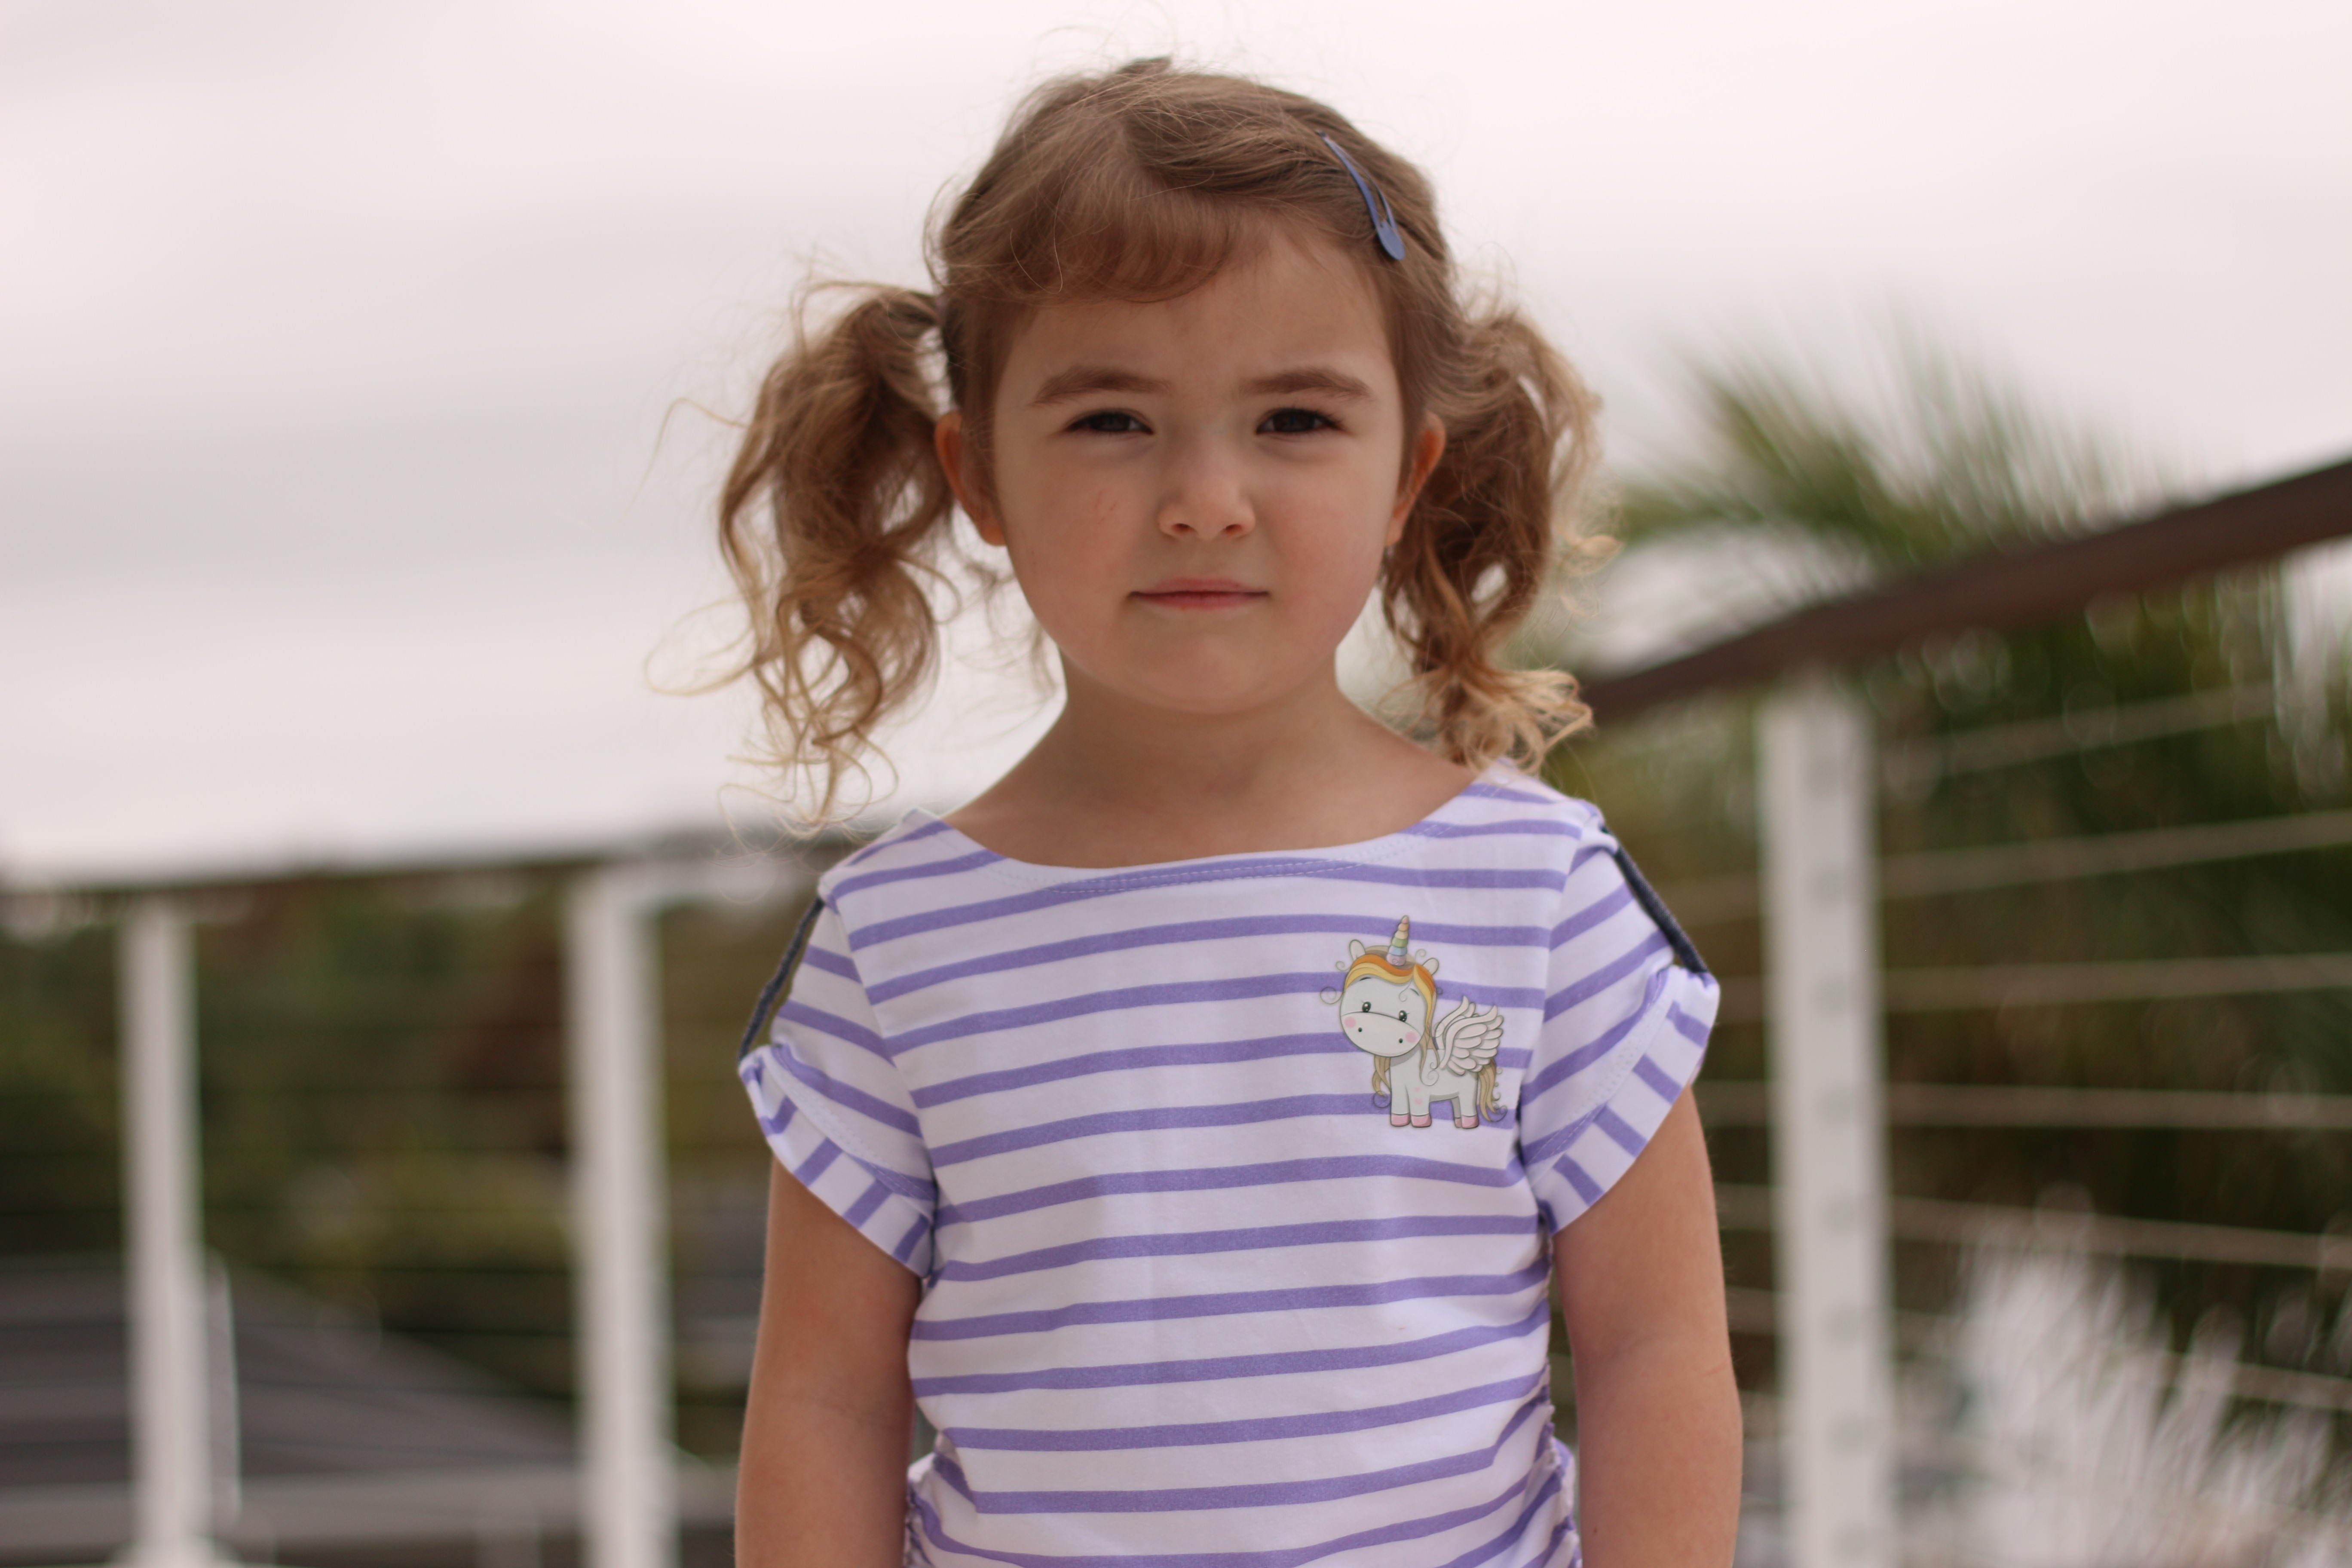
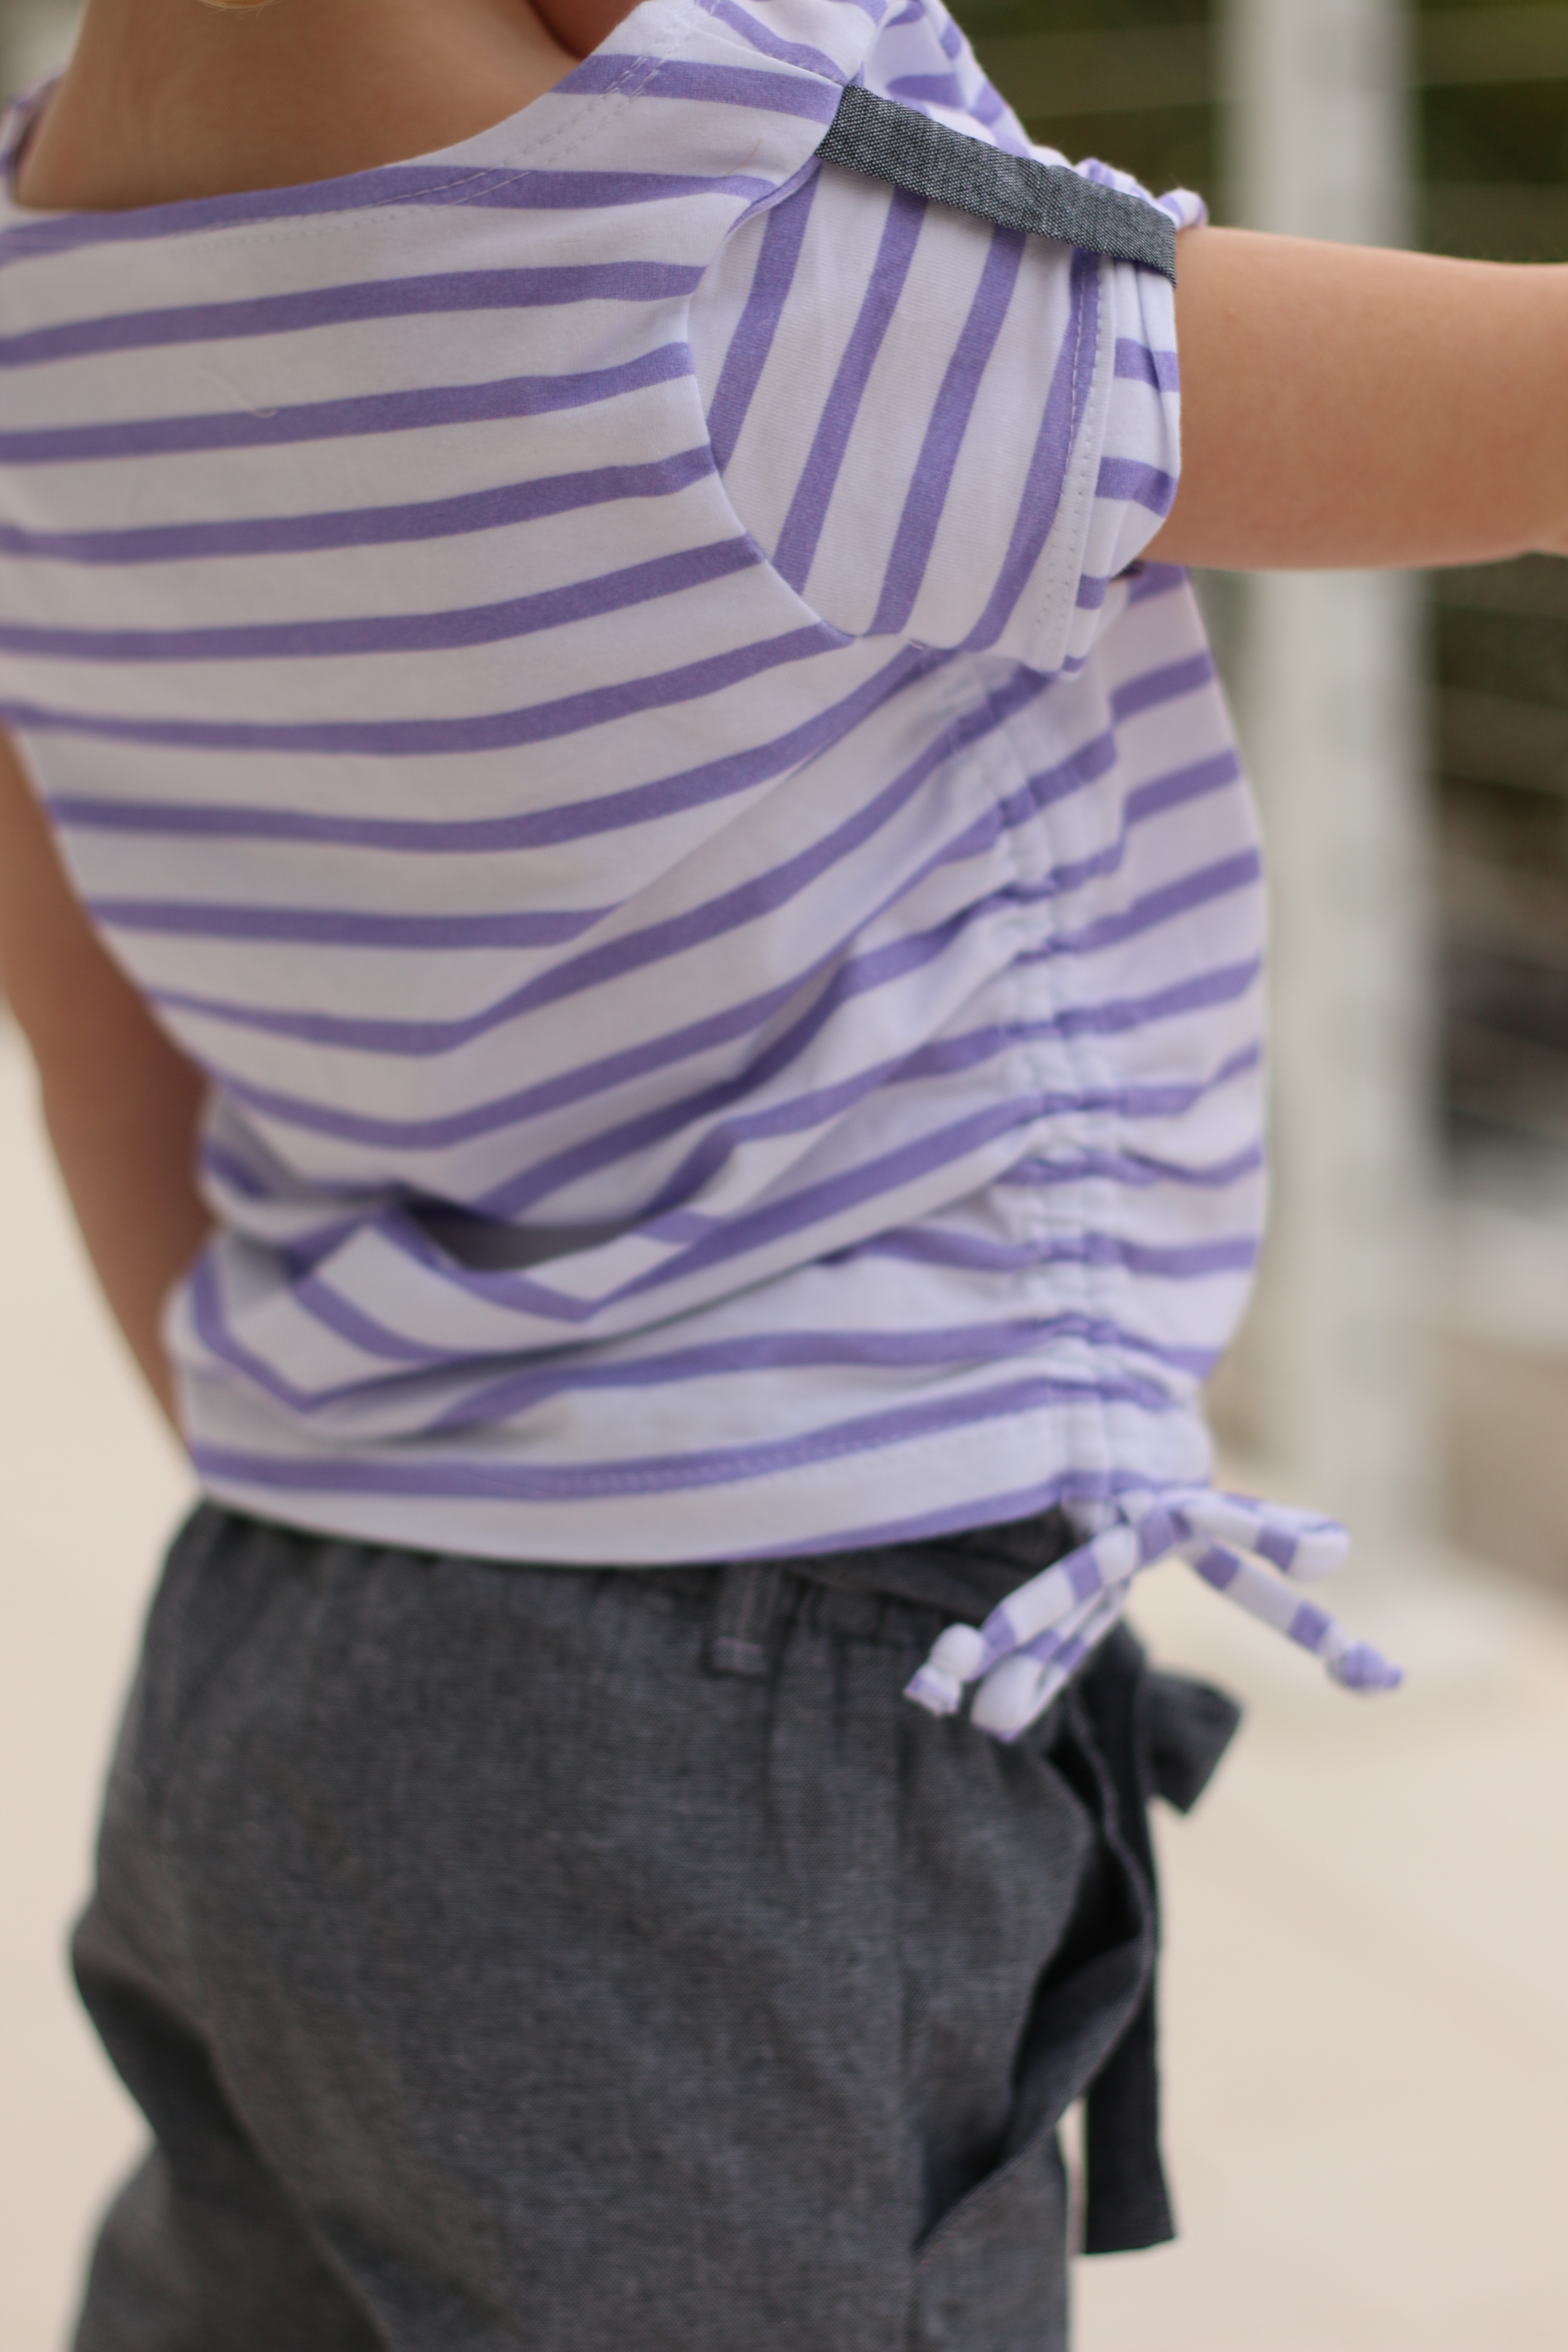
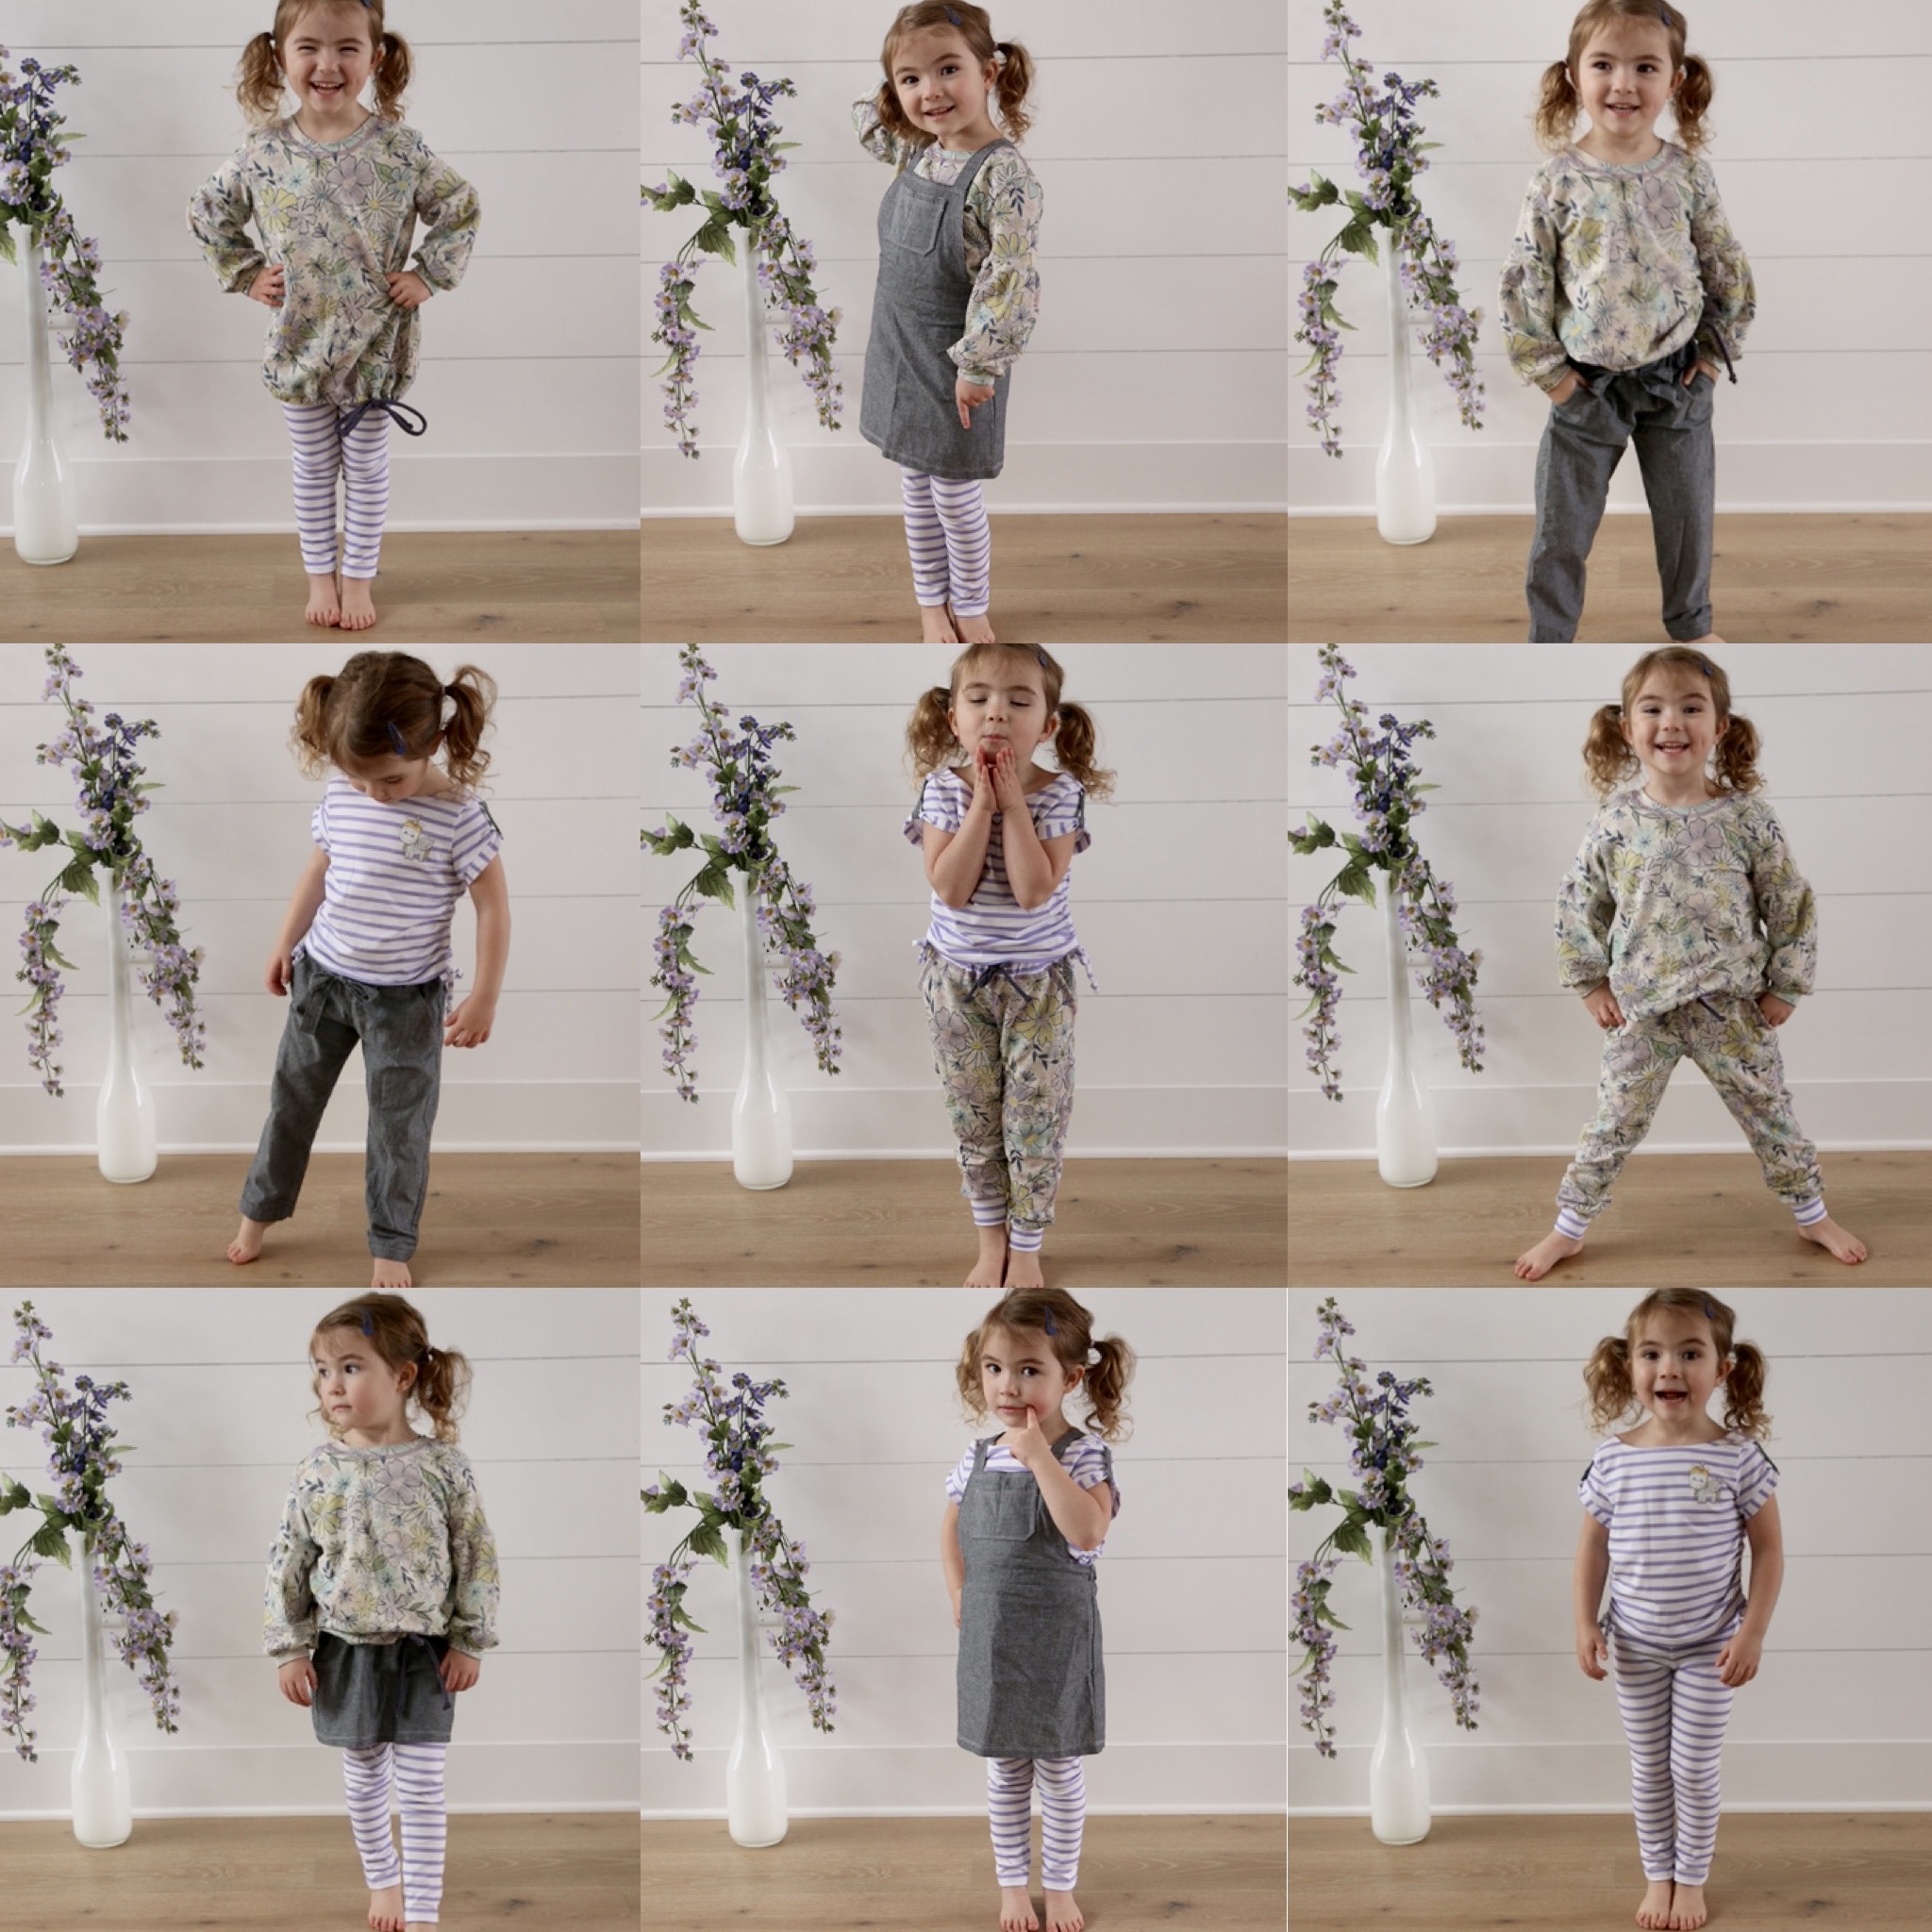
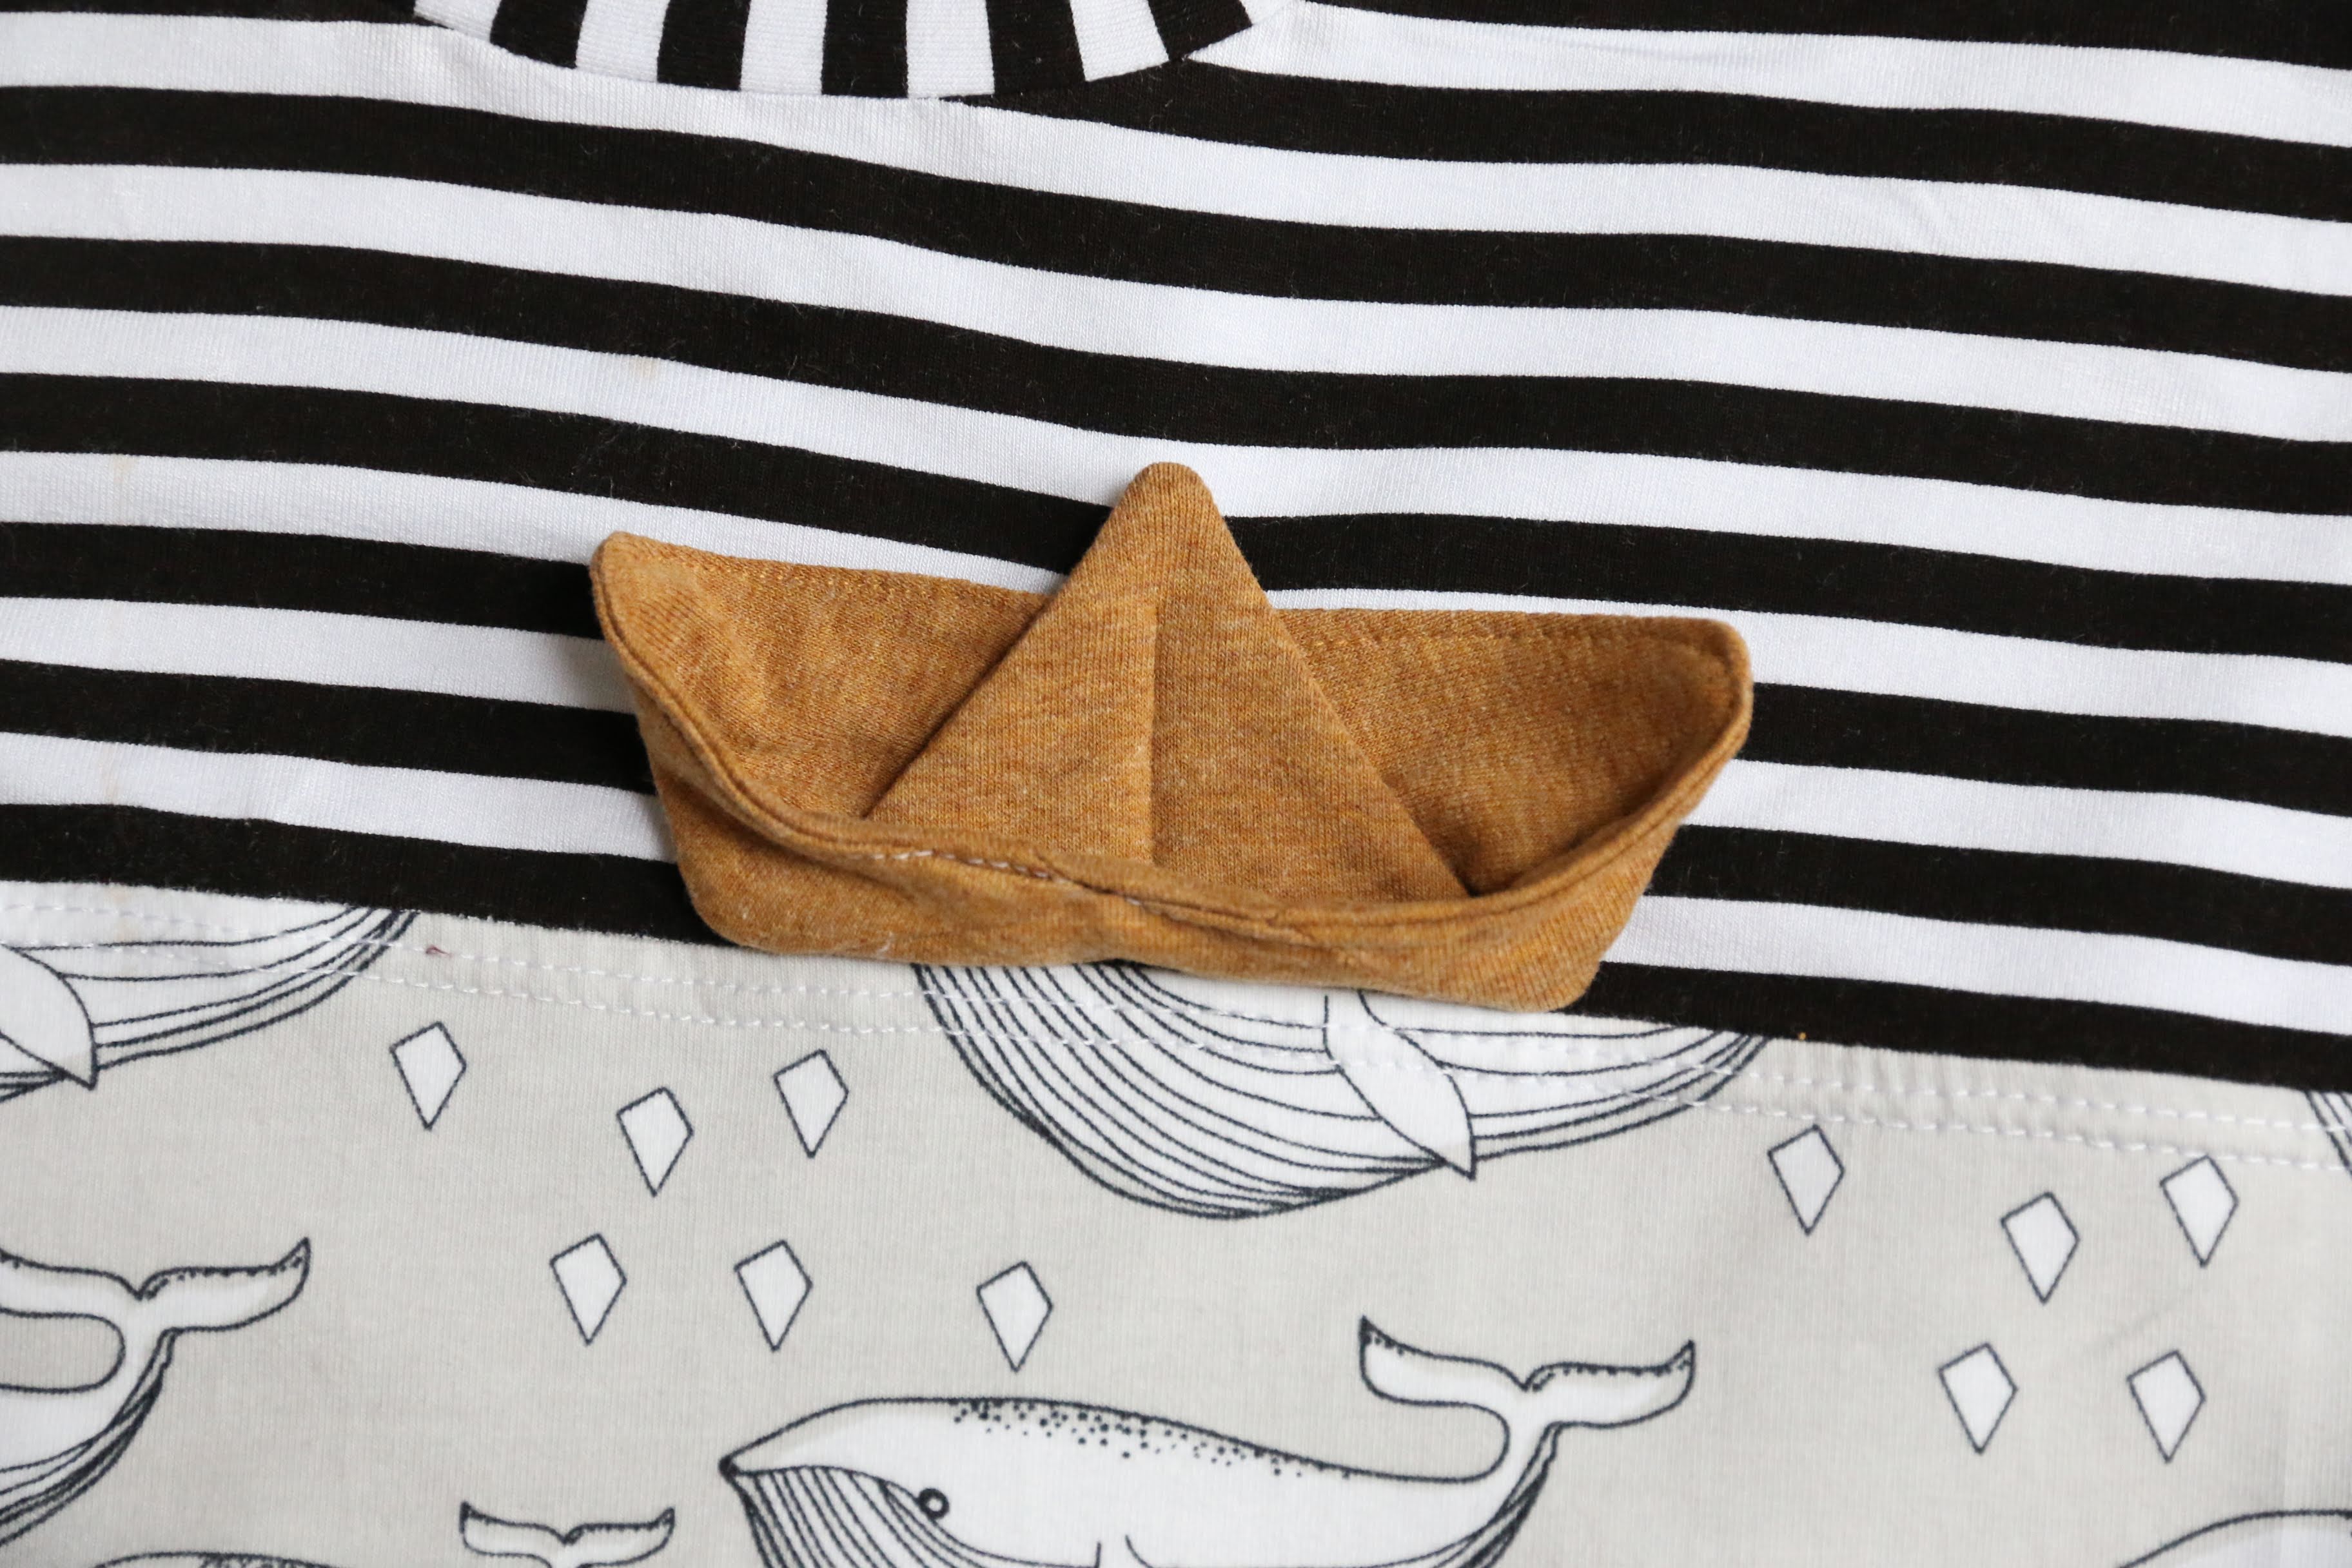
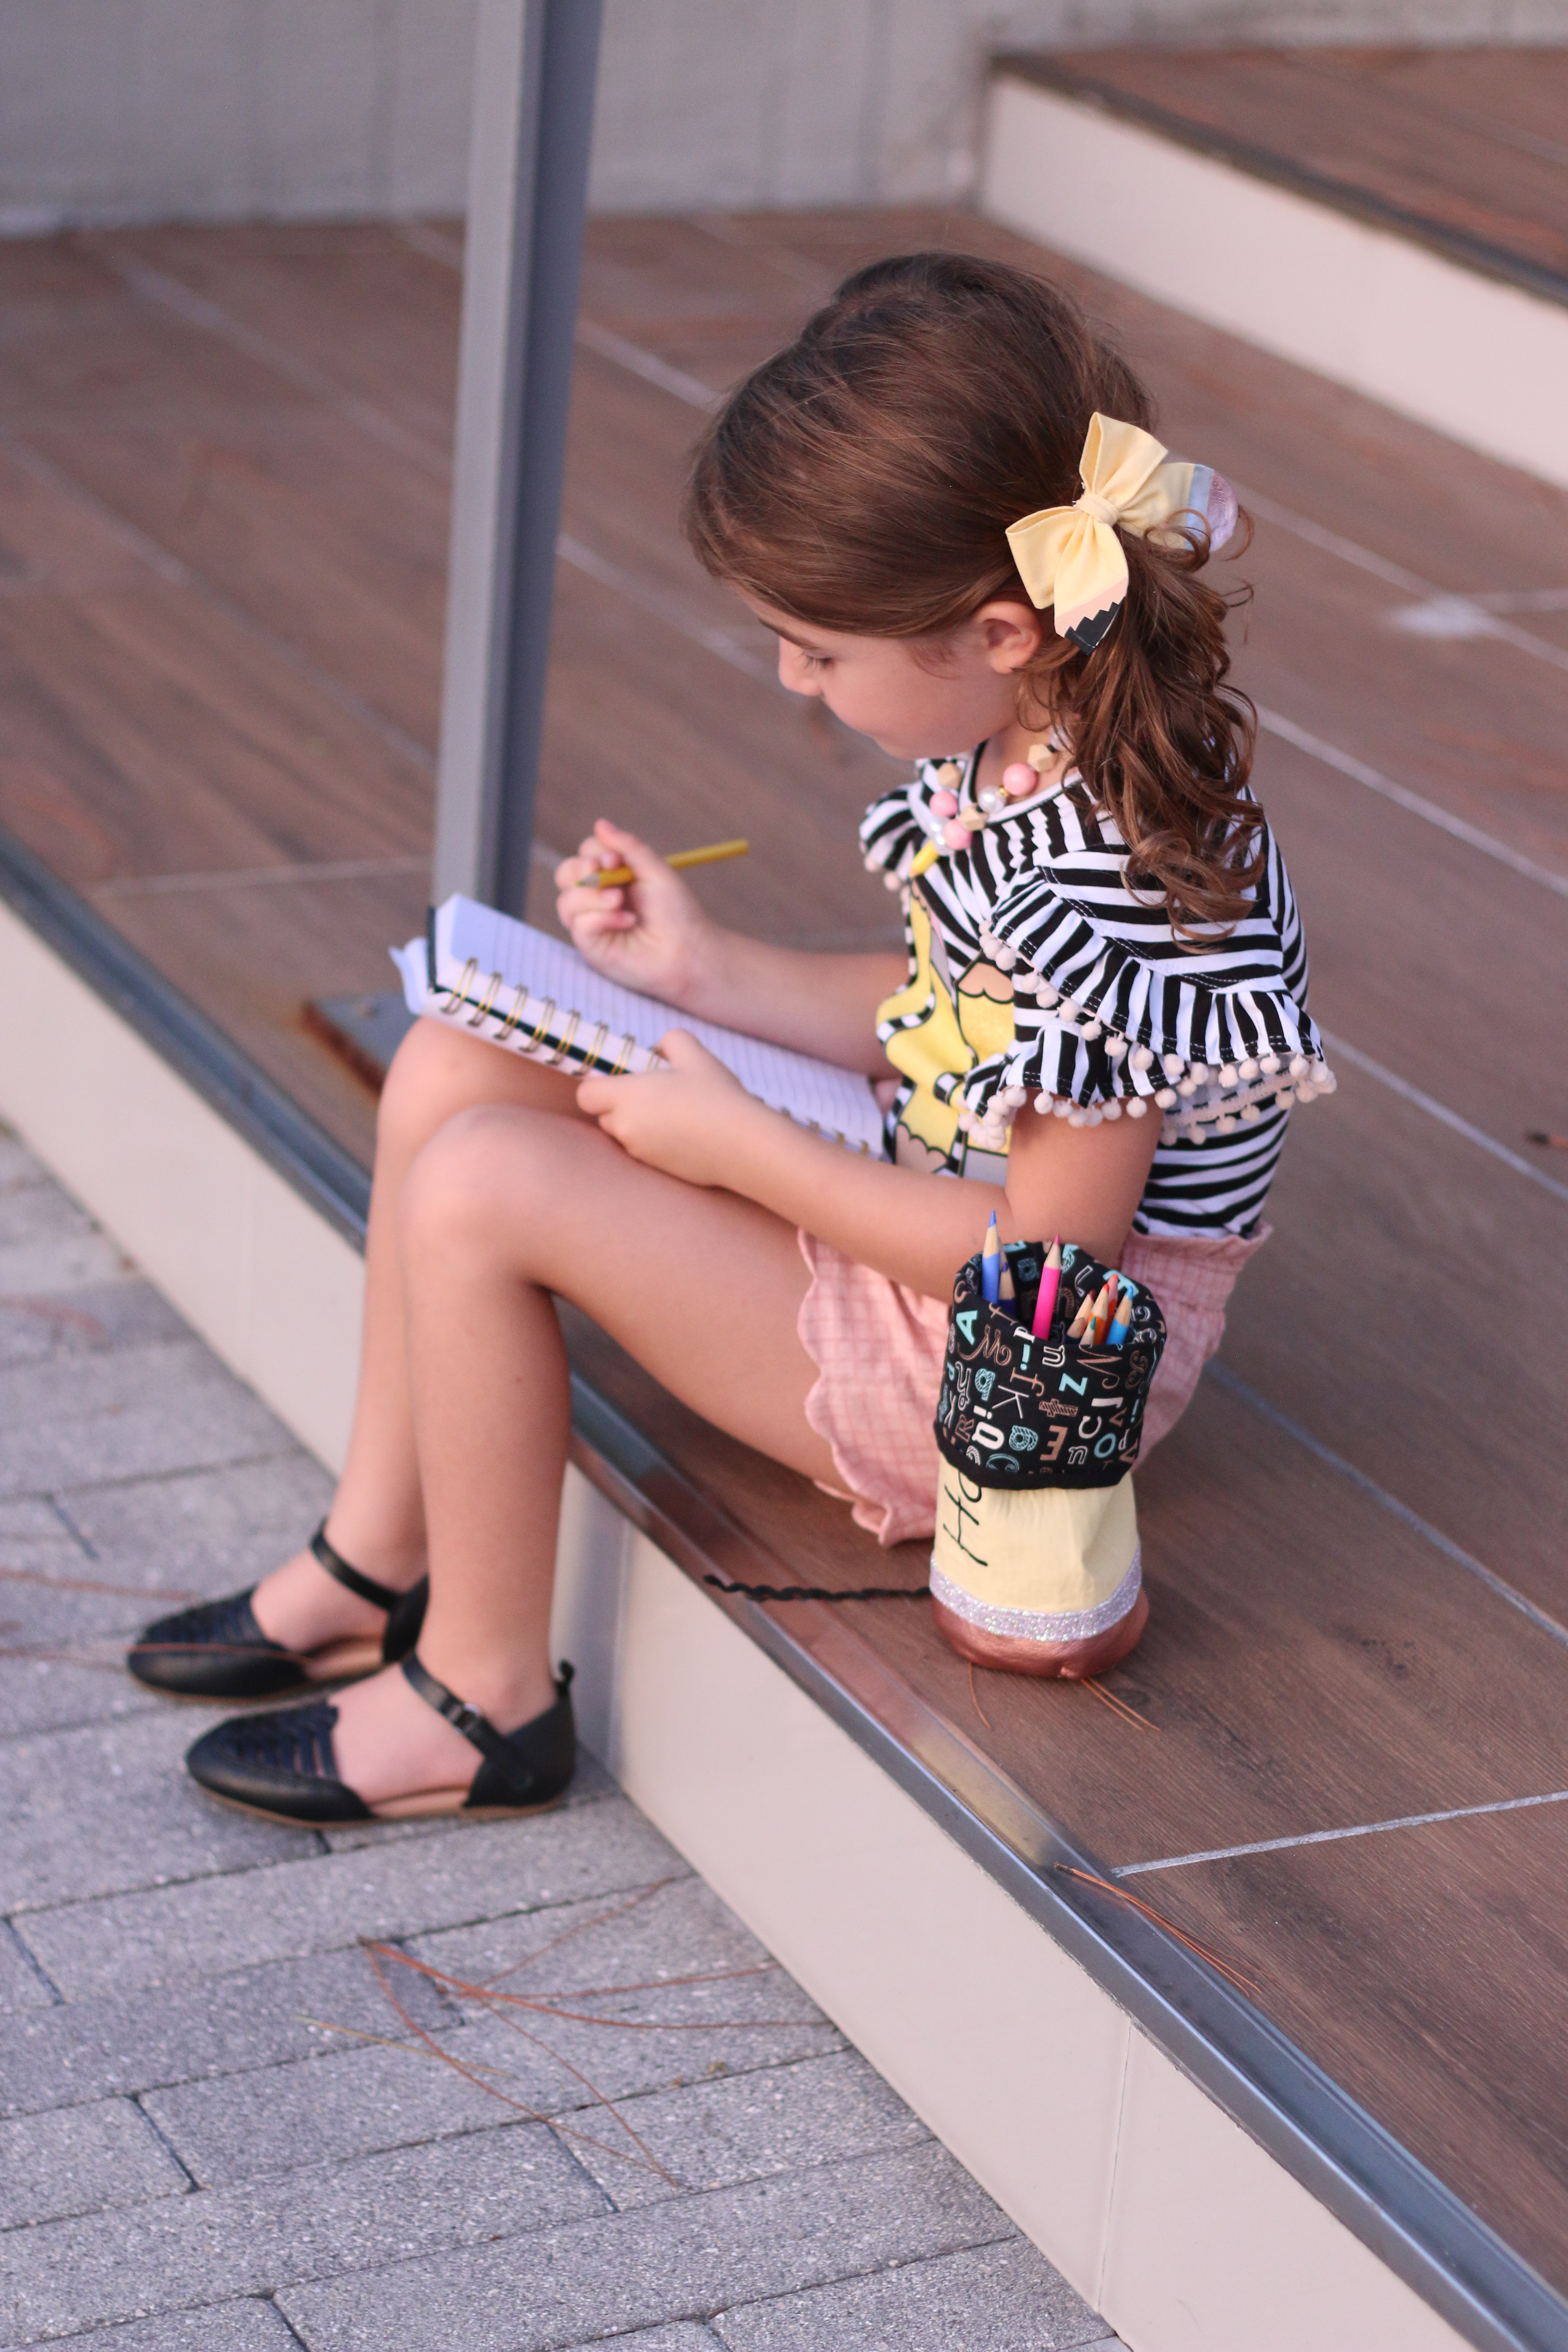
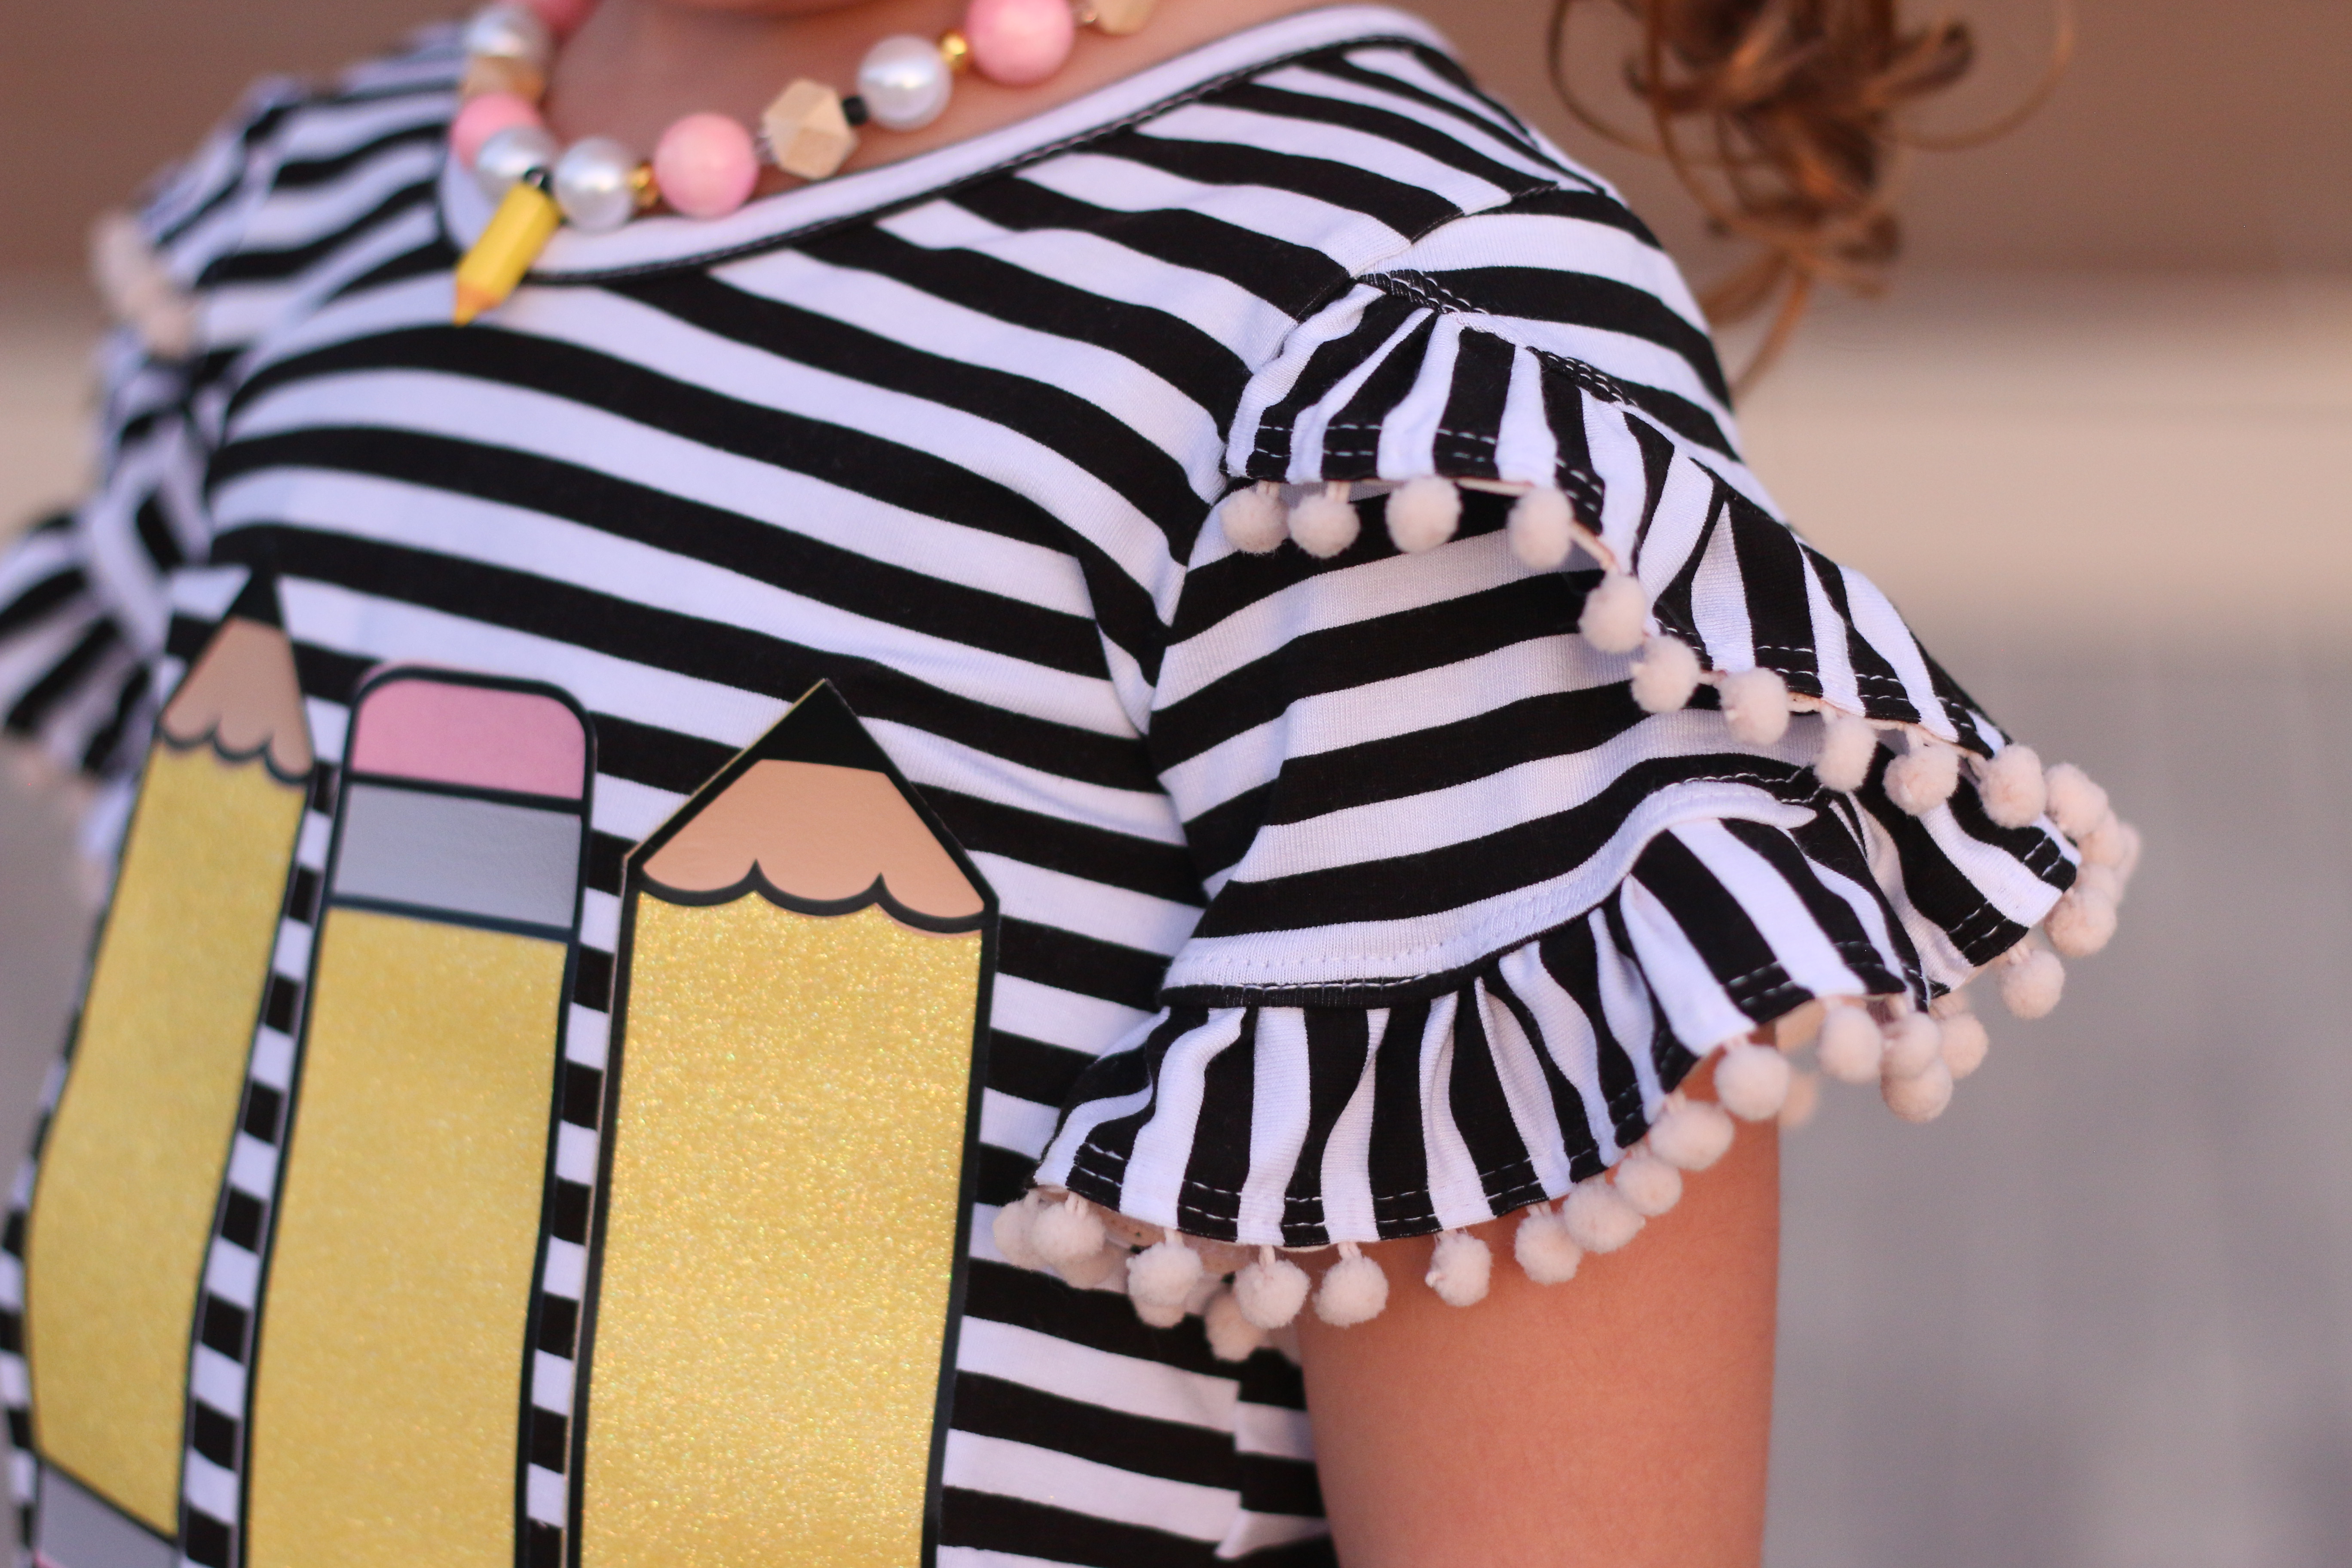
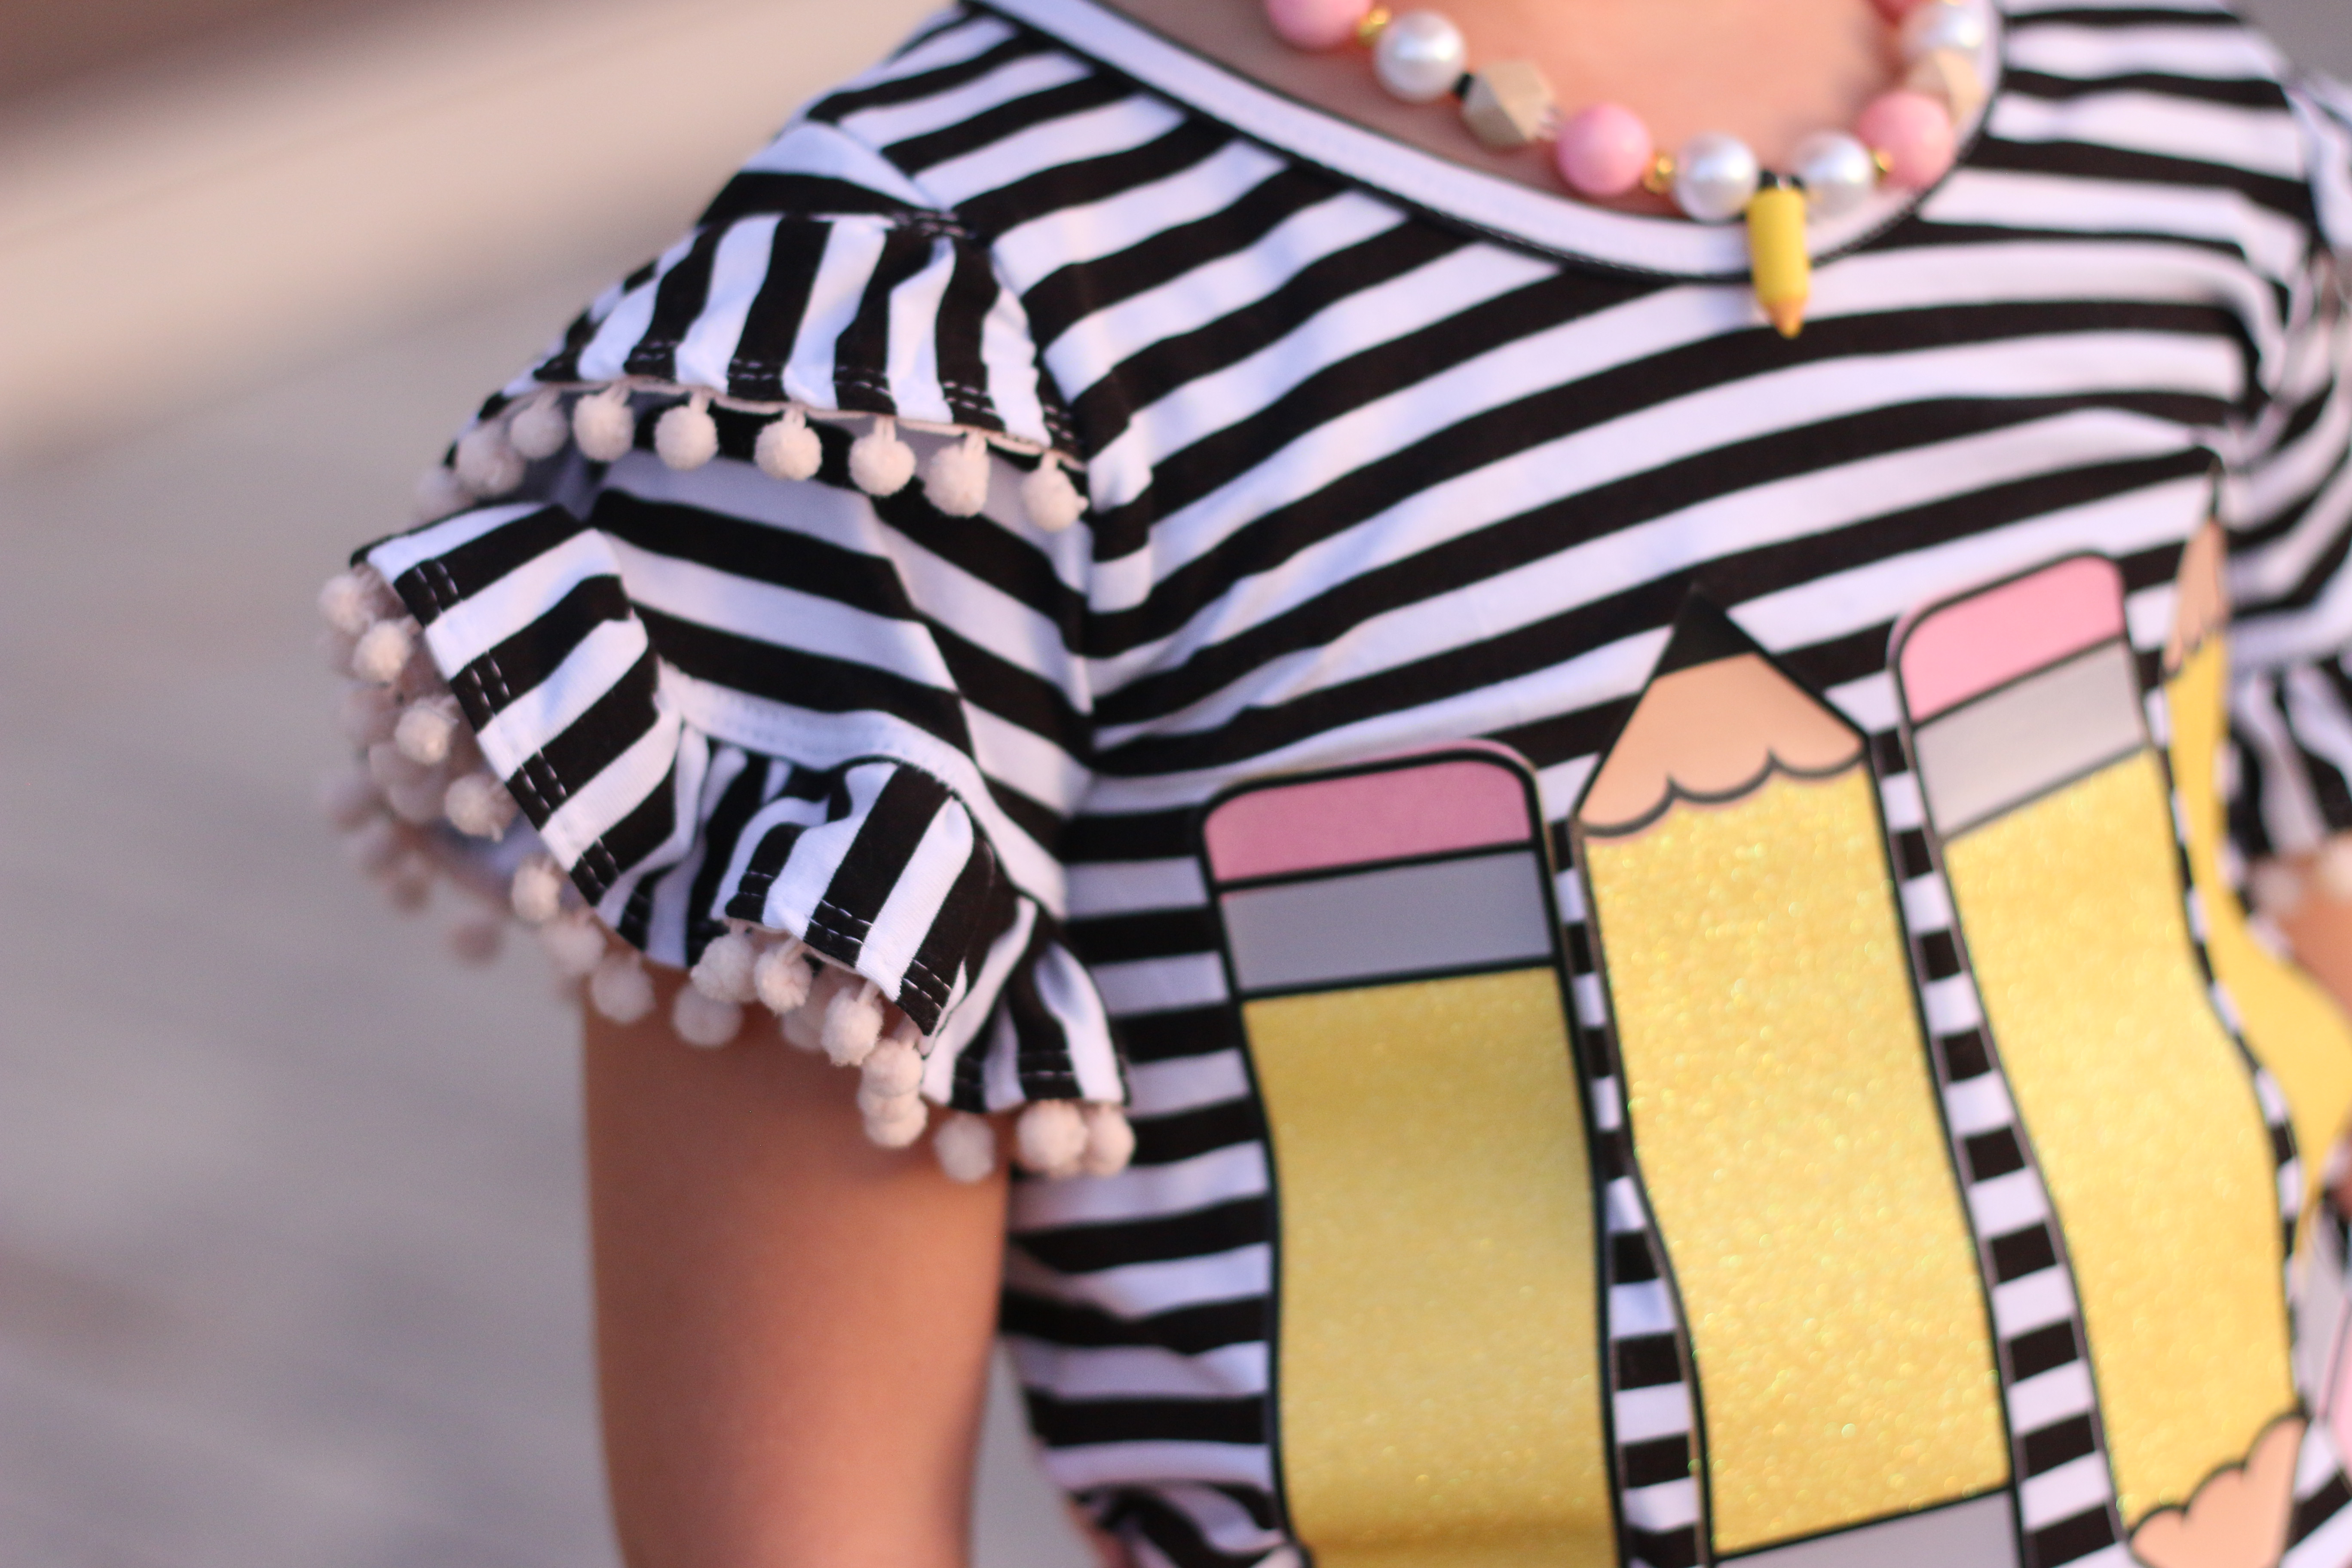
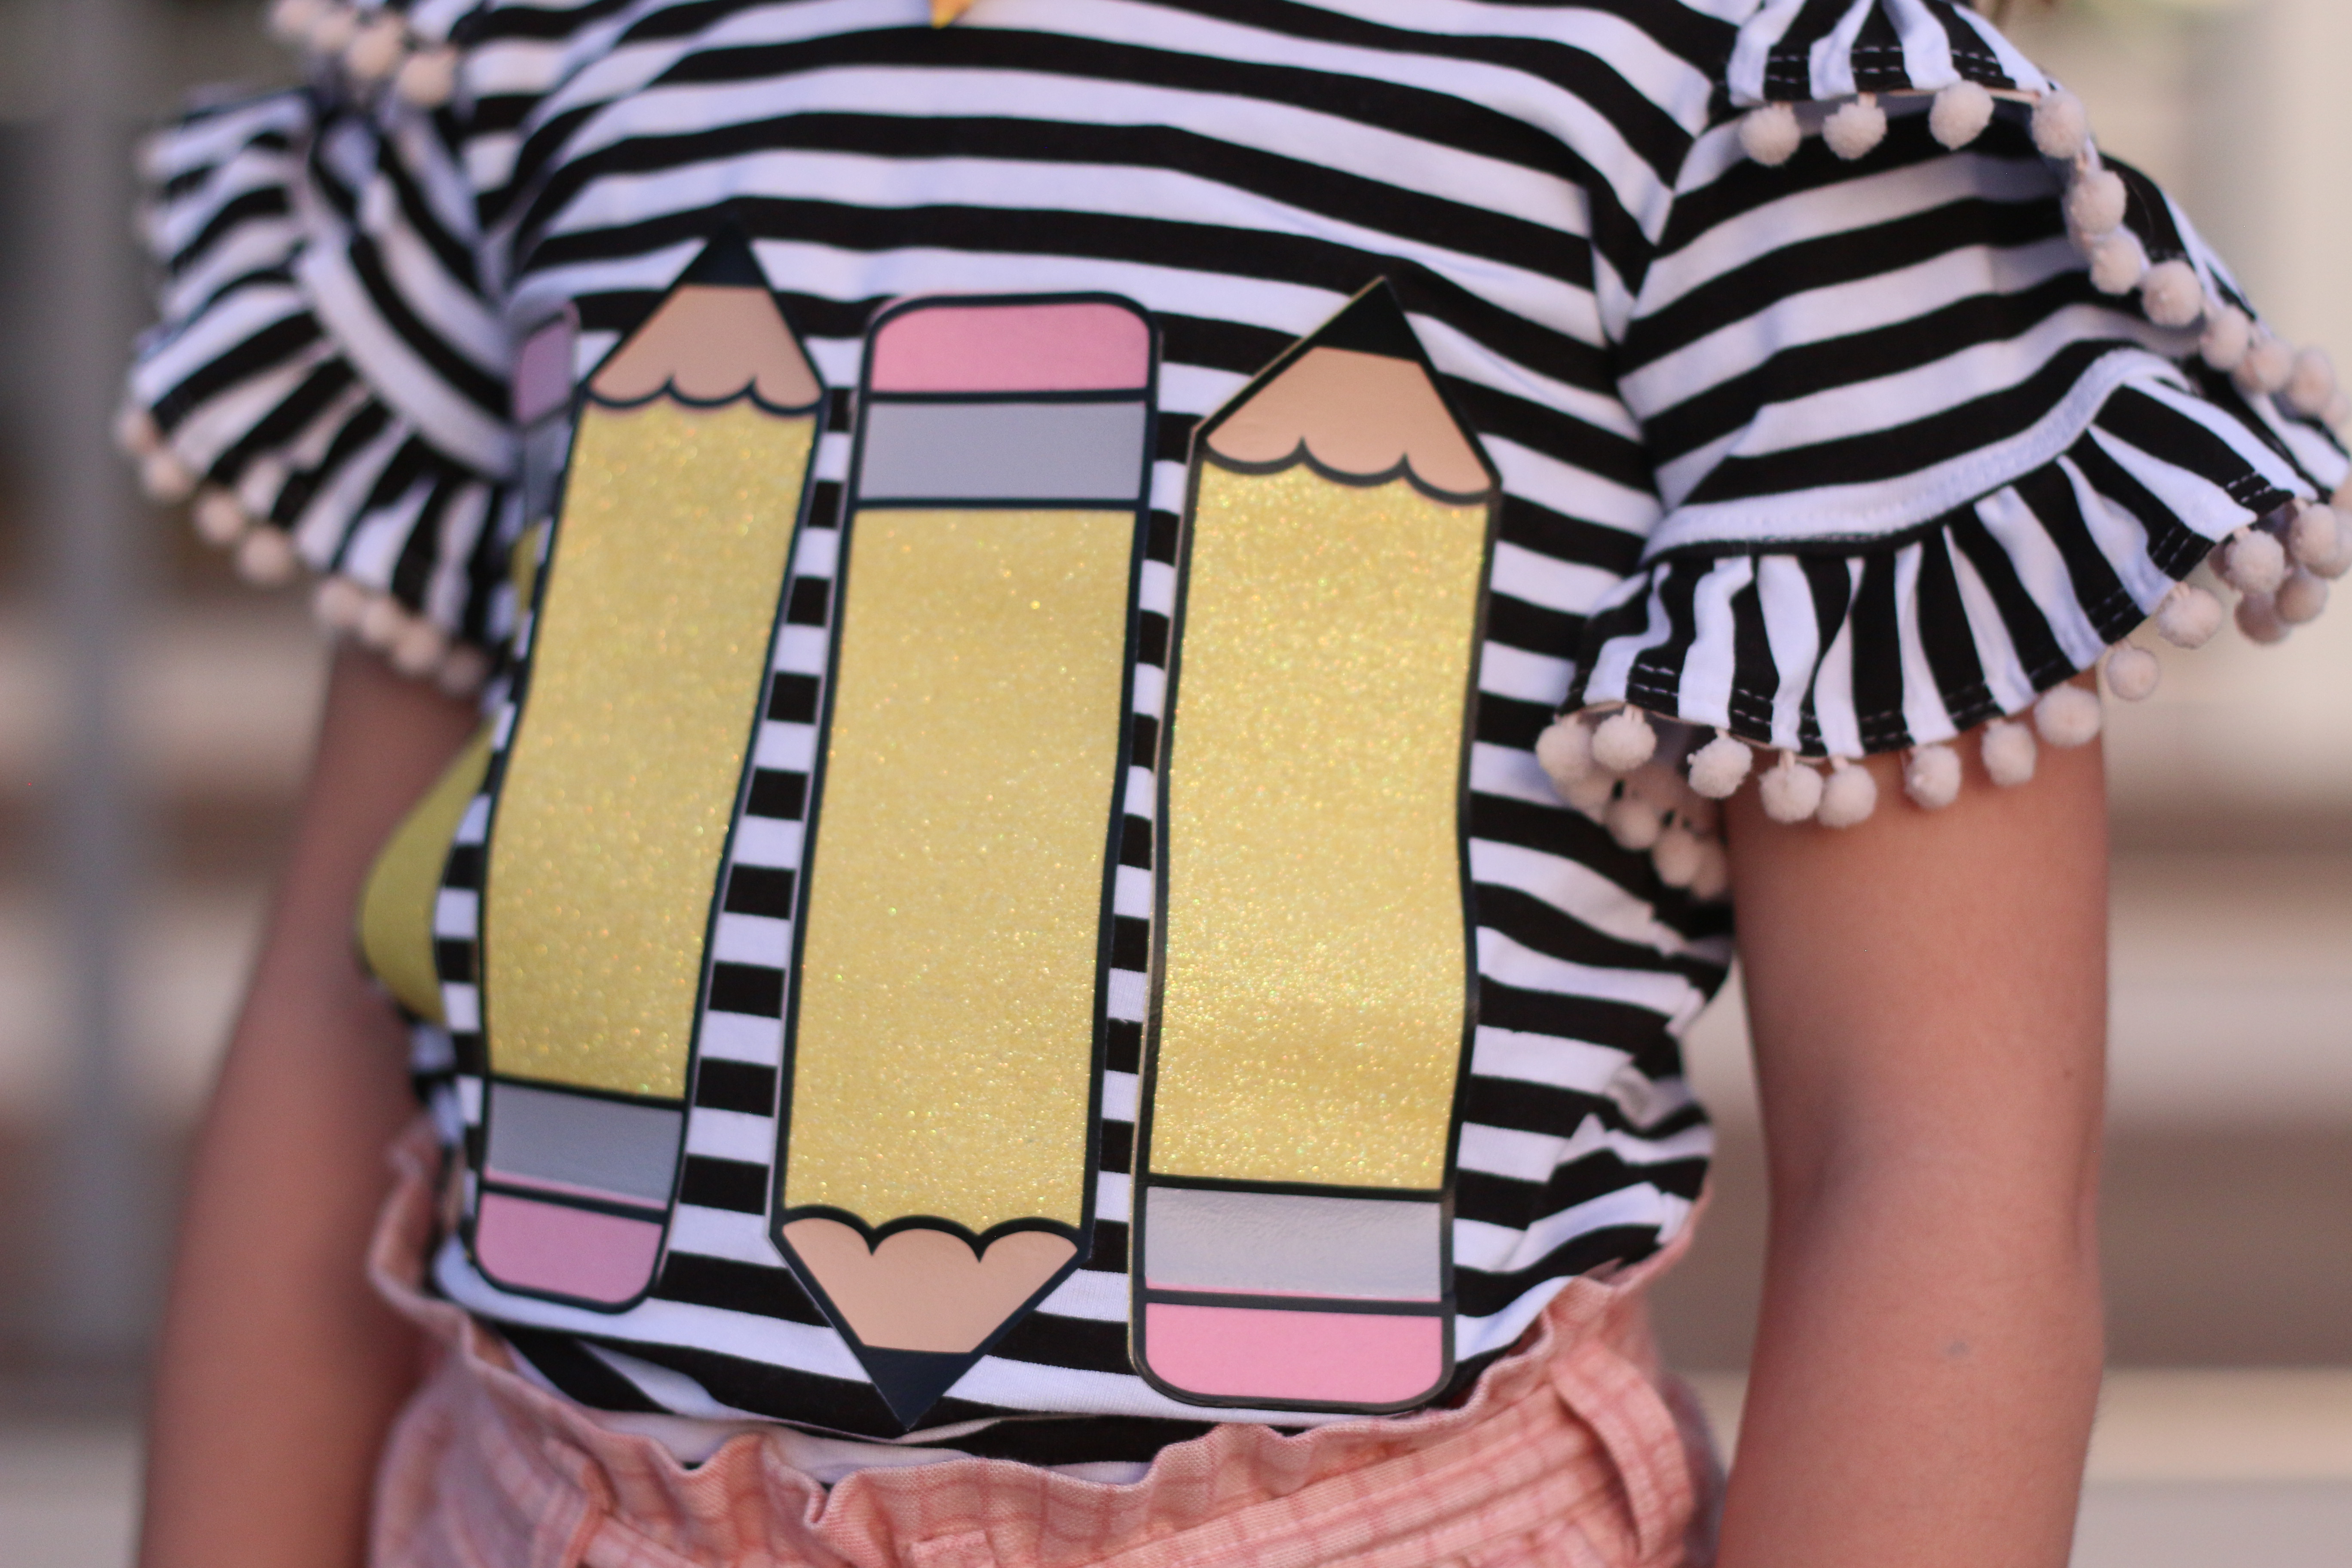
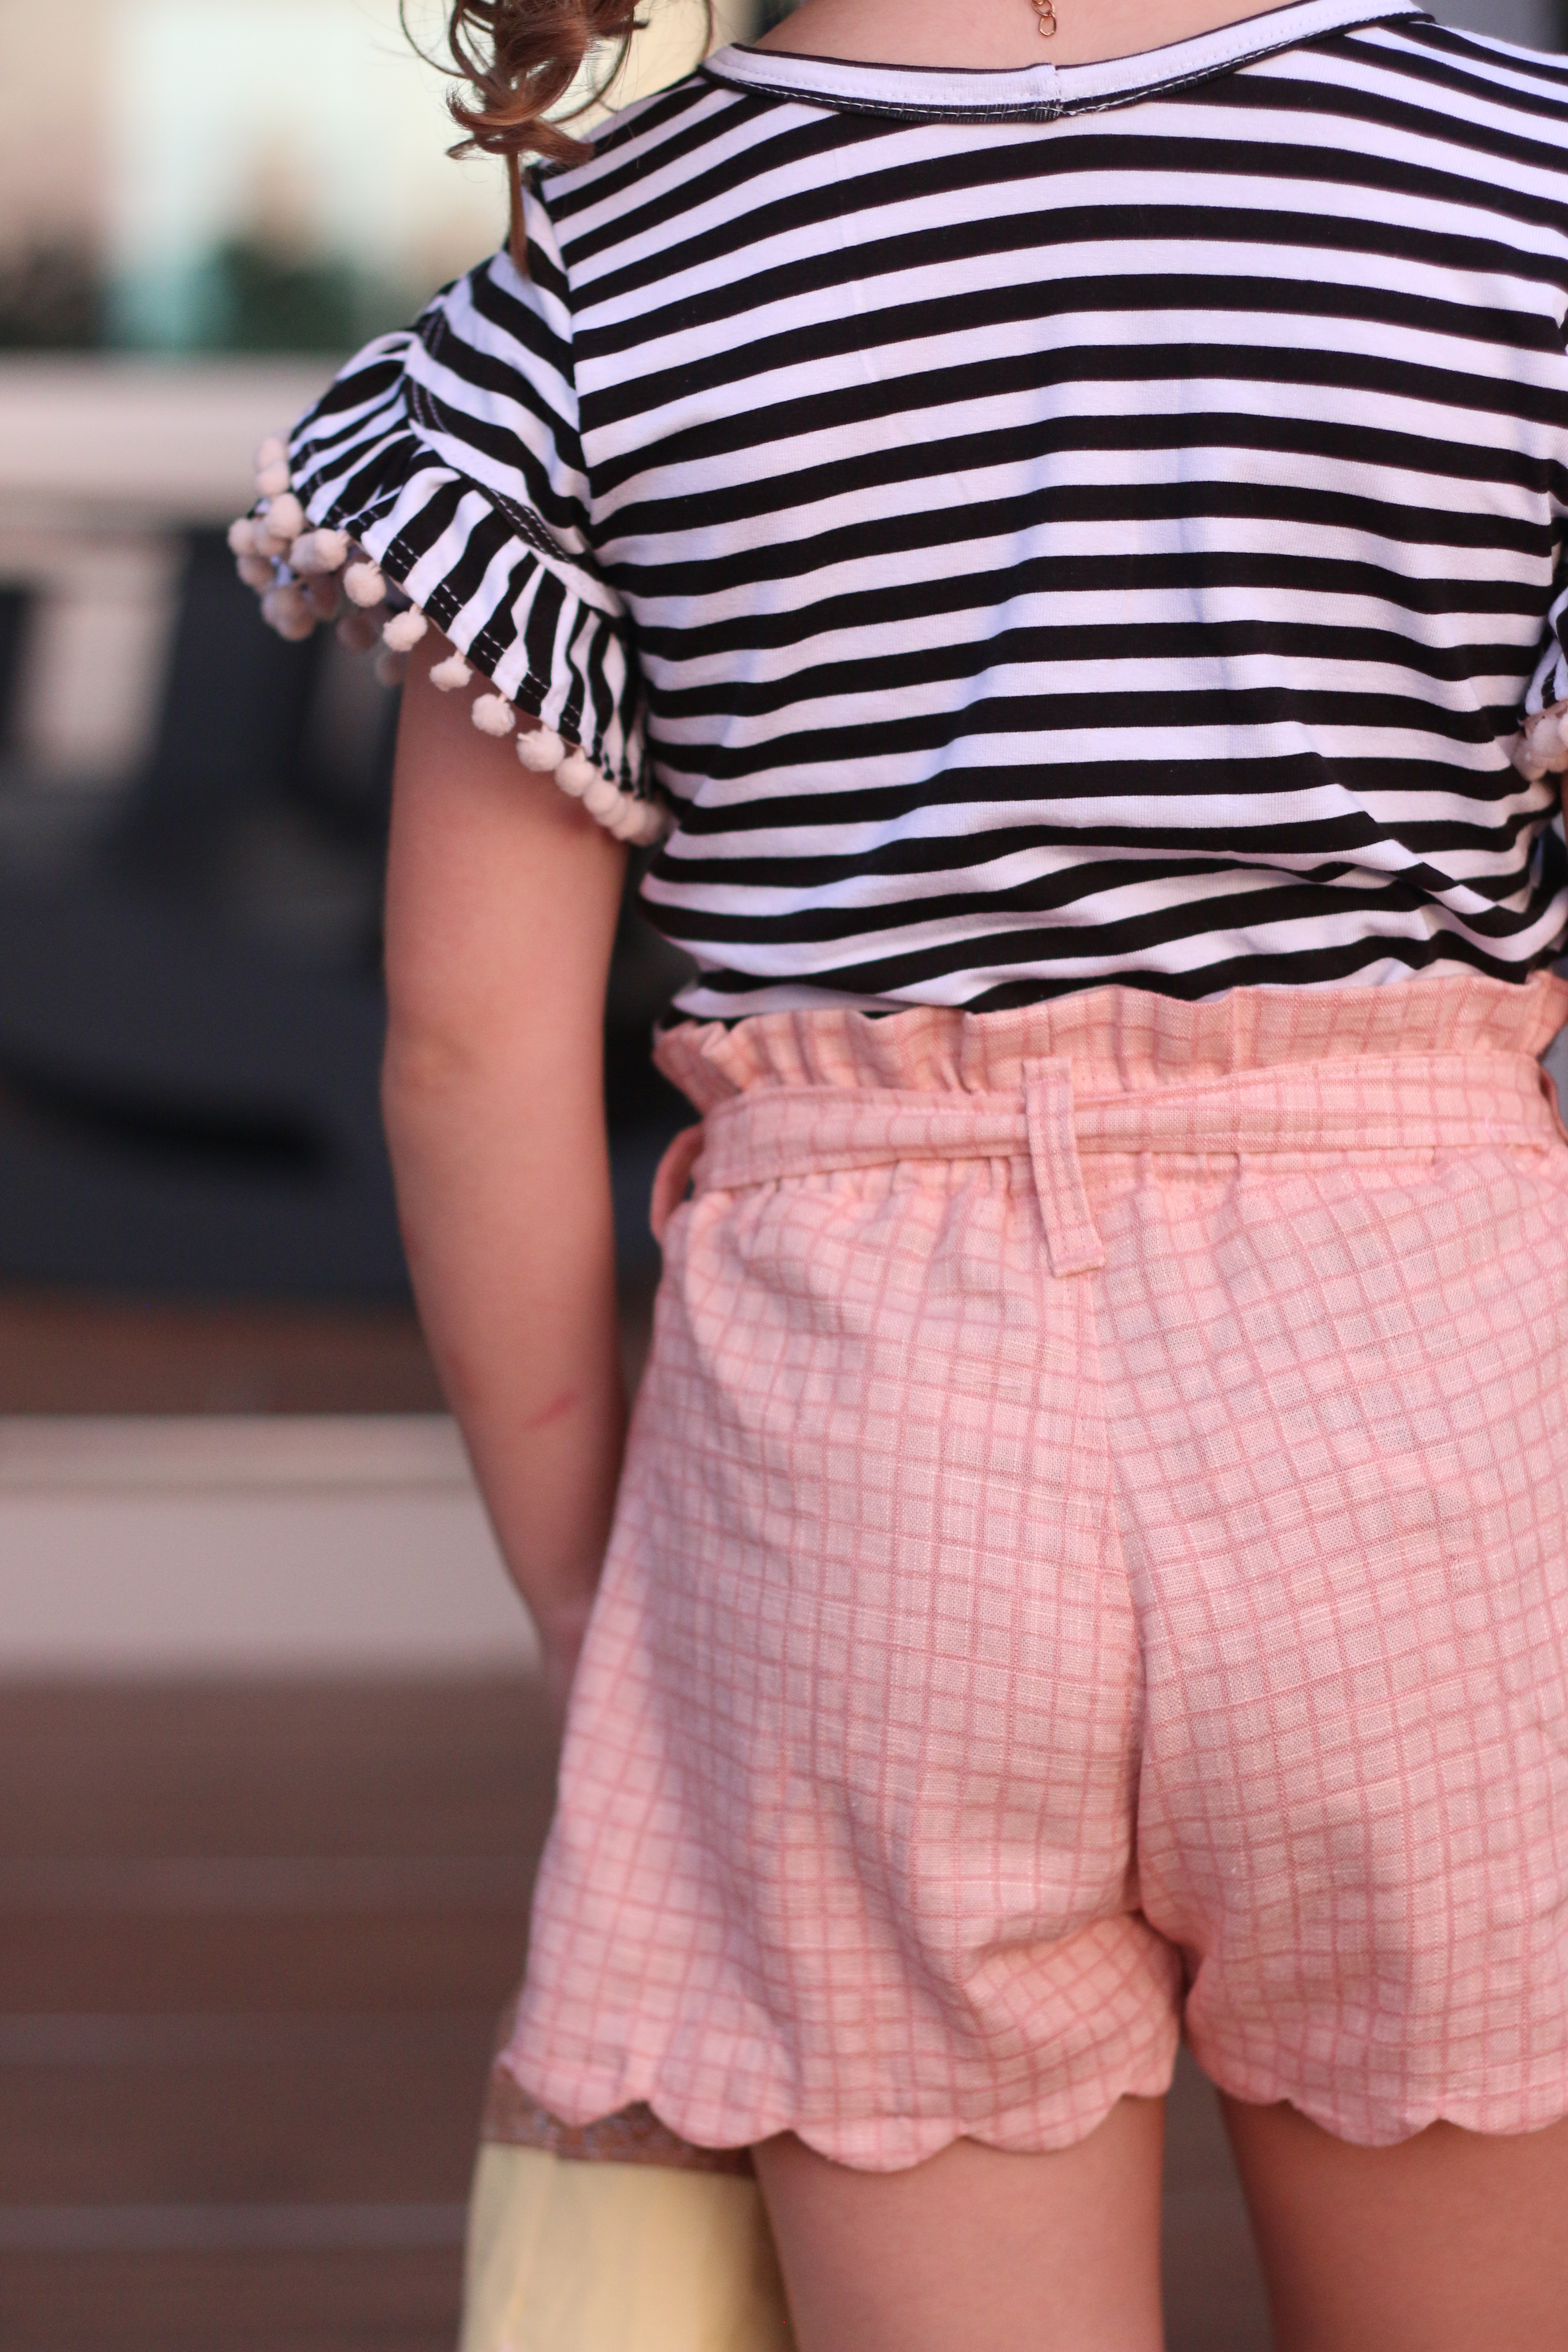
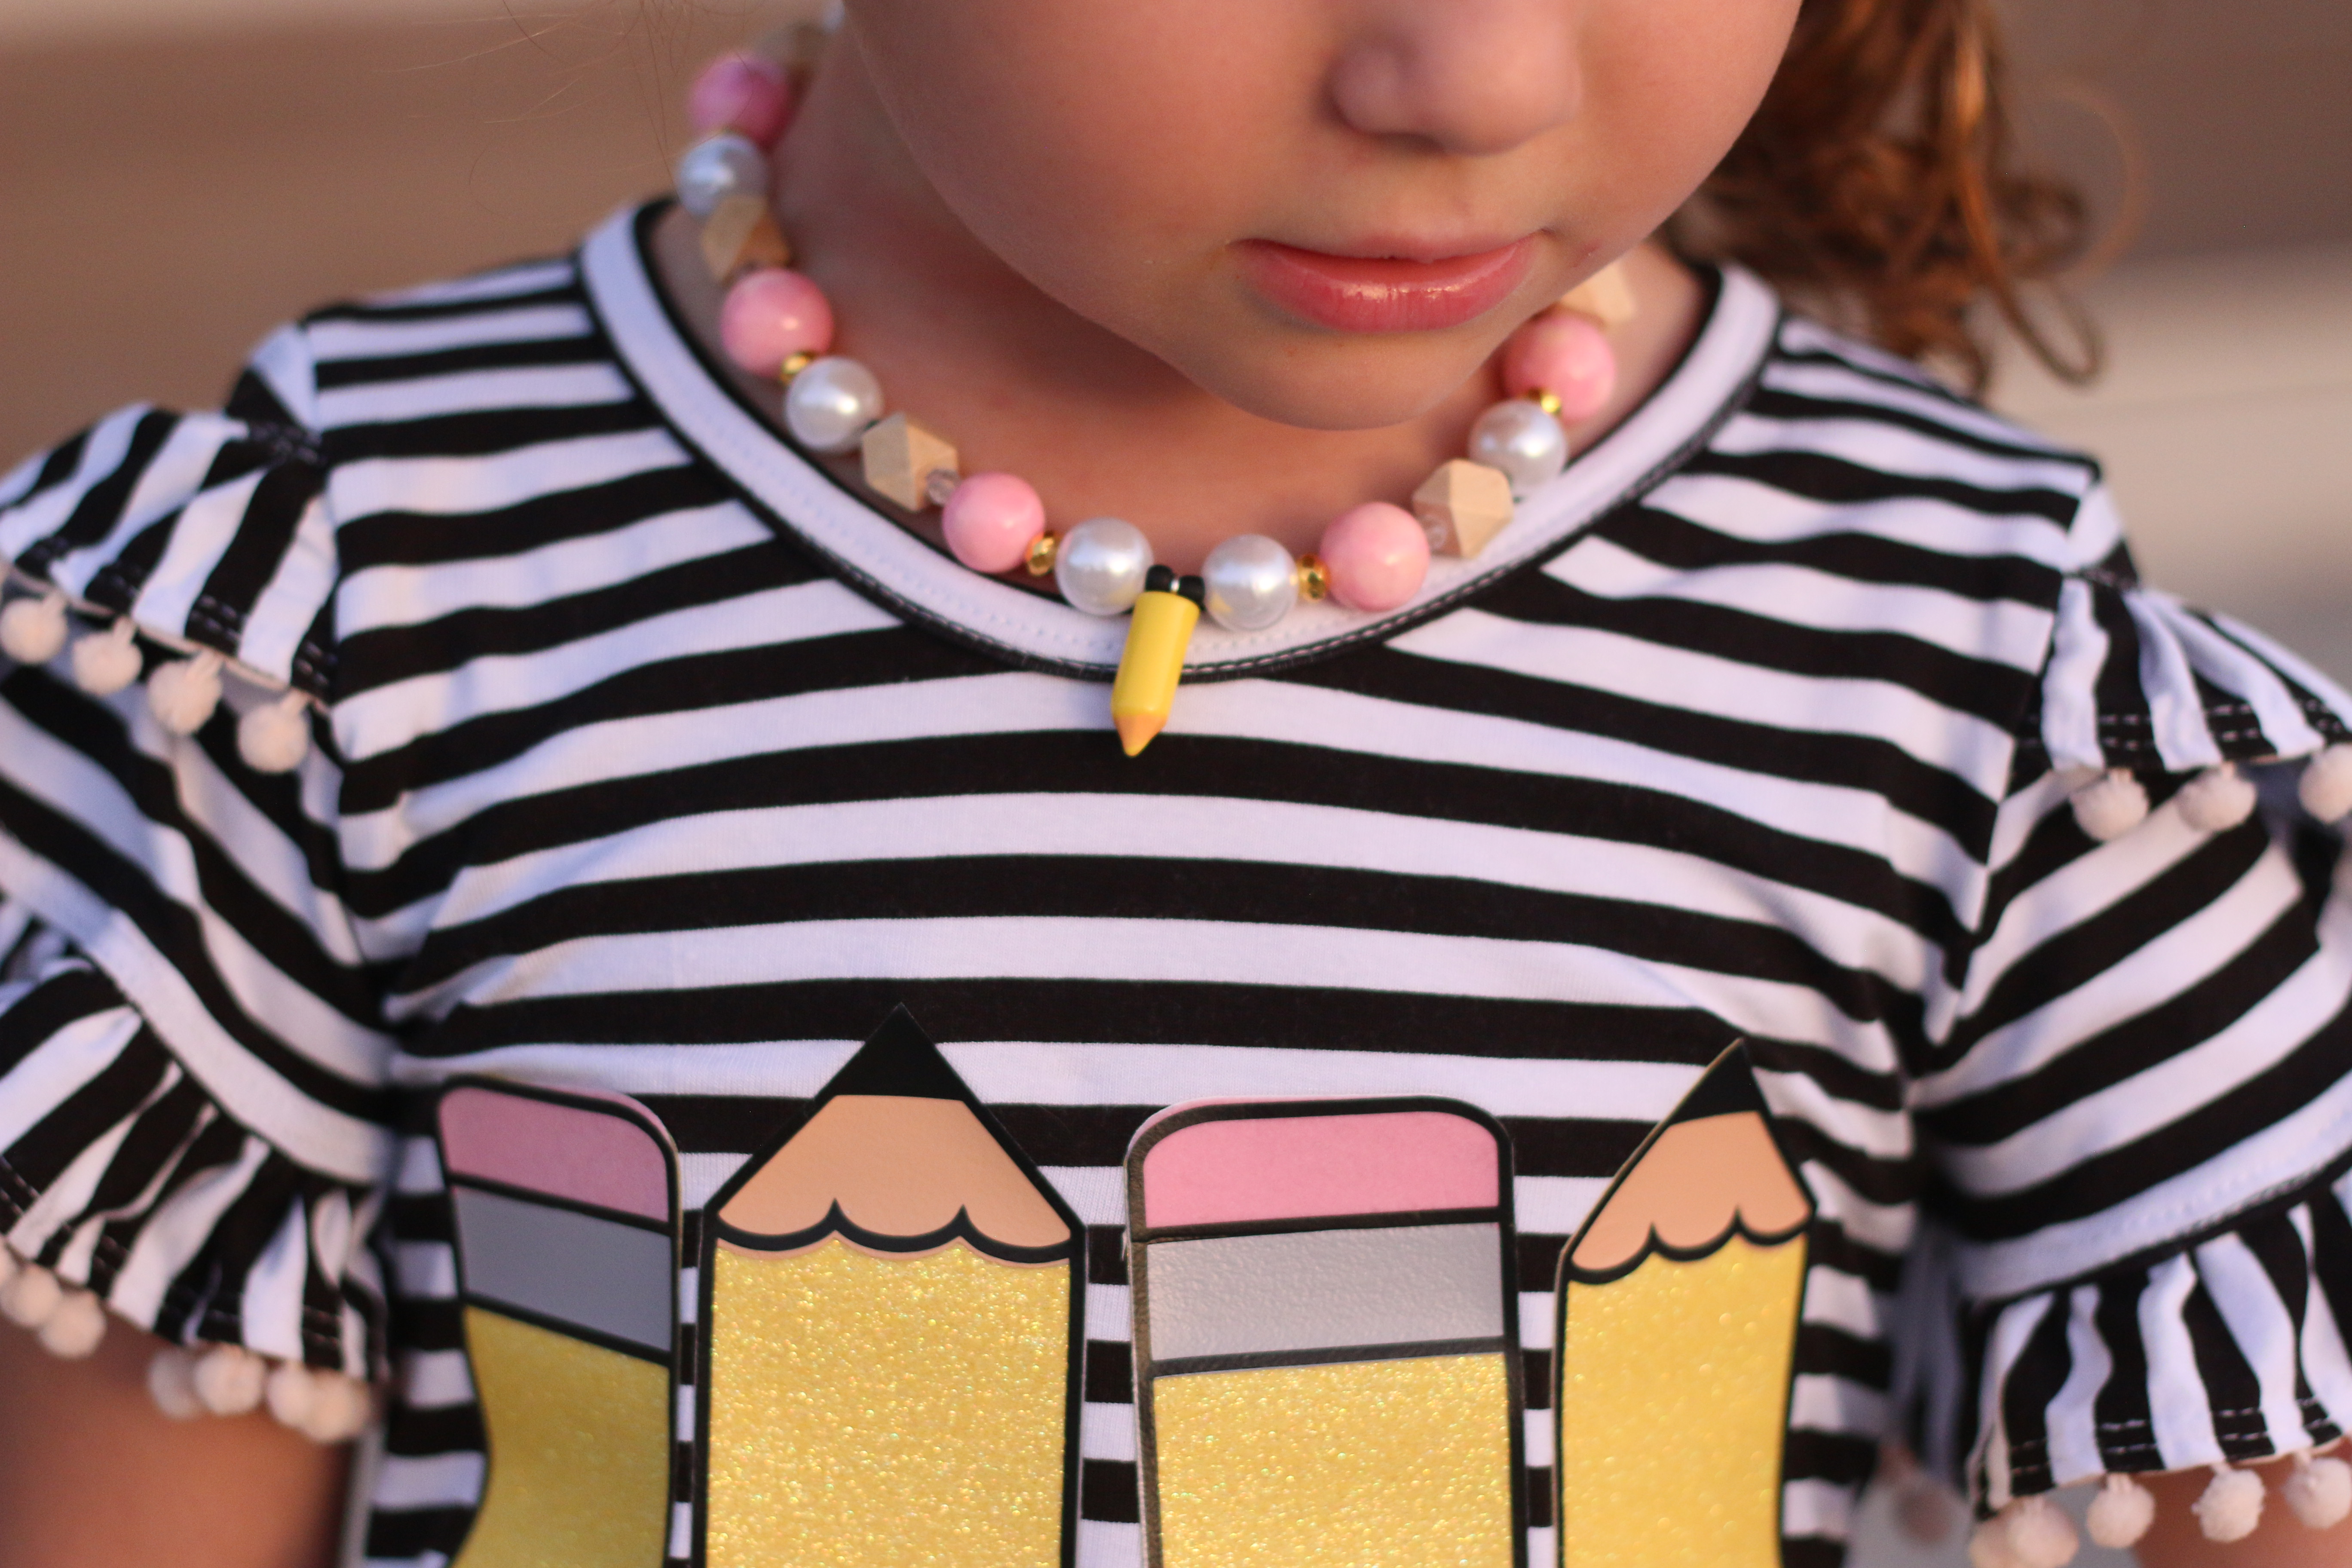
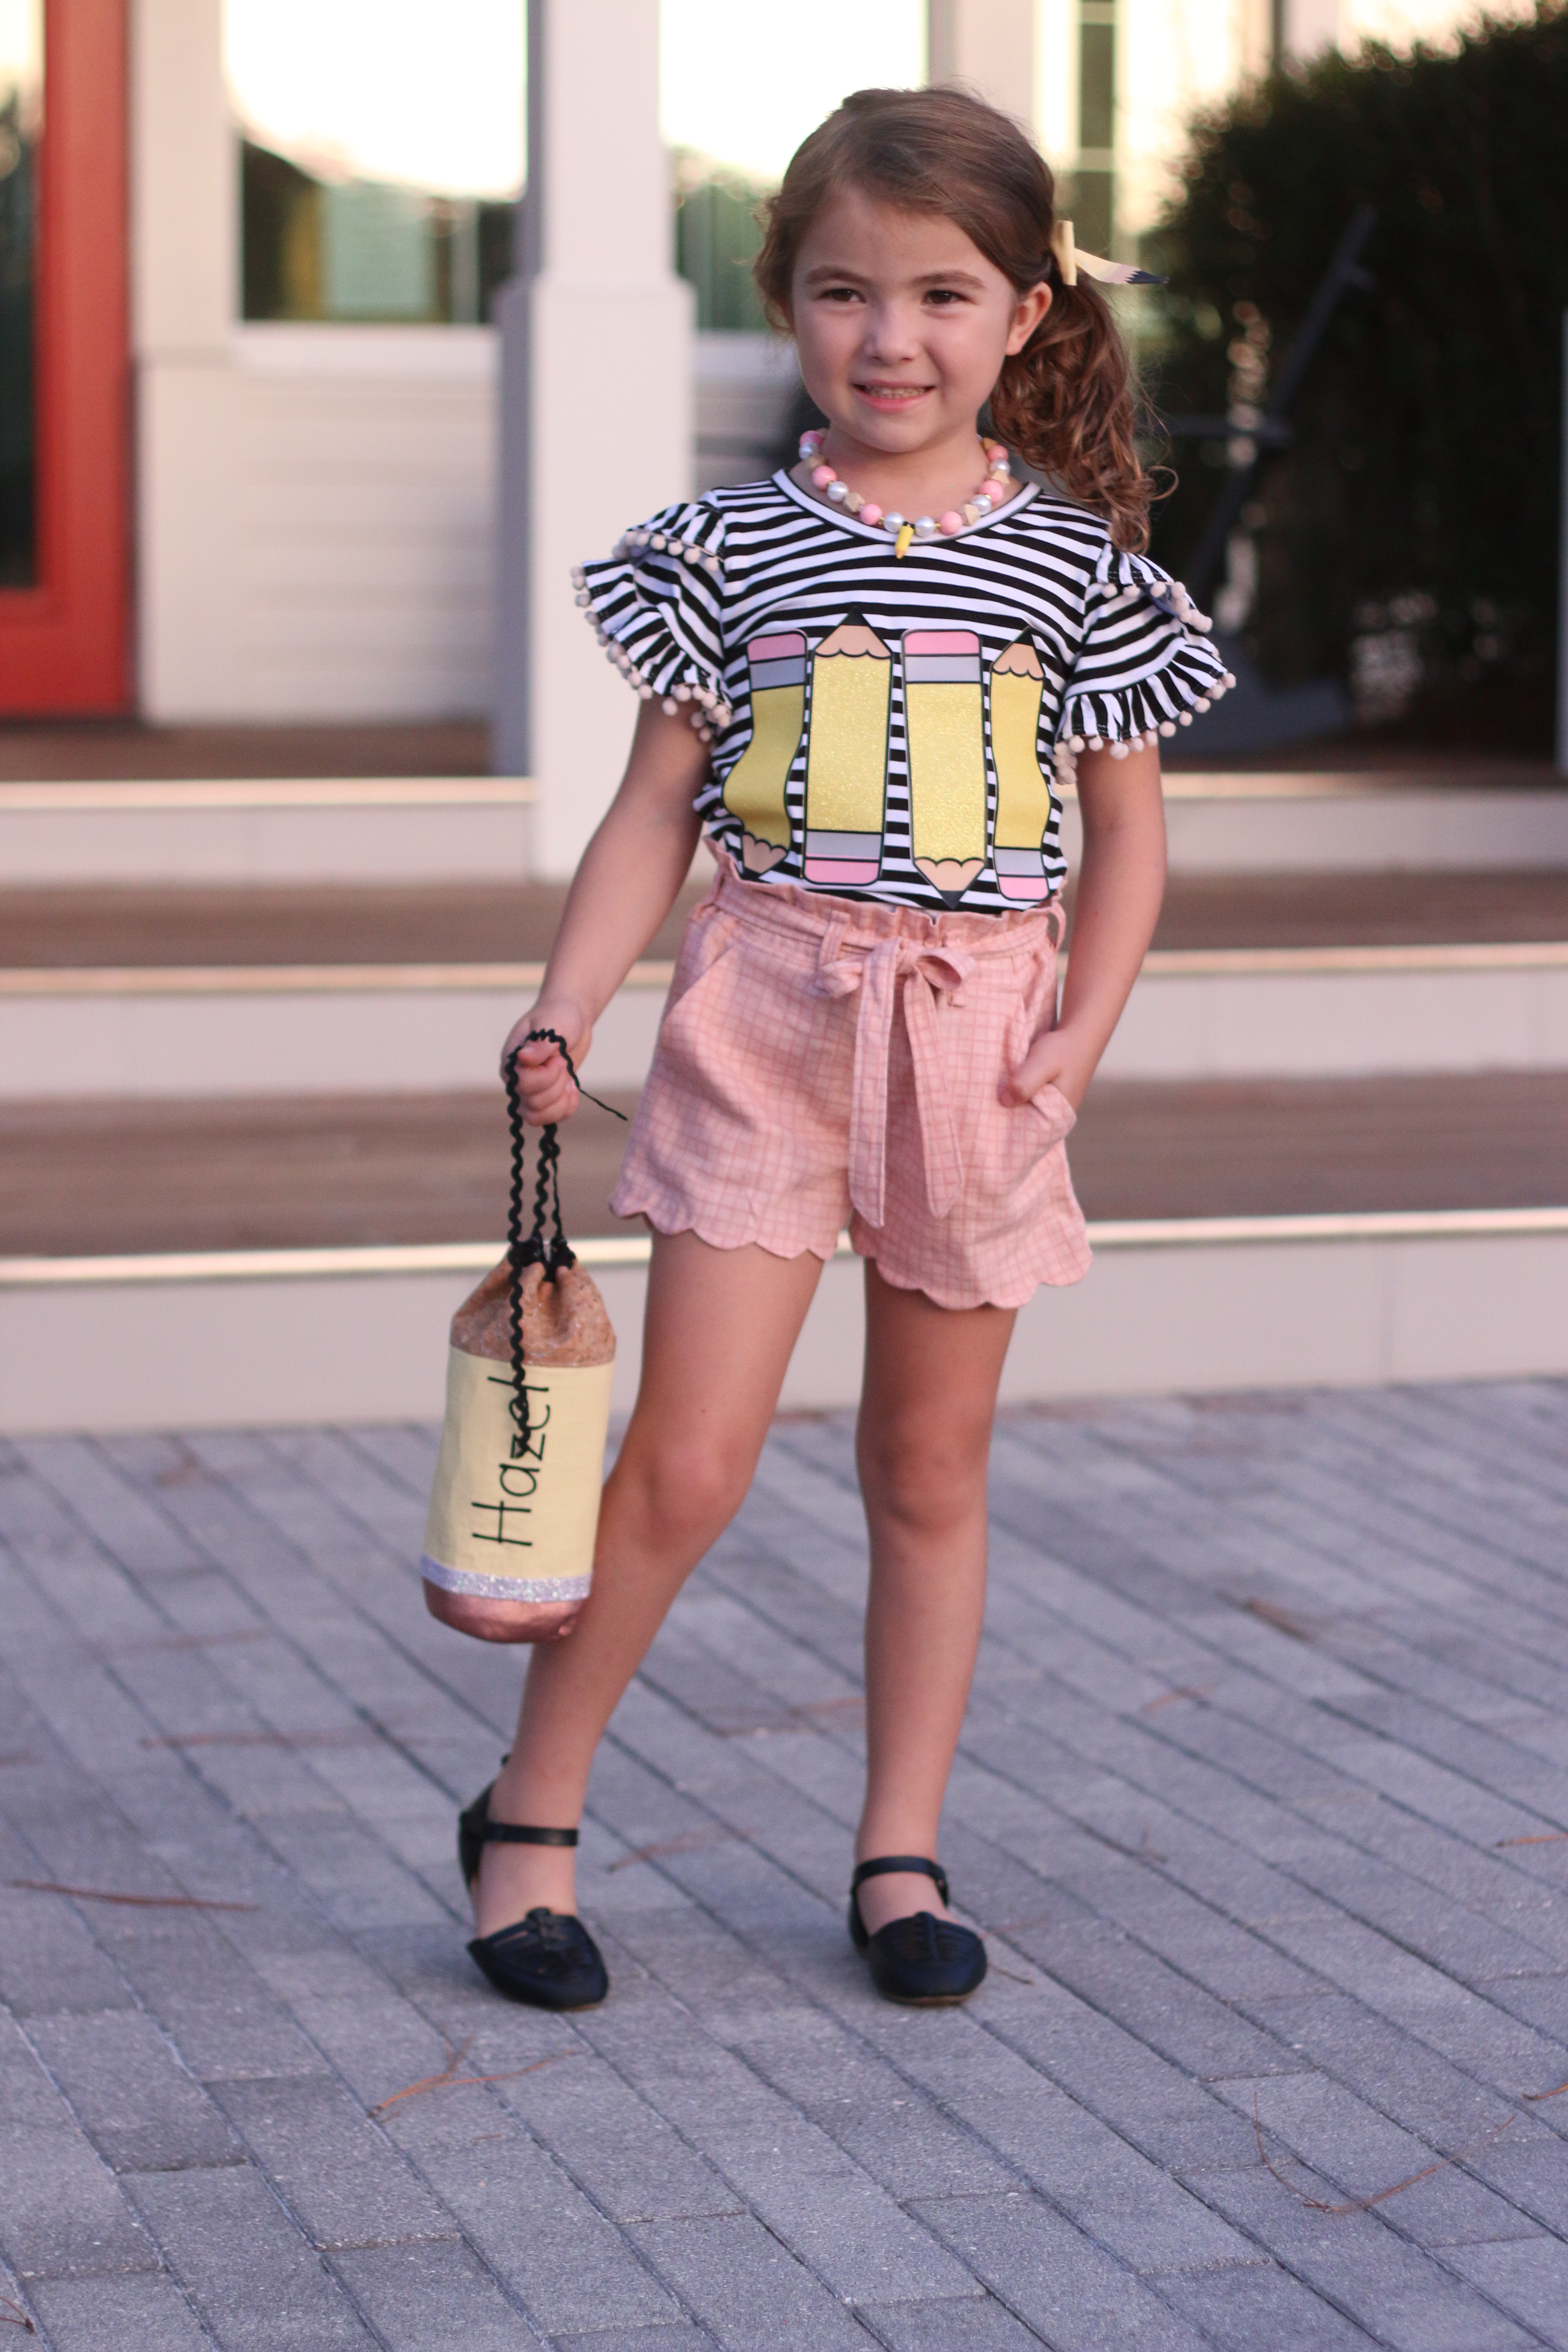
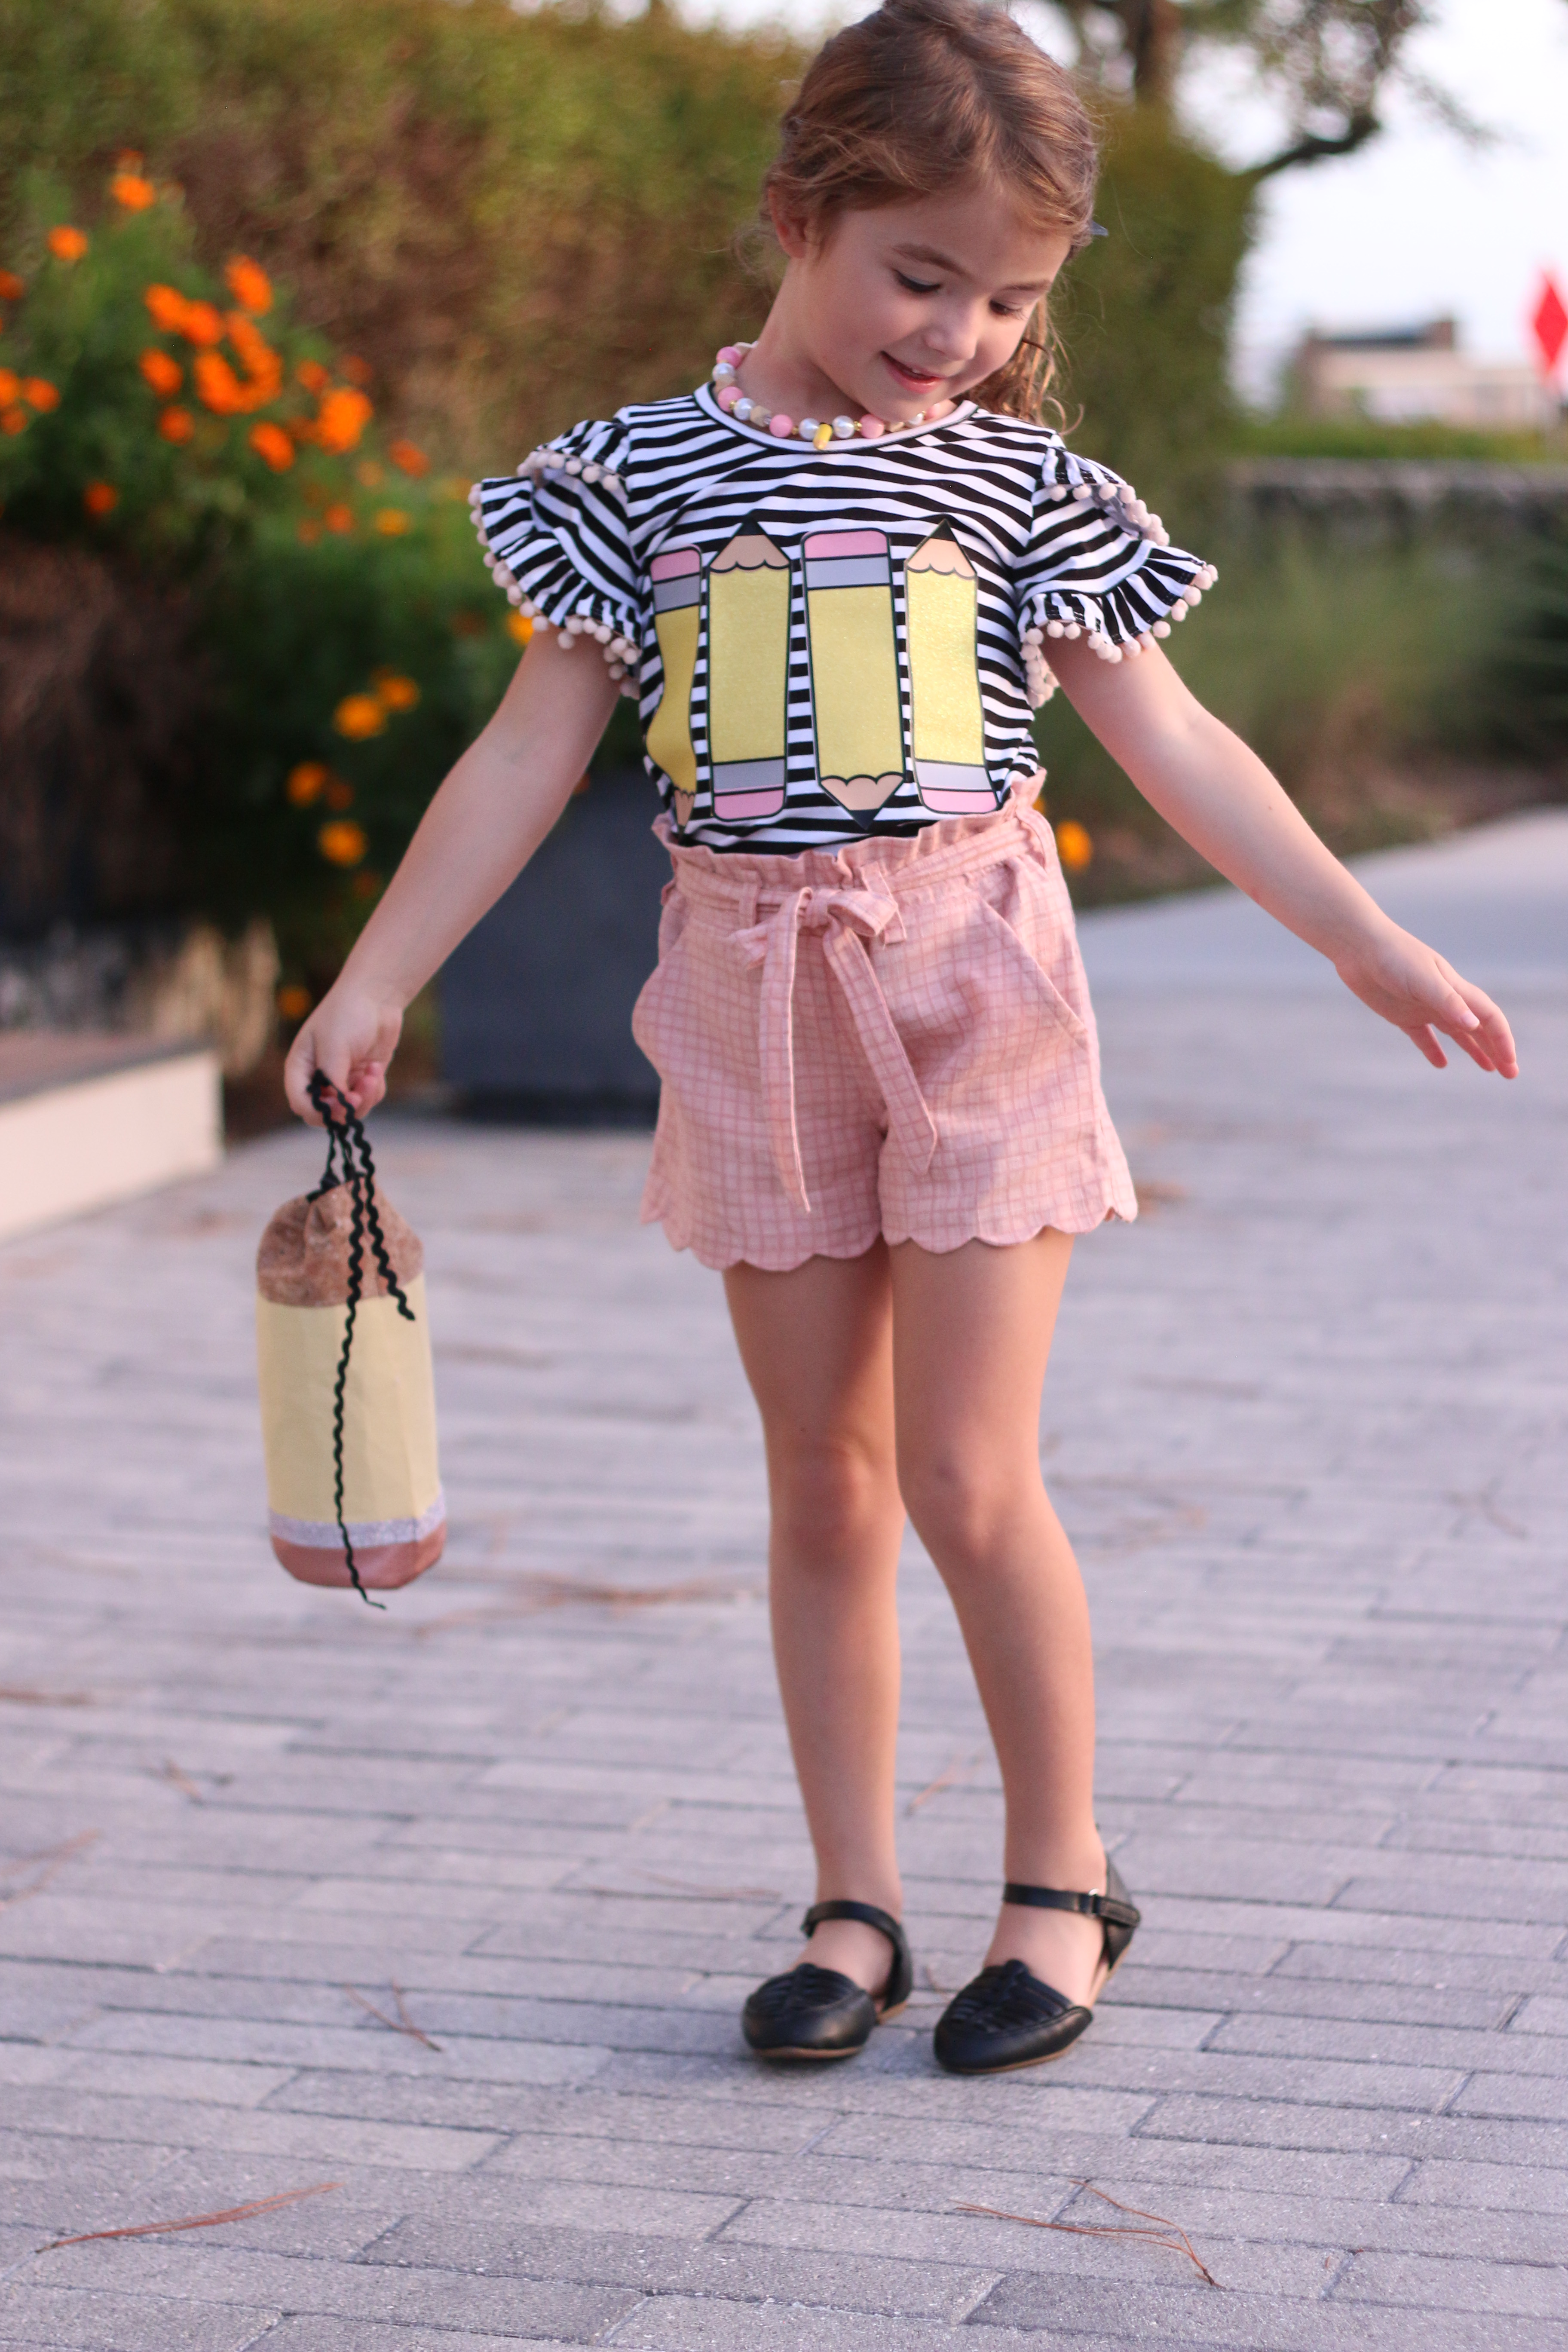
Now for the details!! I started with the shirt. The inspiration was a black and white stripe and I happened to have a viscose jersey blend that matched it closely. I used the Little Lizard King Zafra top because really the inspiration was identical. So to keep it fresh, I added pom pom trim to the sleeves (like little mini dangling erasers perhaps?) and made sure the cut the ruffle crossgrain to keep the same look as the inspiration. For the pencil design, I used heat transfer vinyl and layered it up. I used some fuzzy pink for the eraser and glitter for the pencil body to keep it interesting.

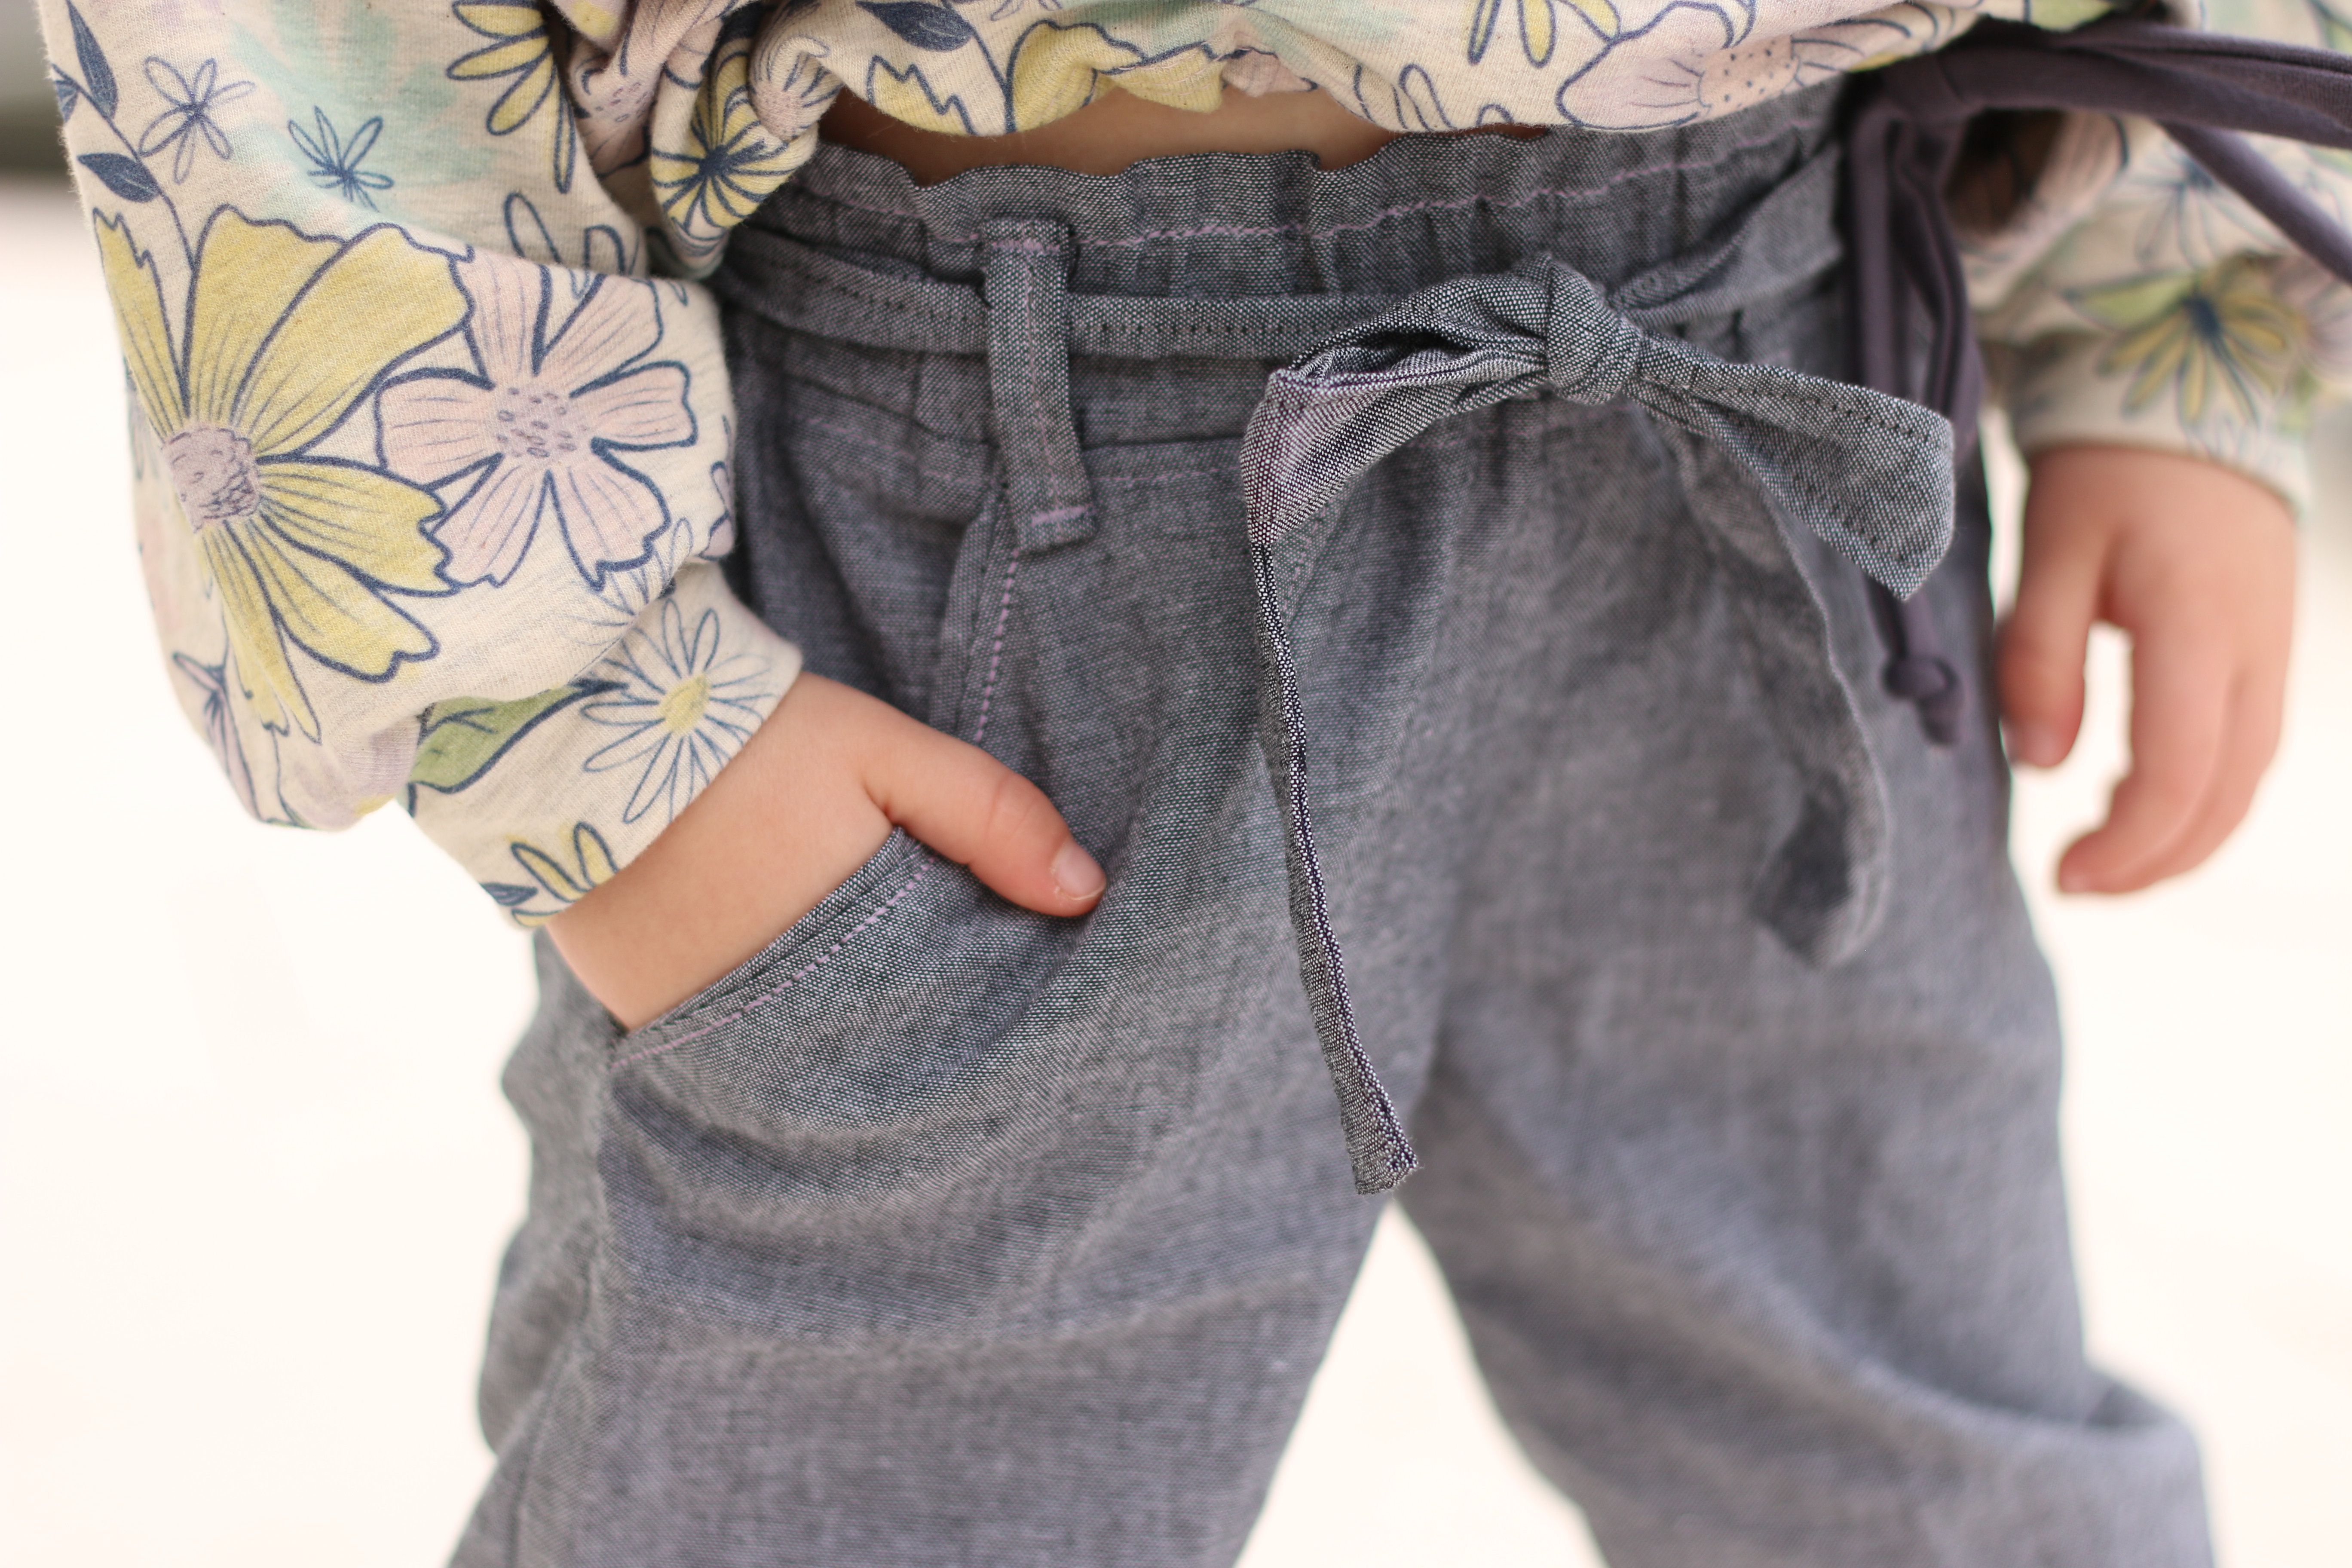
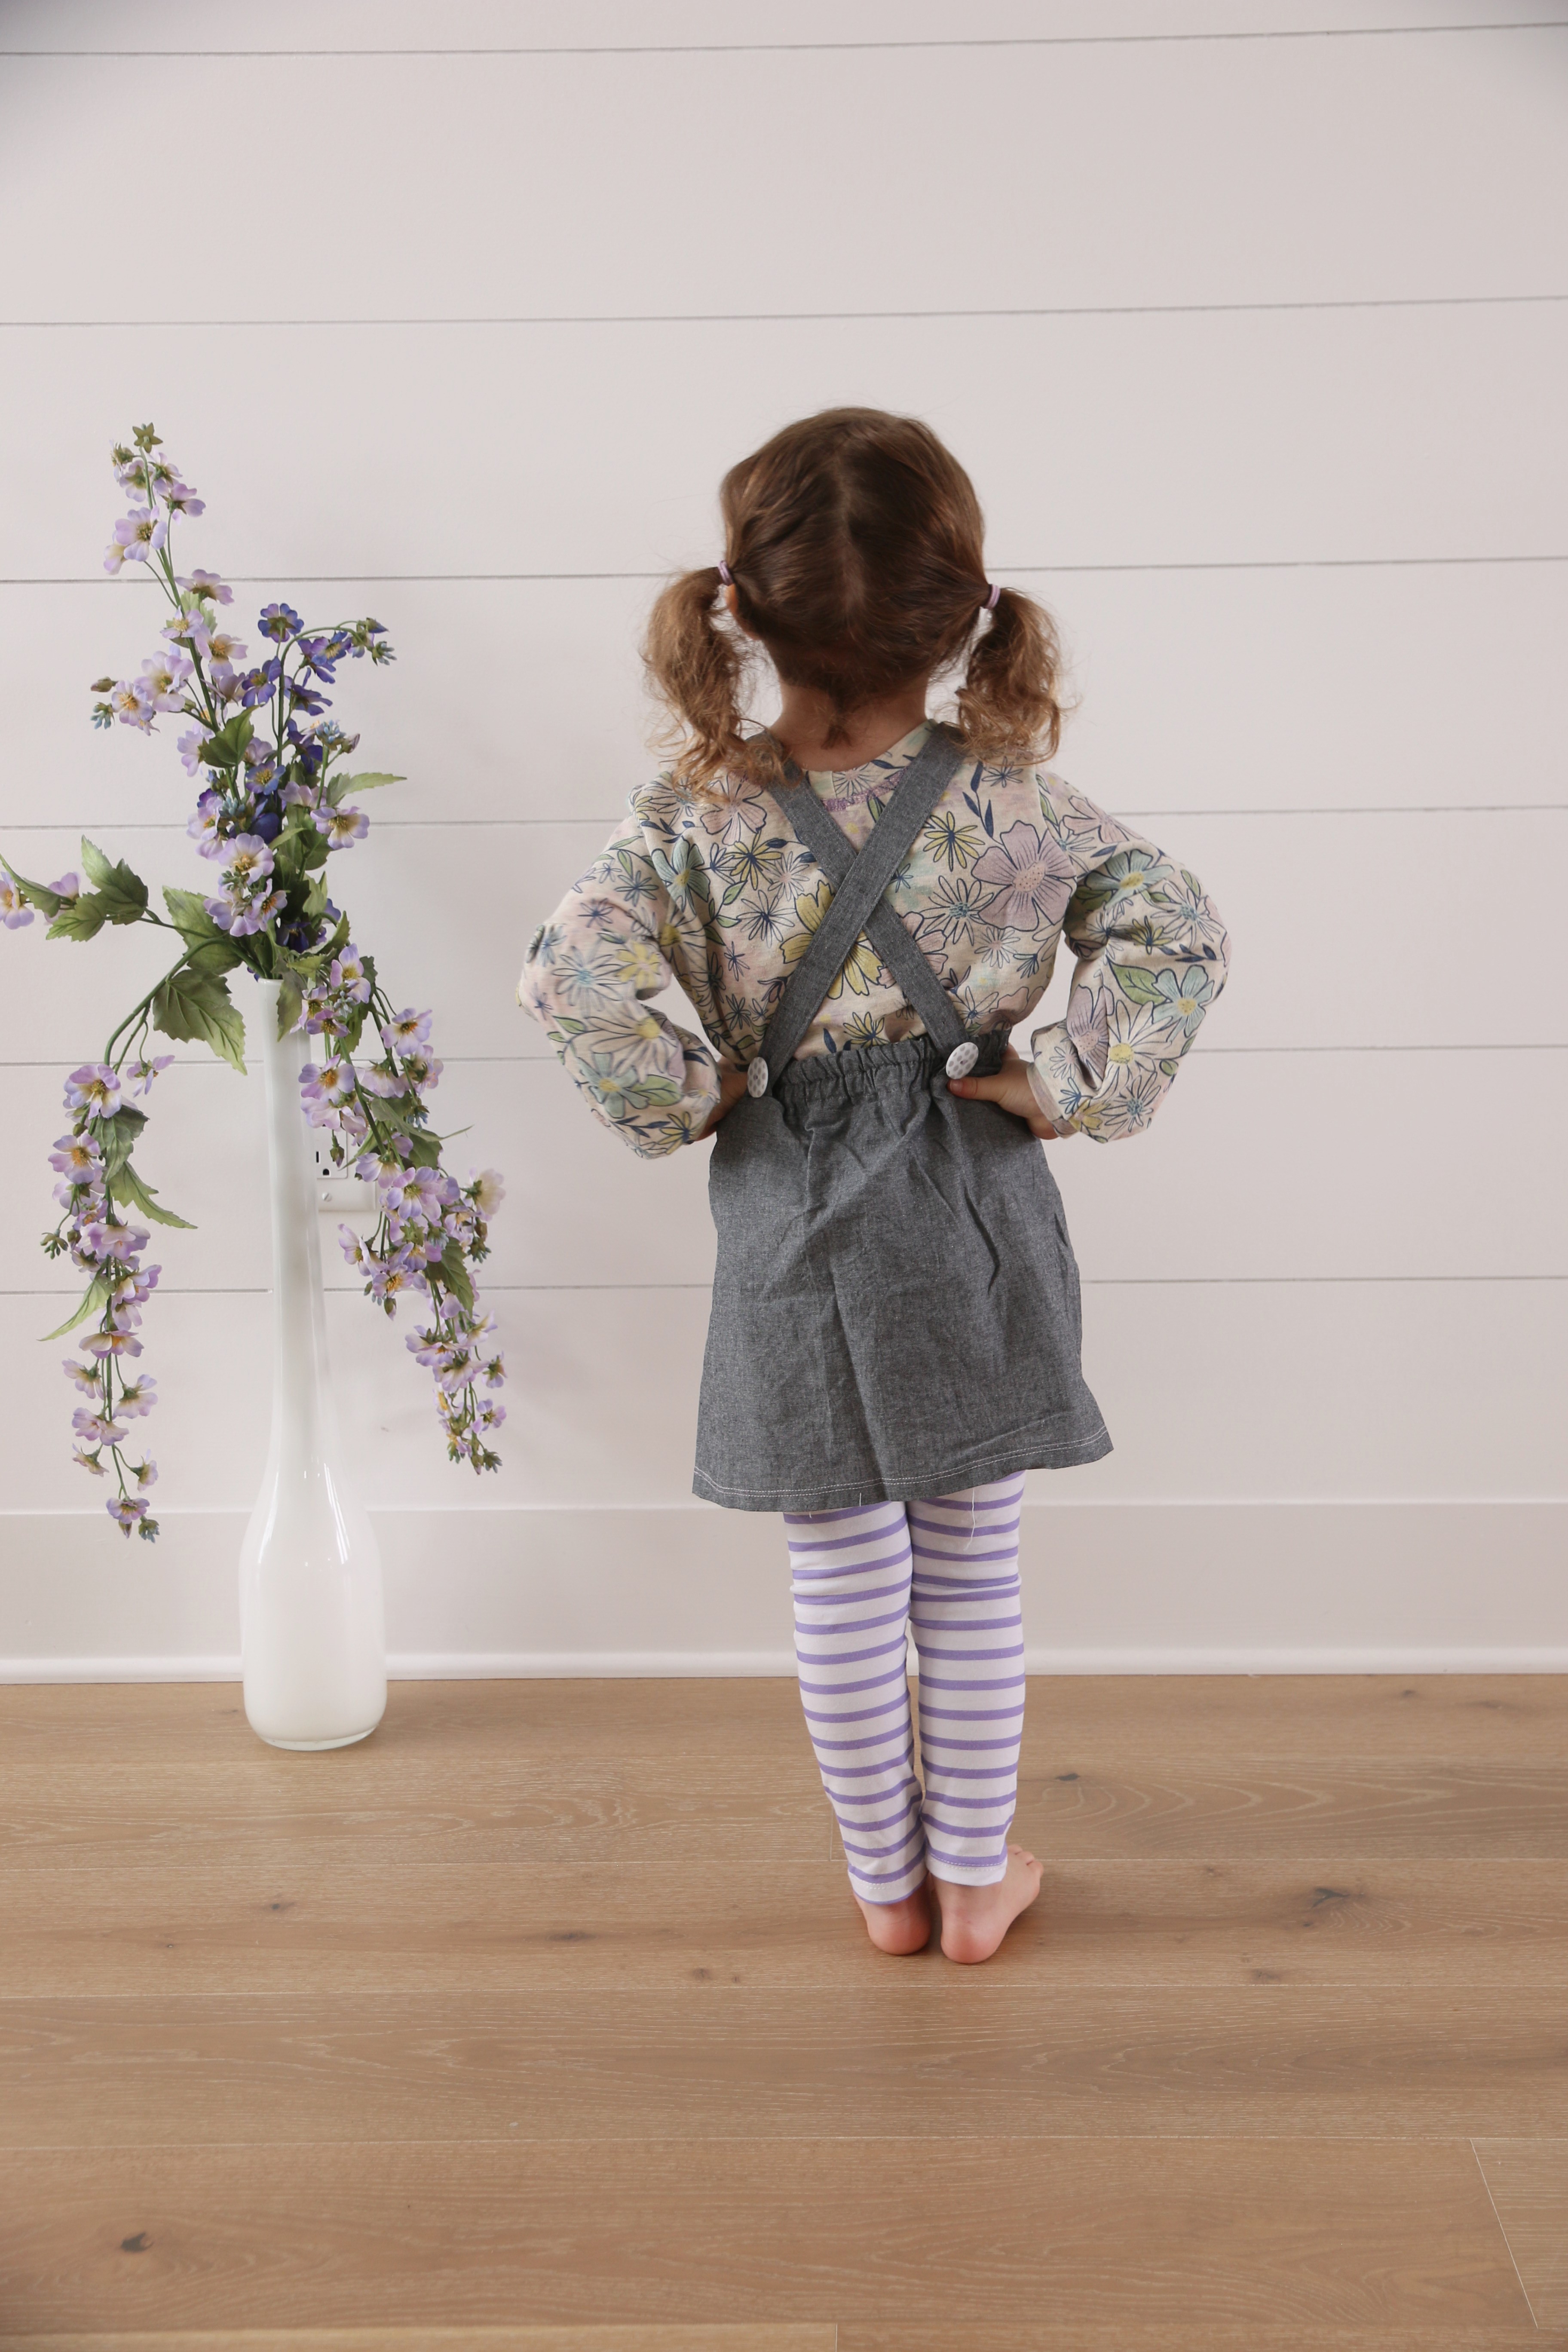
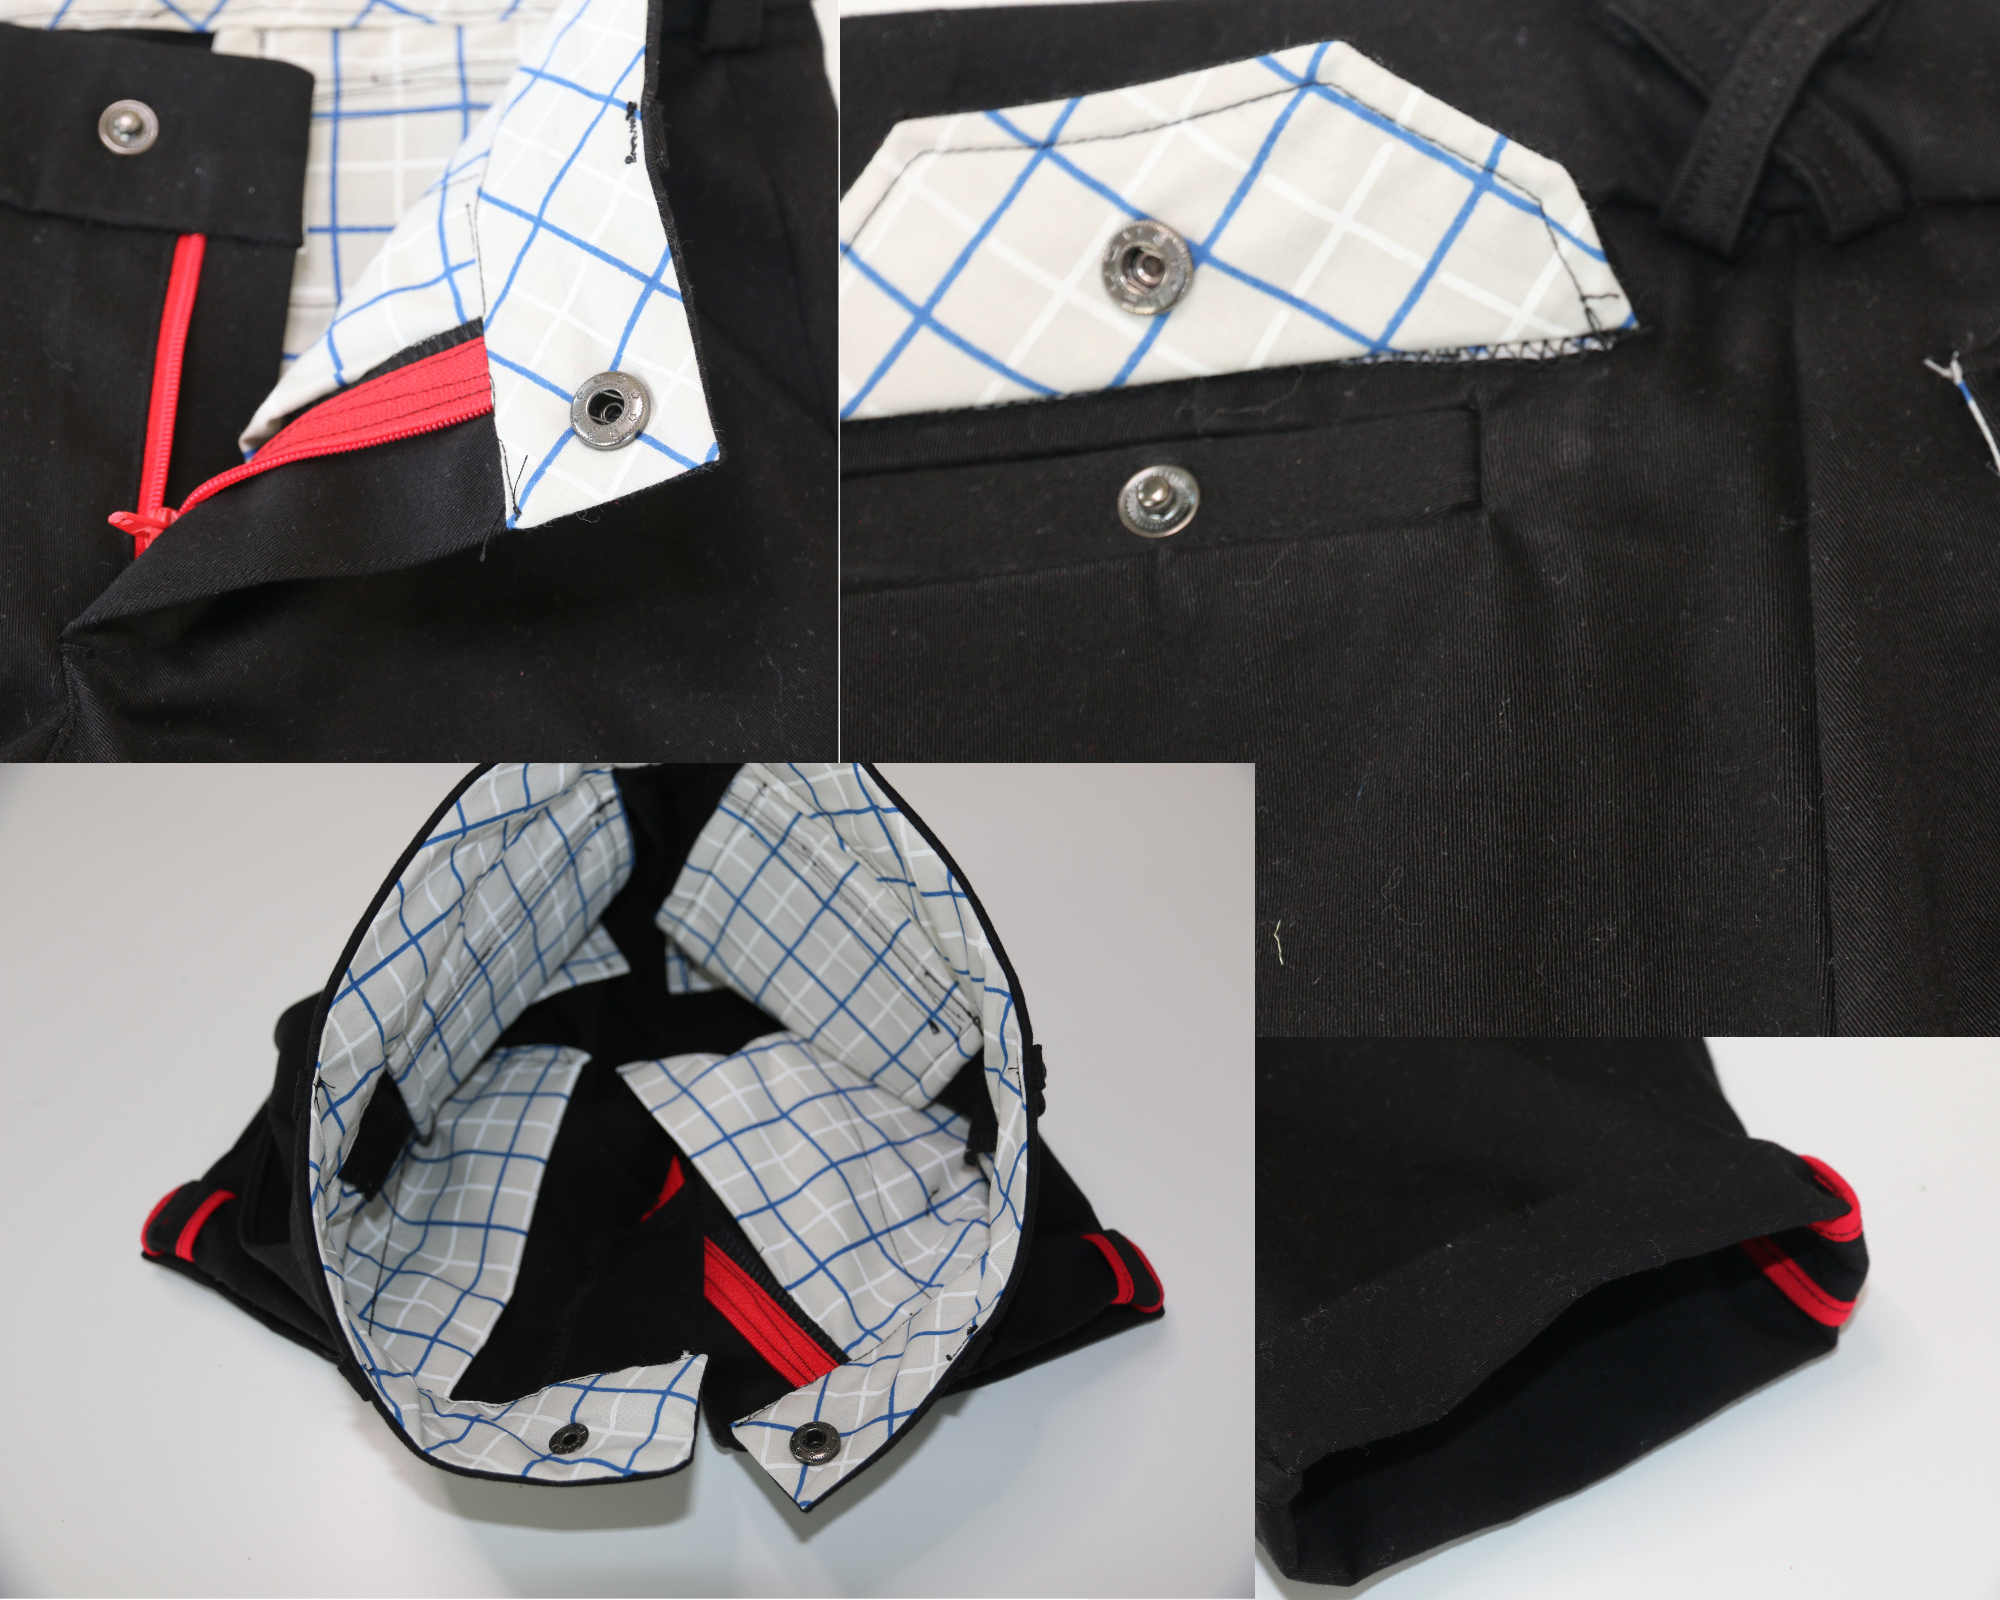
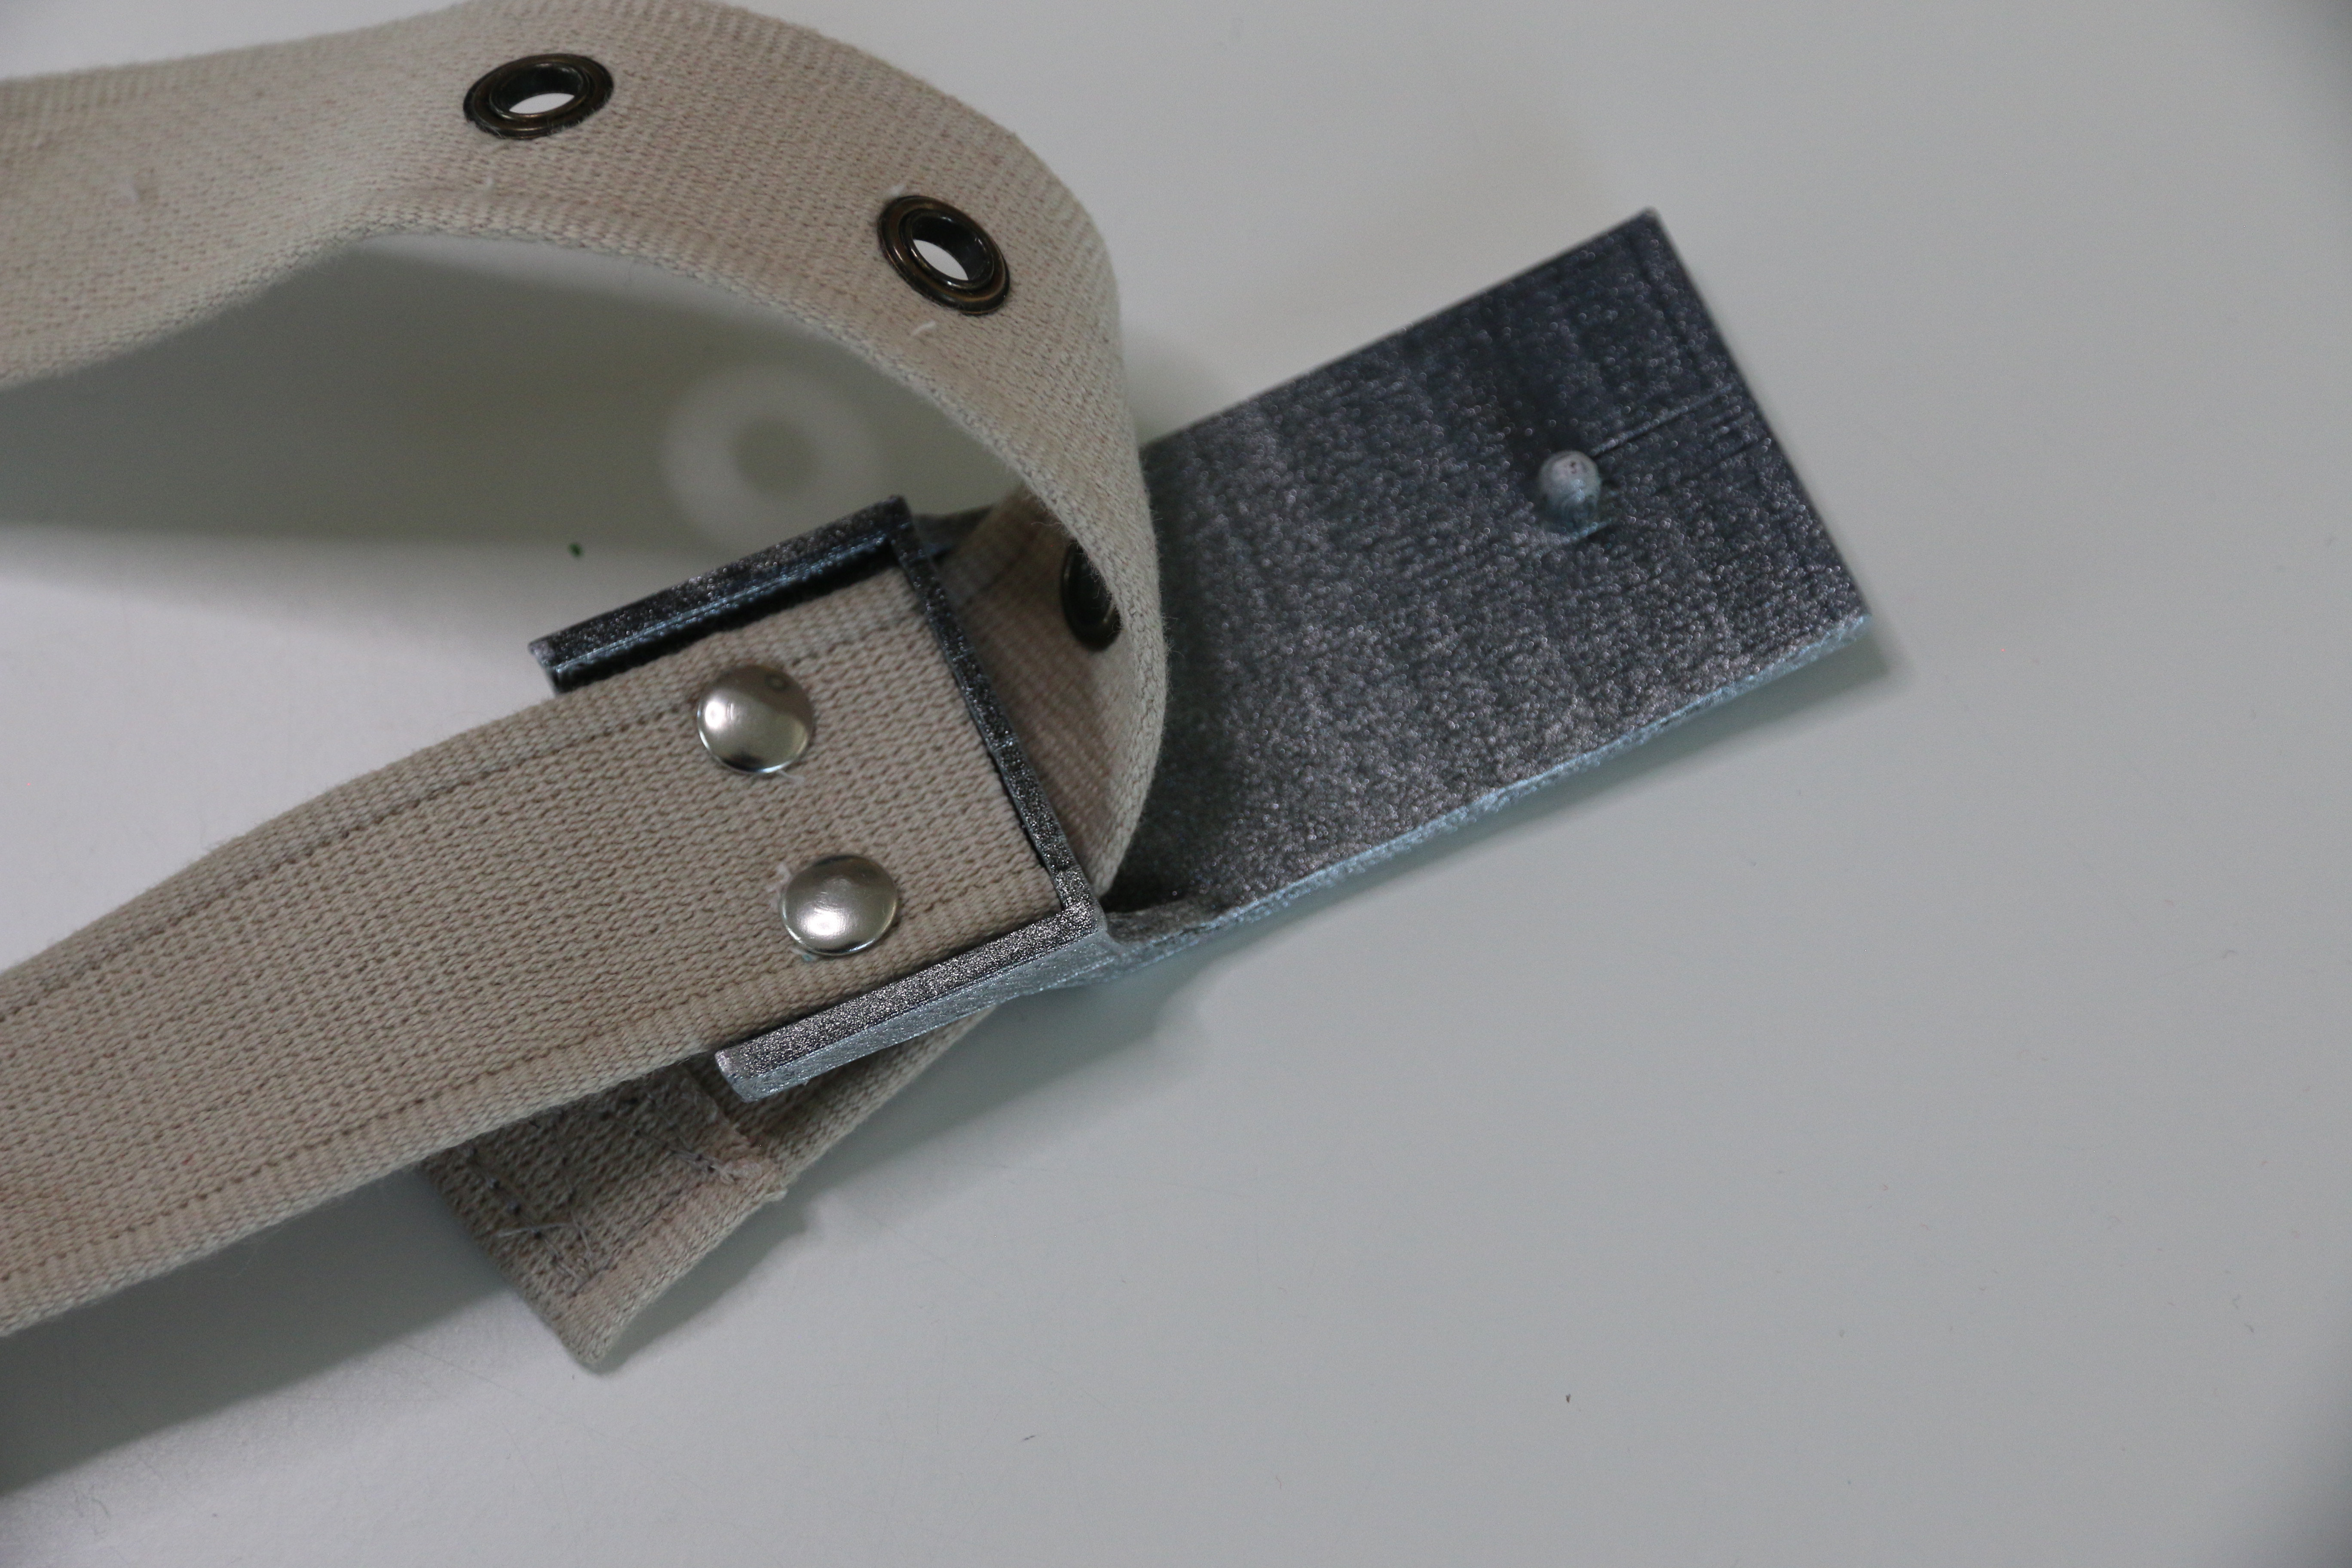
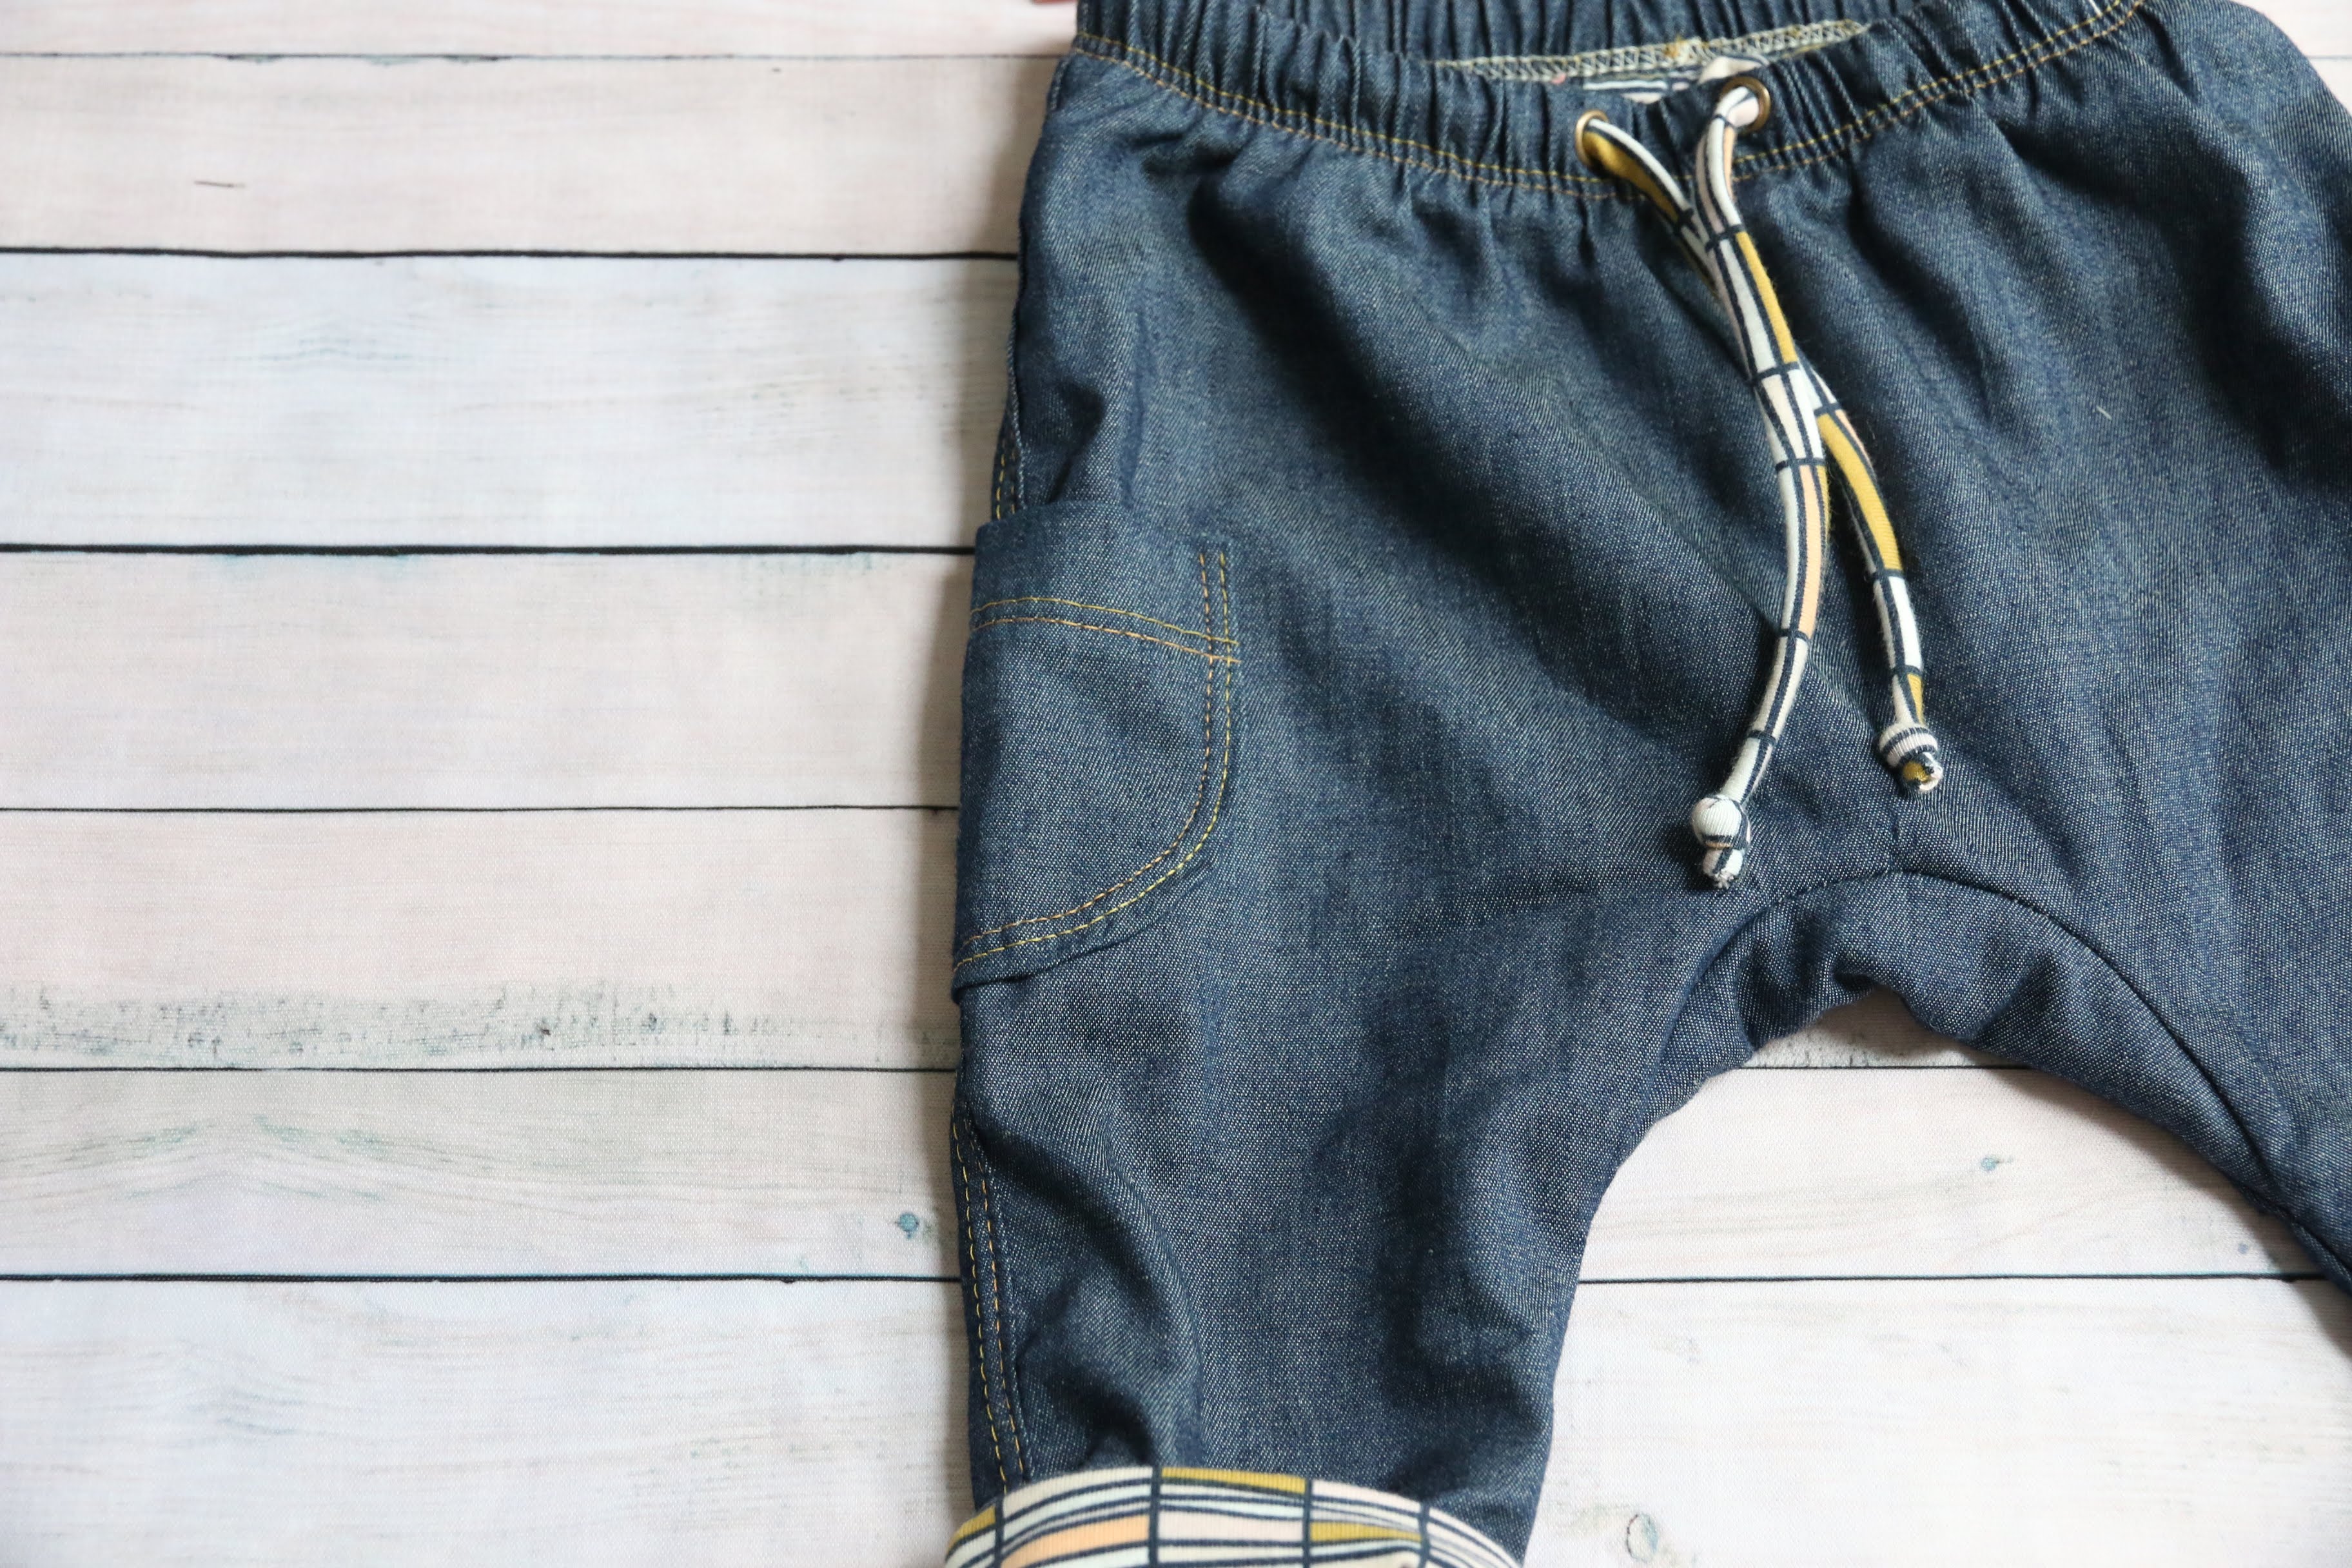
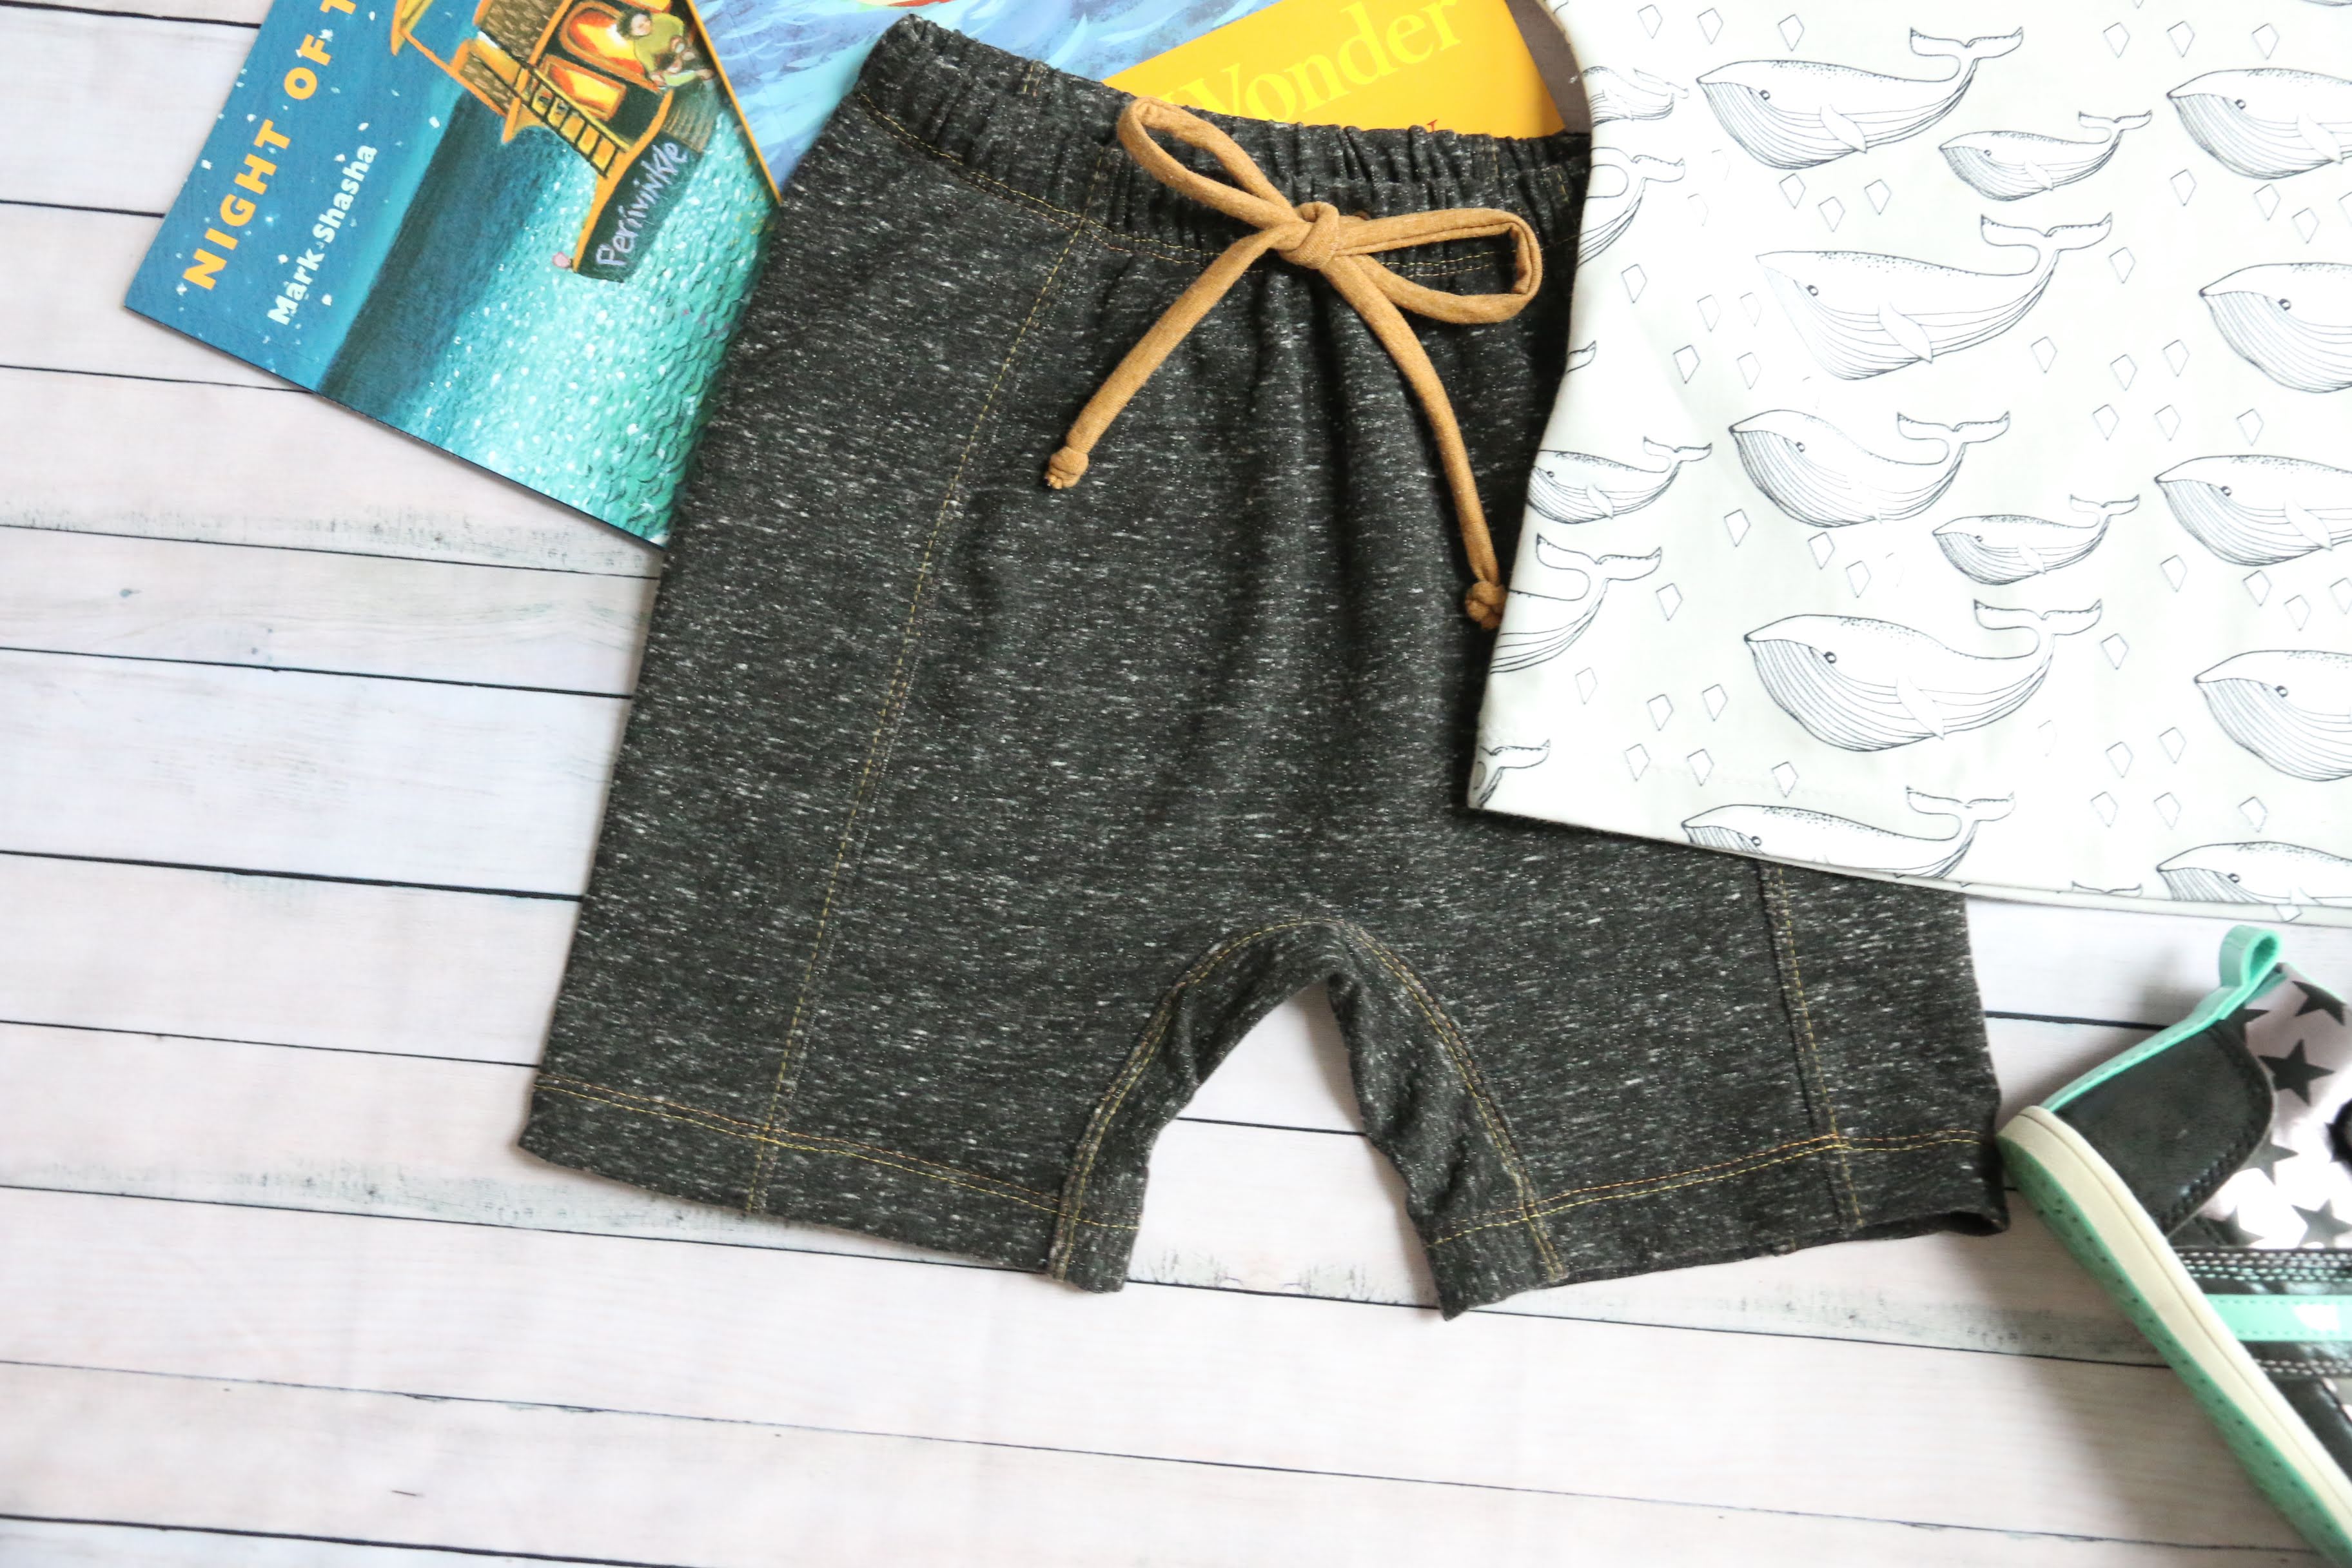
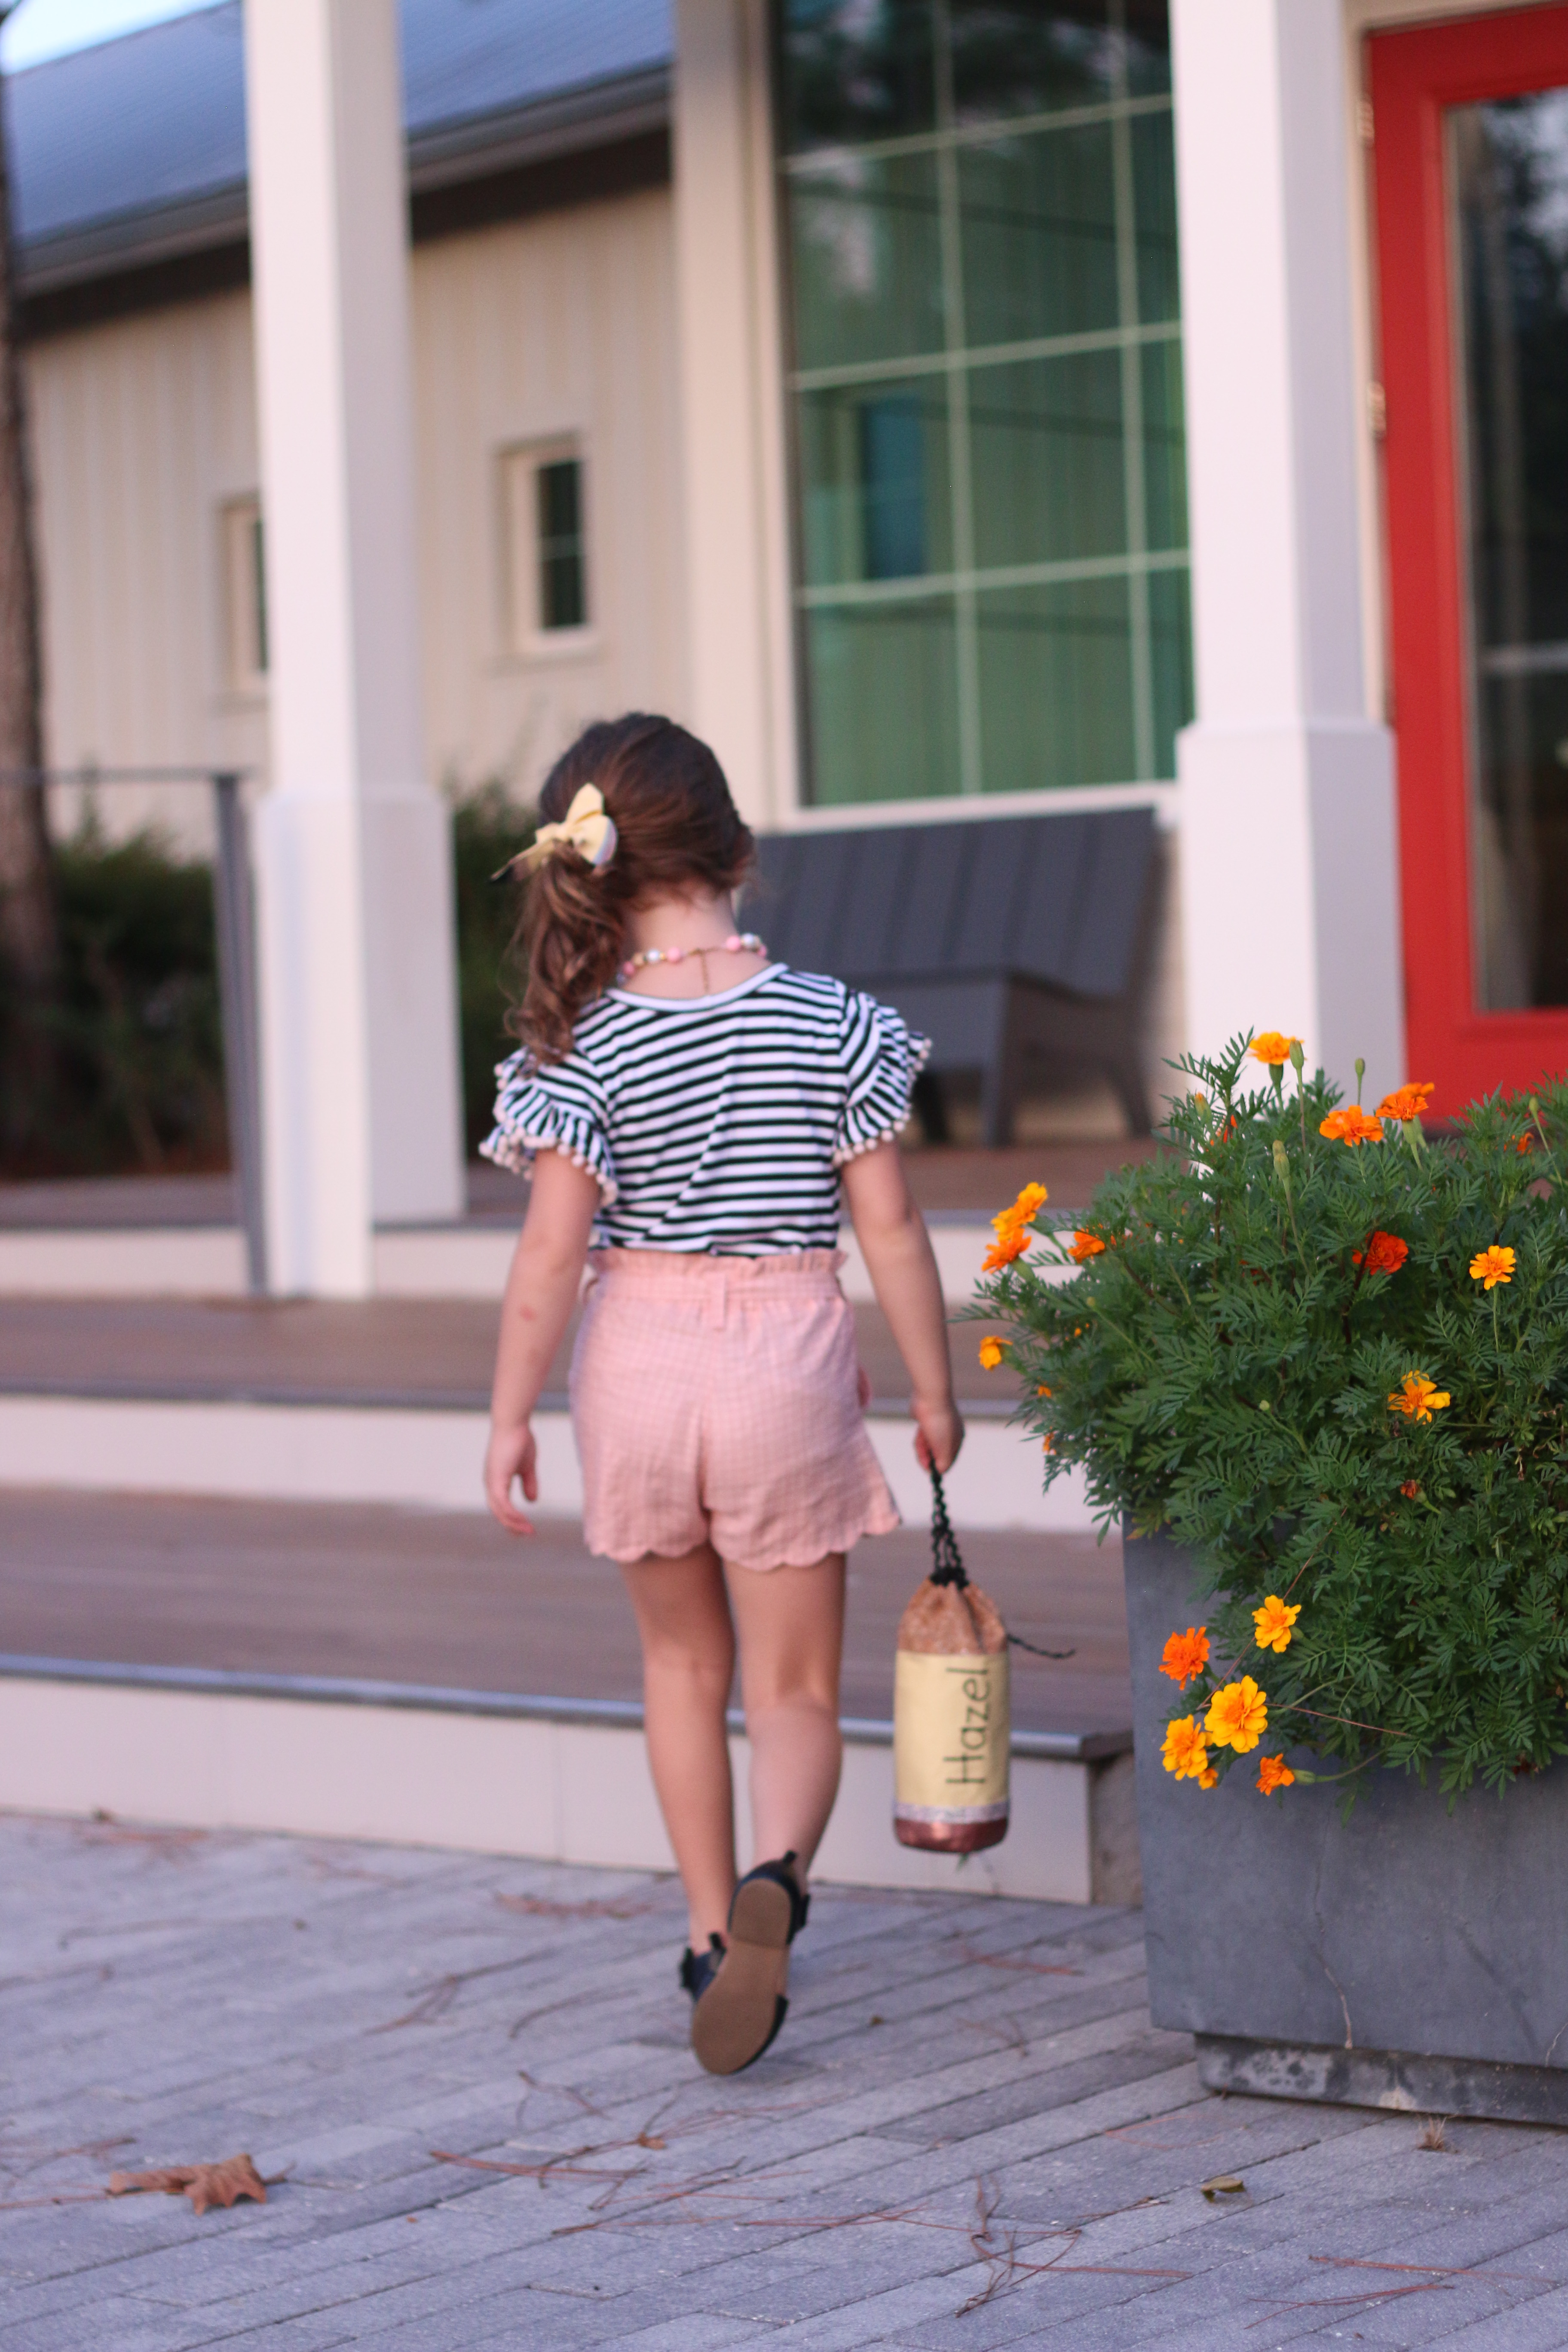
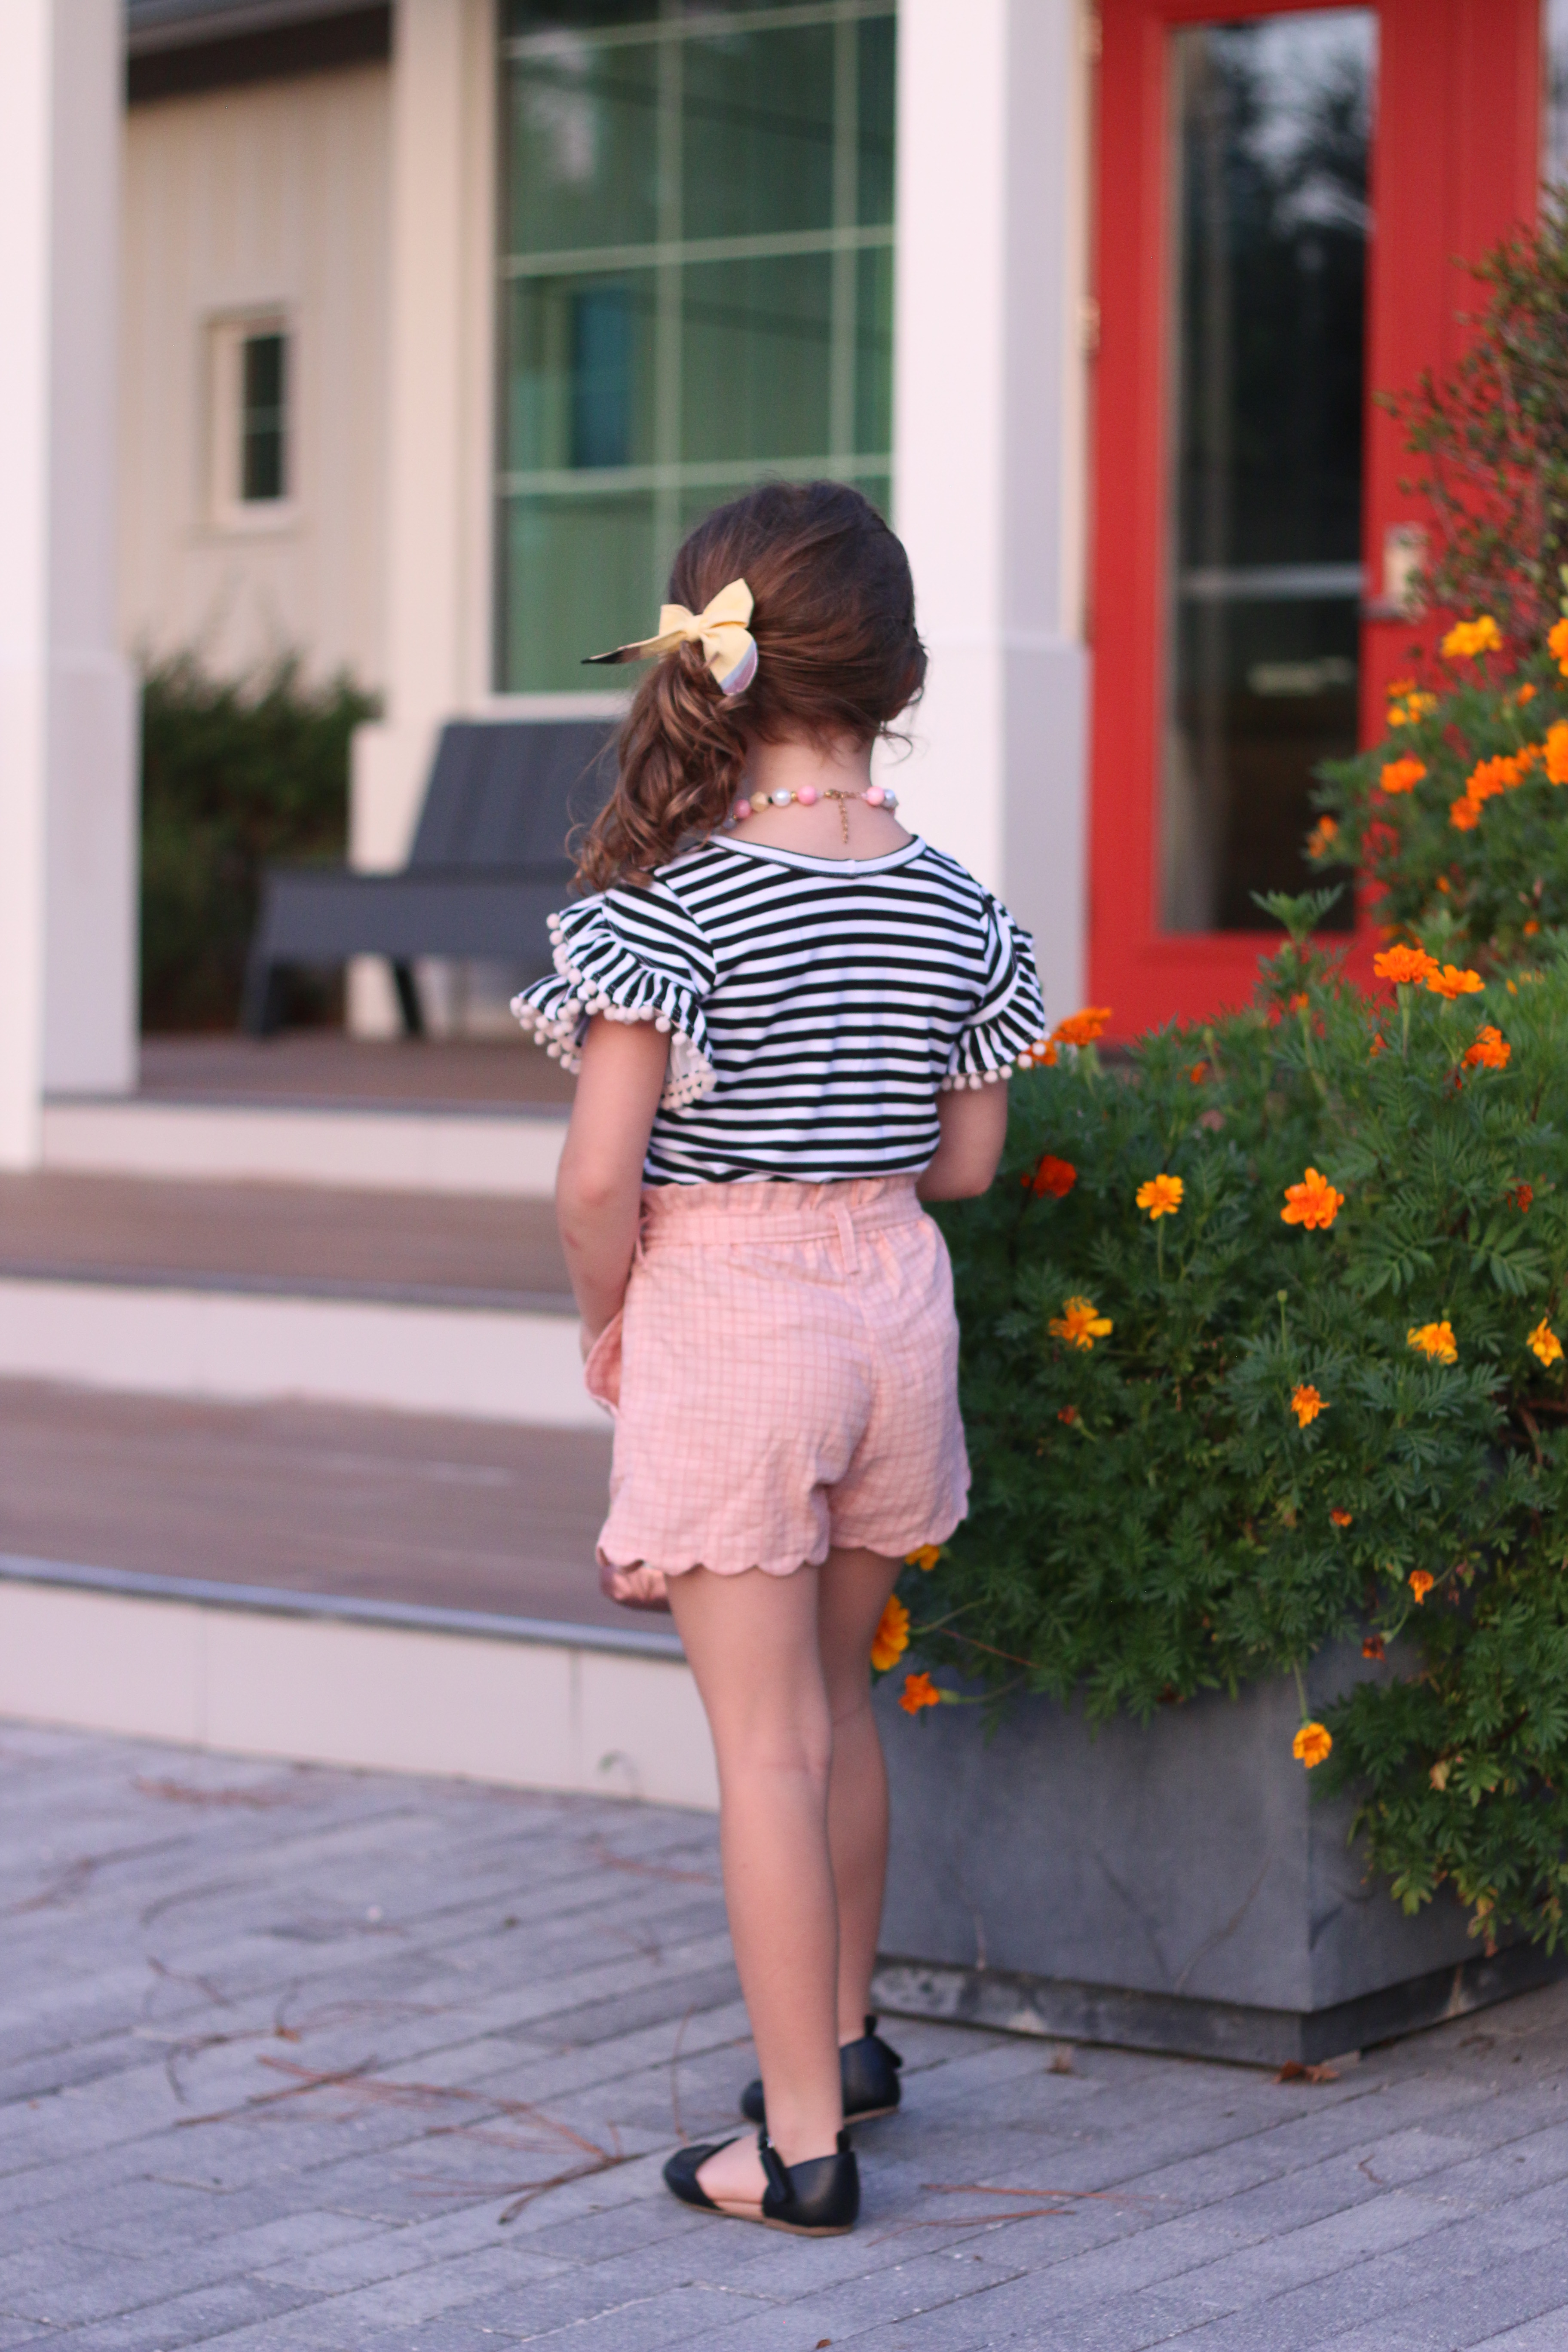
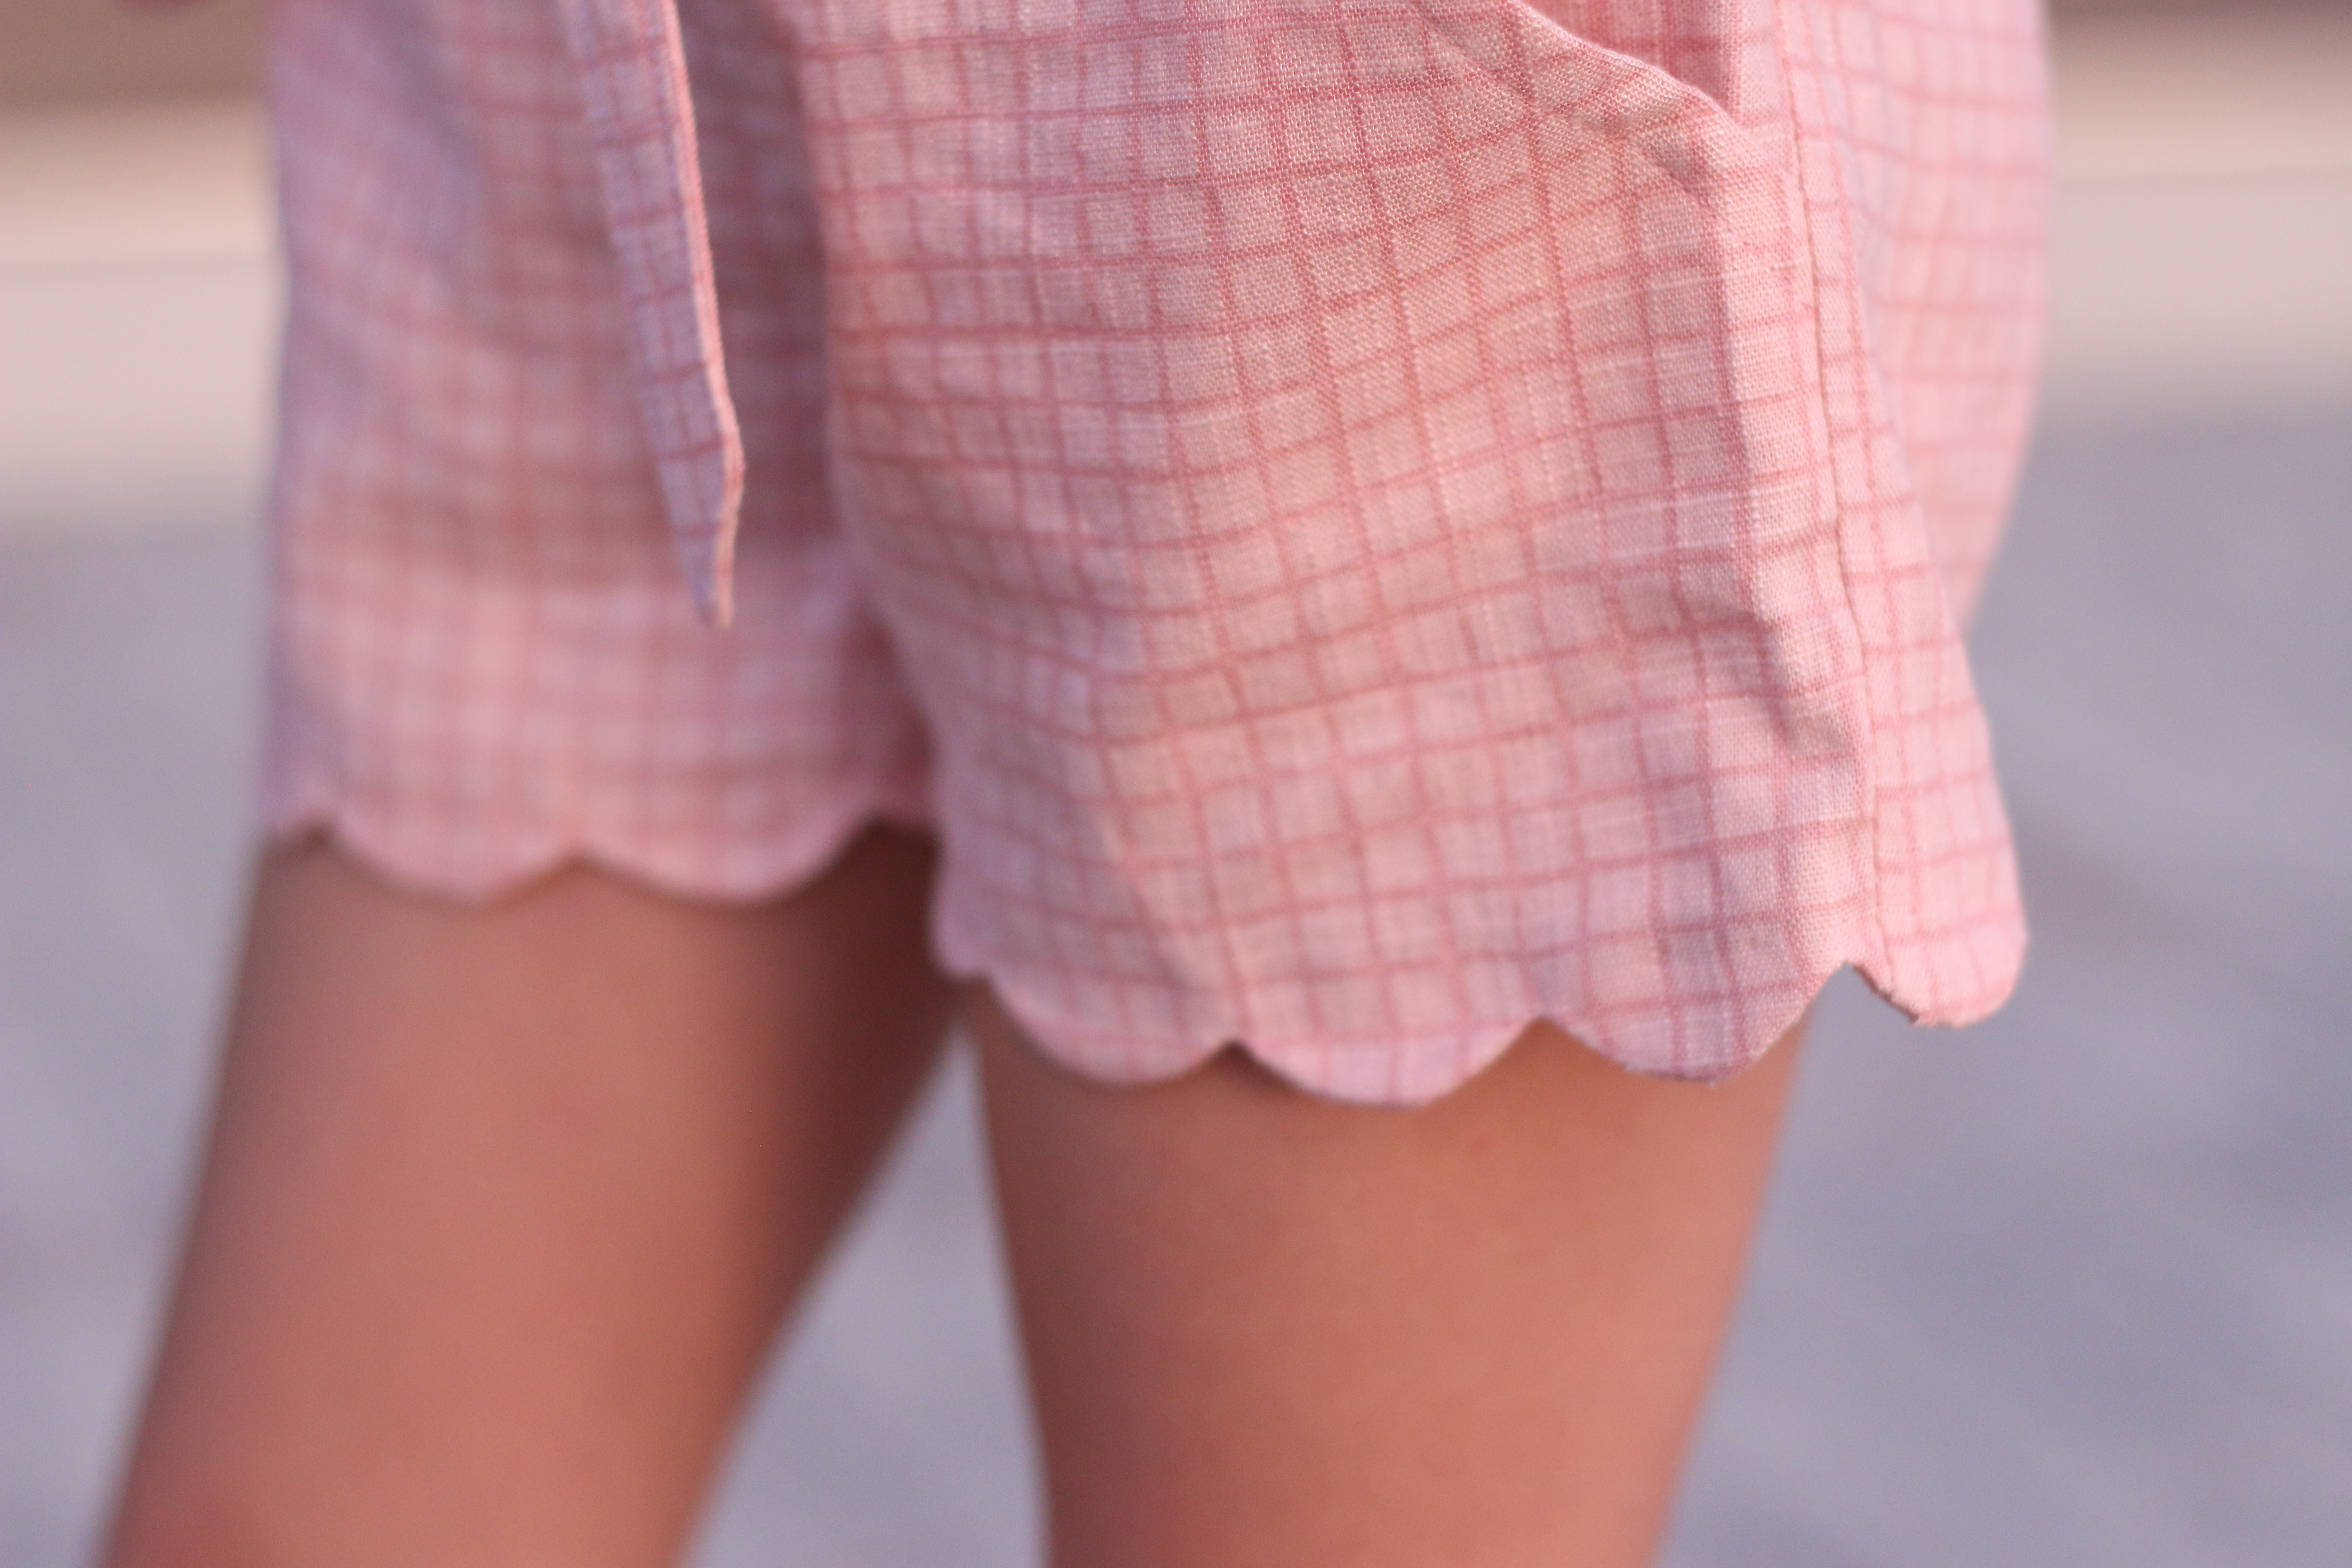
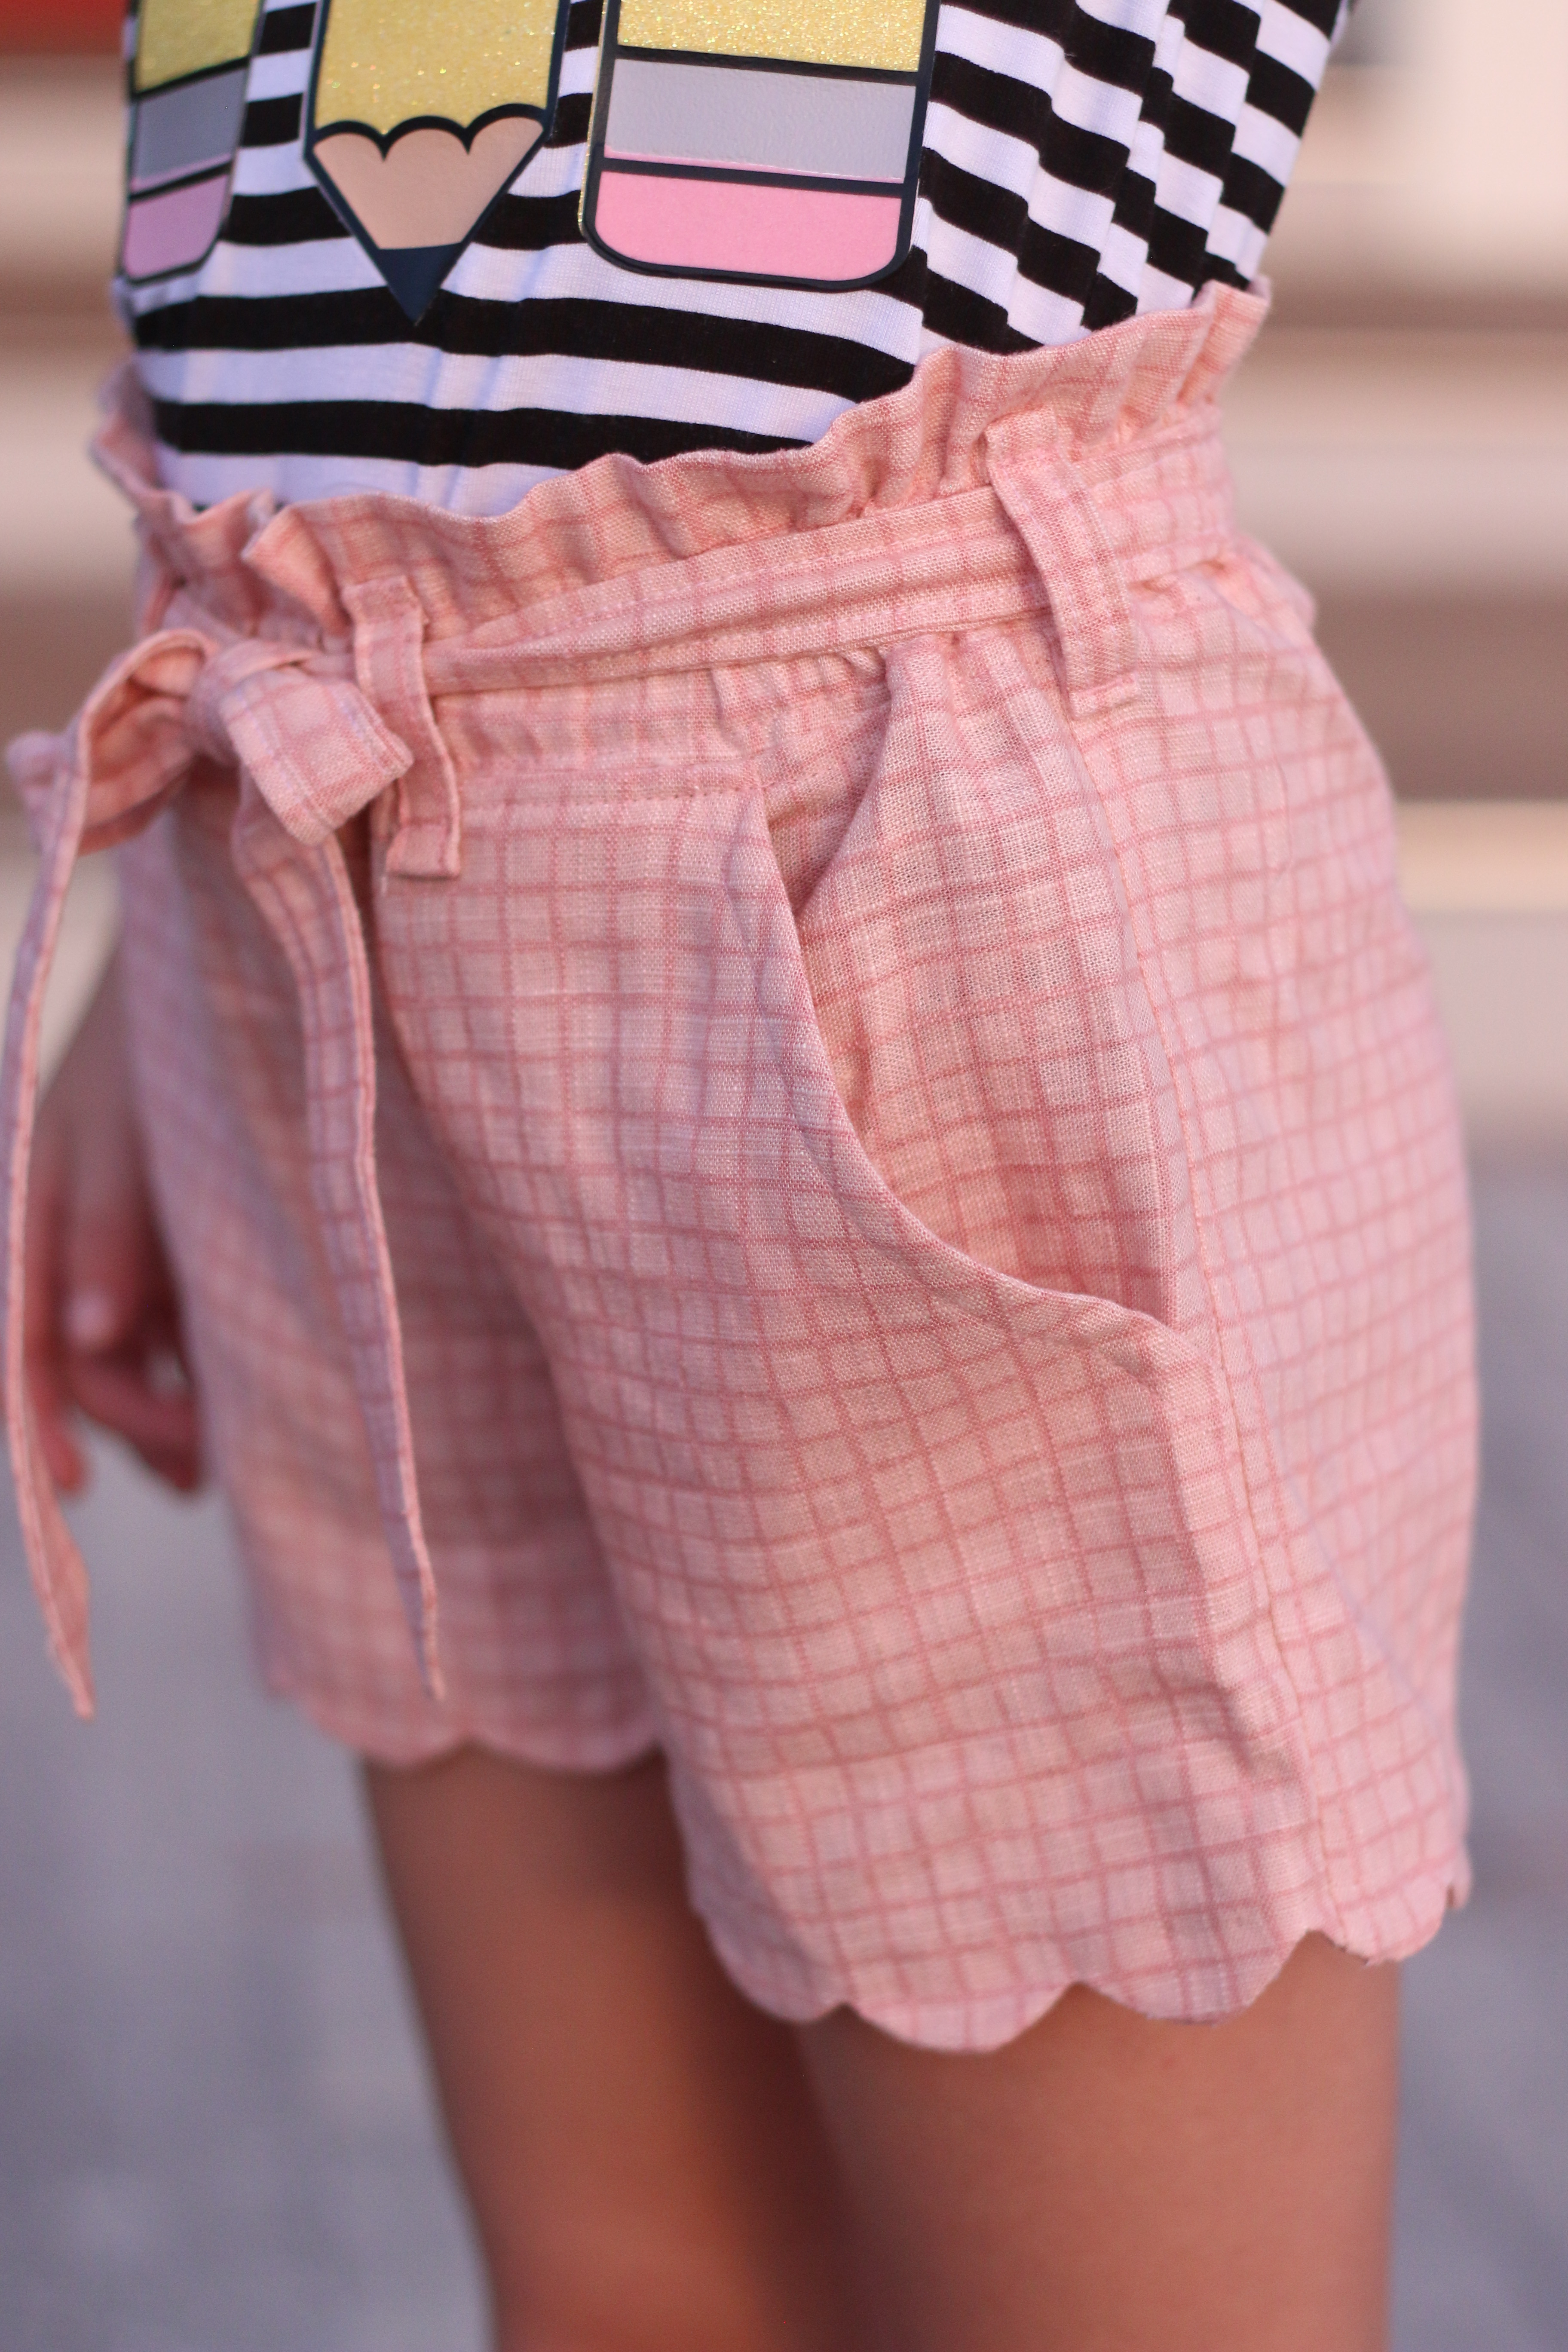
Next up, I tackled the shorts. The inspo ones appear to be a knit but I knew I wanted crisp scallops at the hem so I went with a linen blend I picked up at Joanns. I started with the TinTin shorts from the Project Run&Play shop, but cut them wider to have a bubble effect, and added lots of length to the hem. I also increased the height of the paperbag waist so that it would really stand out. For the scallop, I turned that increased hem up right sides together, sewed carefully calculated scallops, then trimmed them all very carefully adding some fray check along each point as the linen blend is a looser weave. Then I turned them right side out and pressed really well. I tacked the facing in on the inside to make sure it would not flip out at all. I did beltloops and a belt as well.

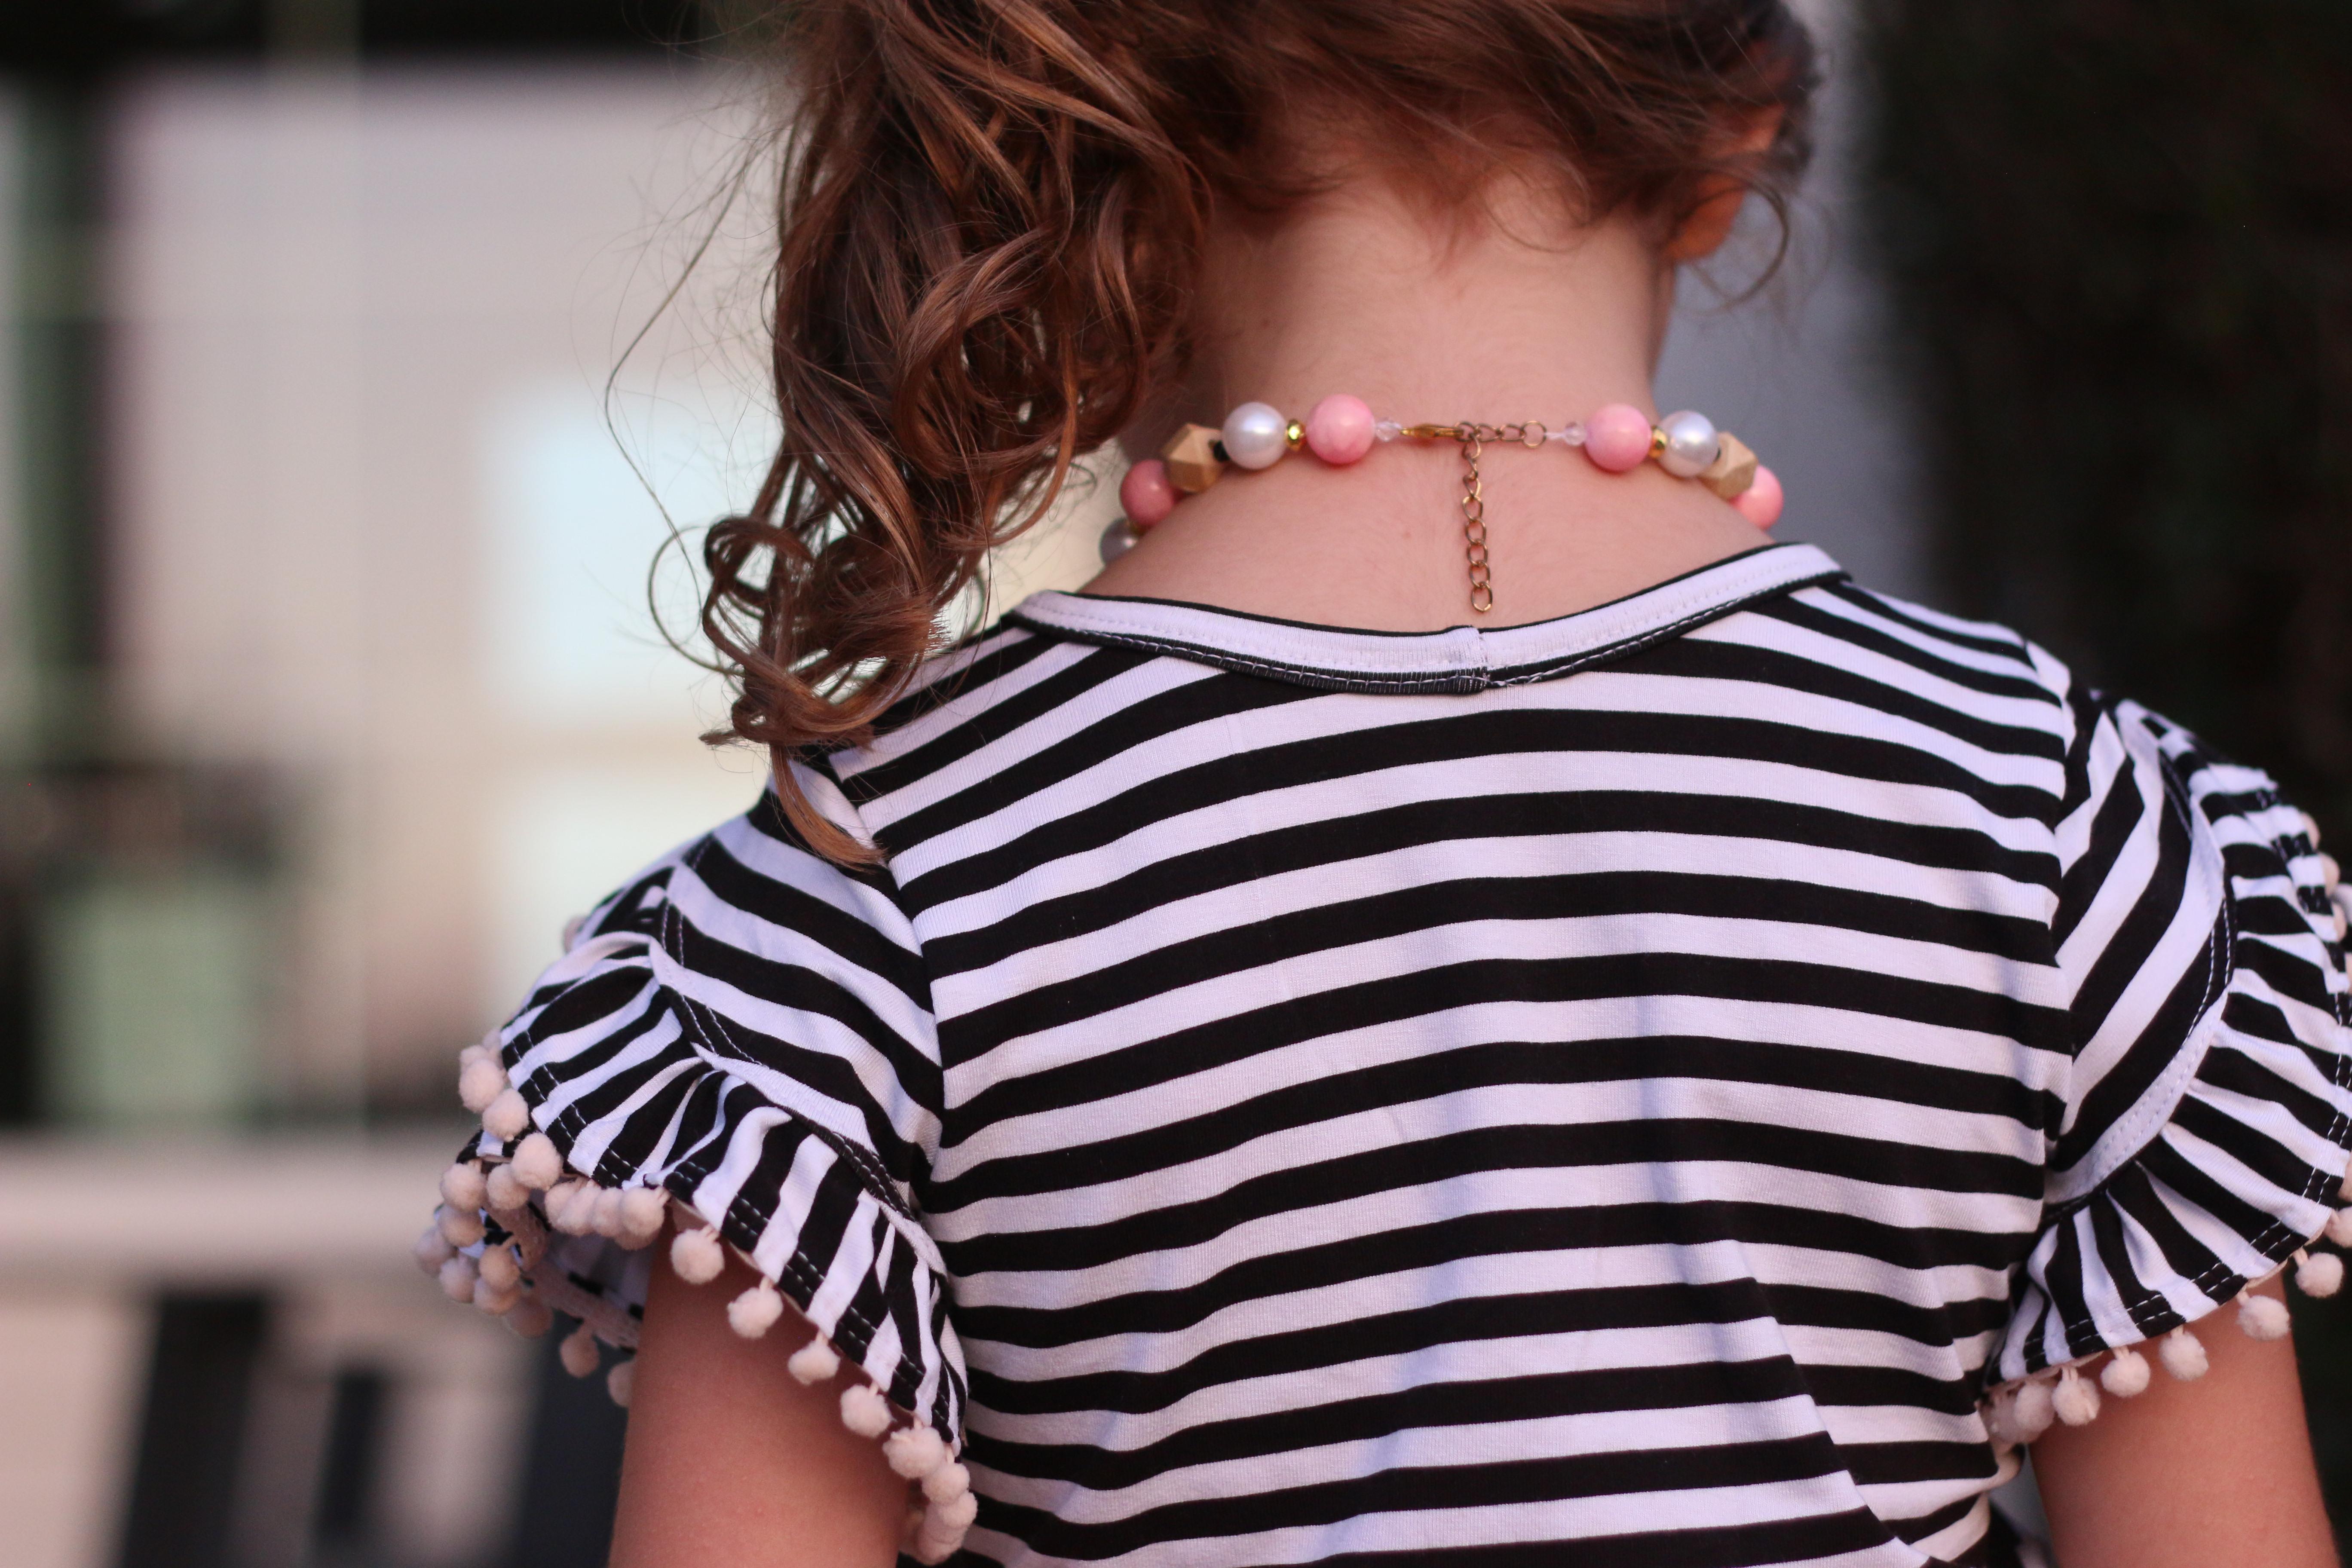
Next up, I made her a necklace….not my forte for sure. I tried to get big sister to tackle that since she makes a lot of jewelry but she said no. Maybe she was bitter I wasn’t making her inspiration drawing. I did a mix of real stone for the pink, wood beads to mimic the body of a pencil, and white beads from my daughter’s supply. I spaced each with smaller coordinating beads in clear, gold and black to mimic the original. I finished it off with an adjustable clasp and pencil charm.

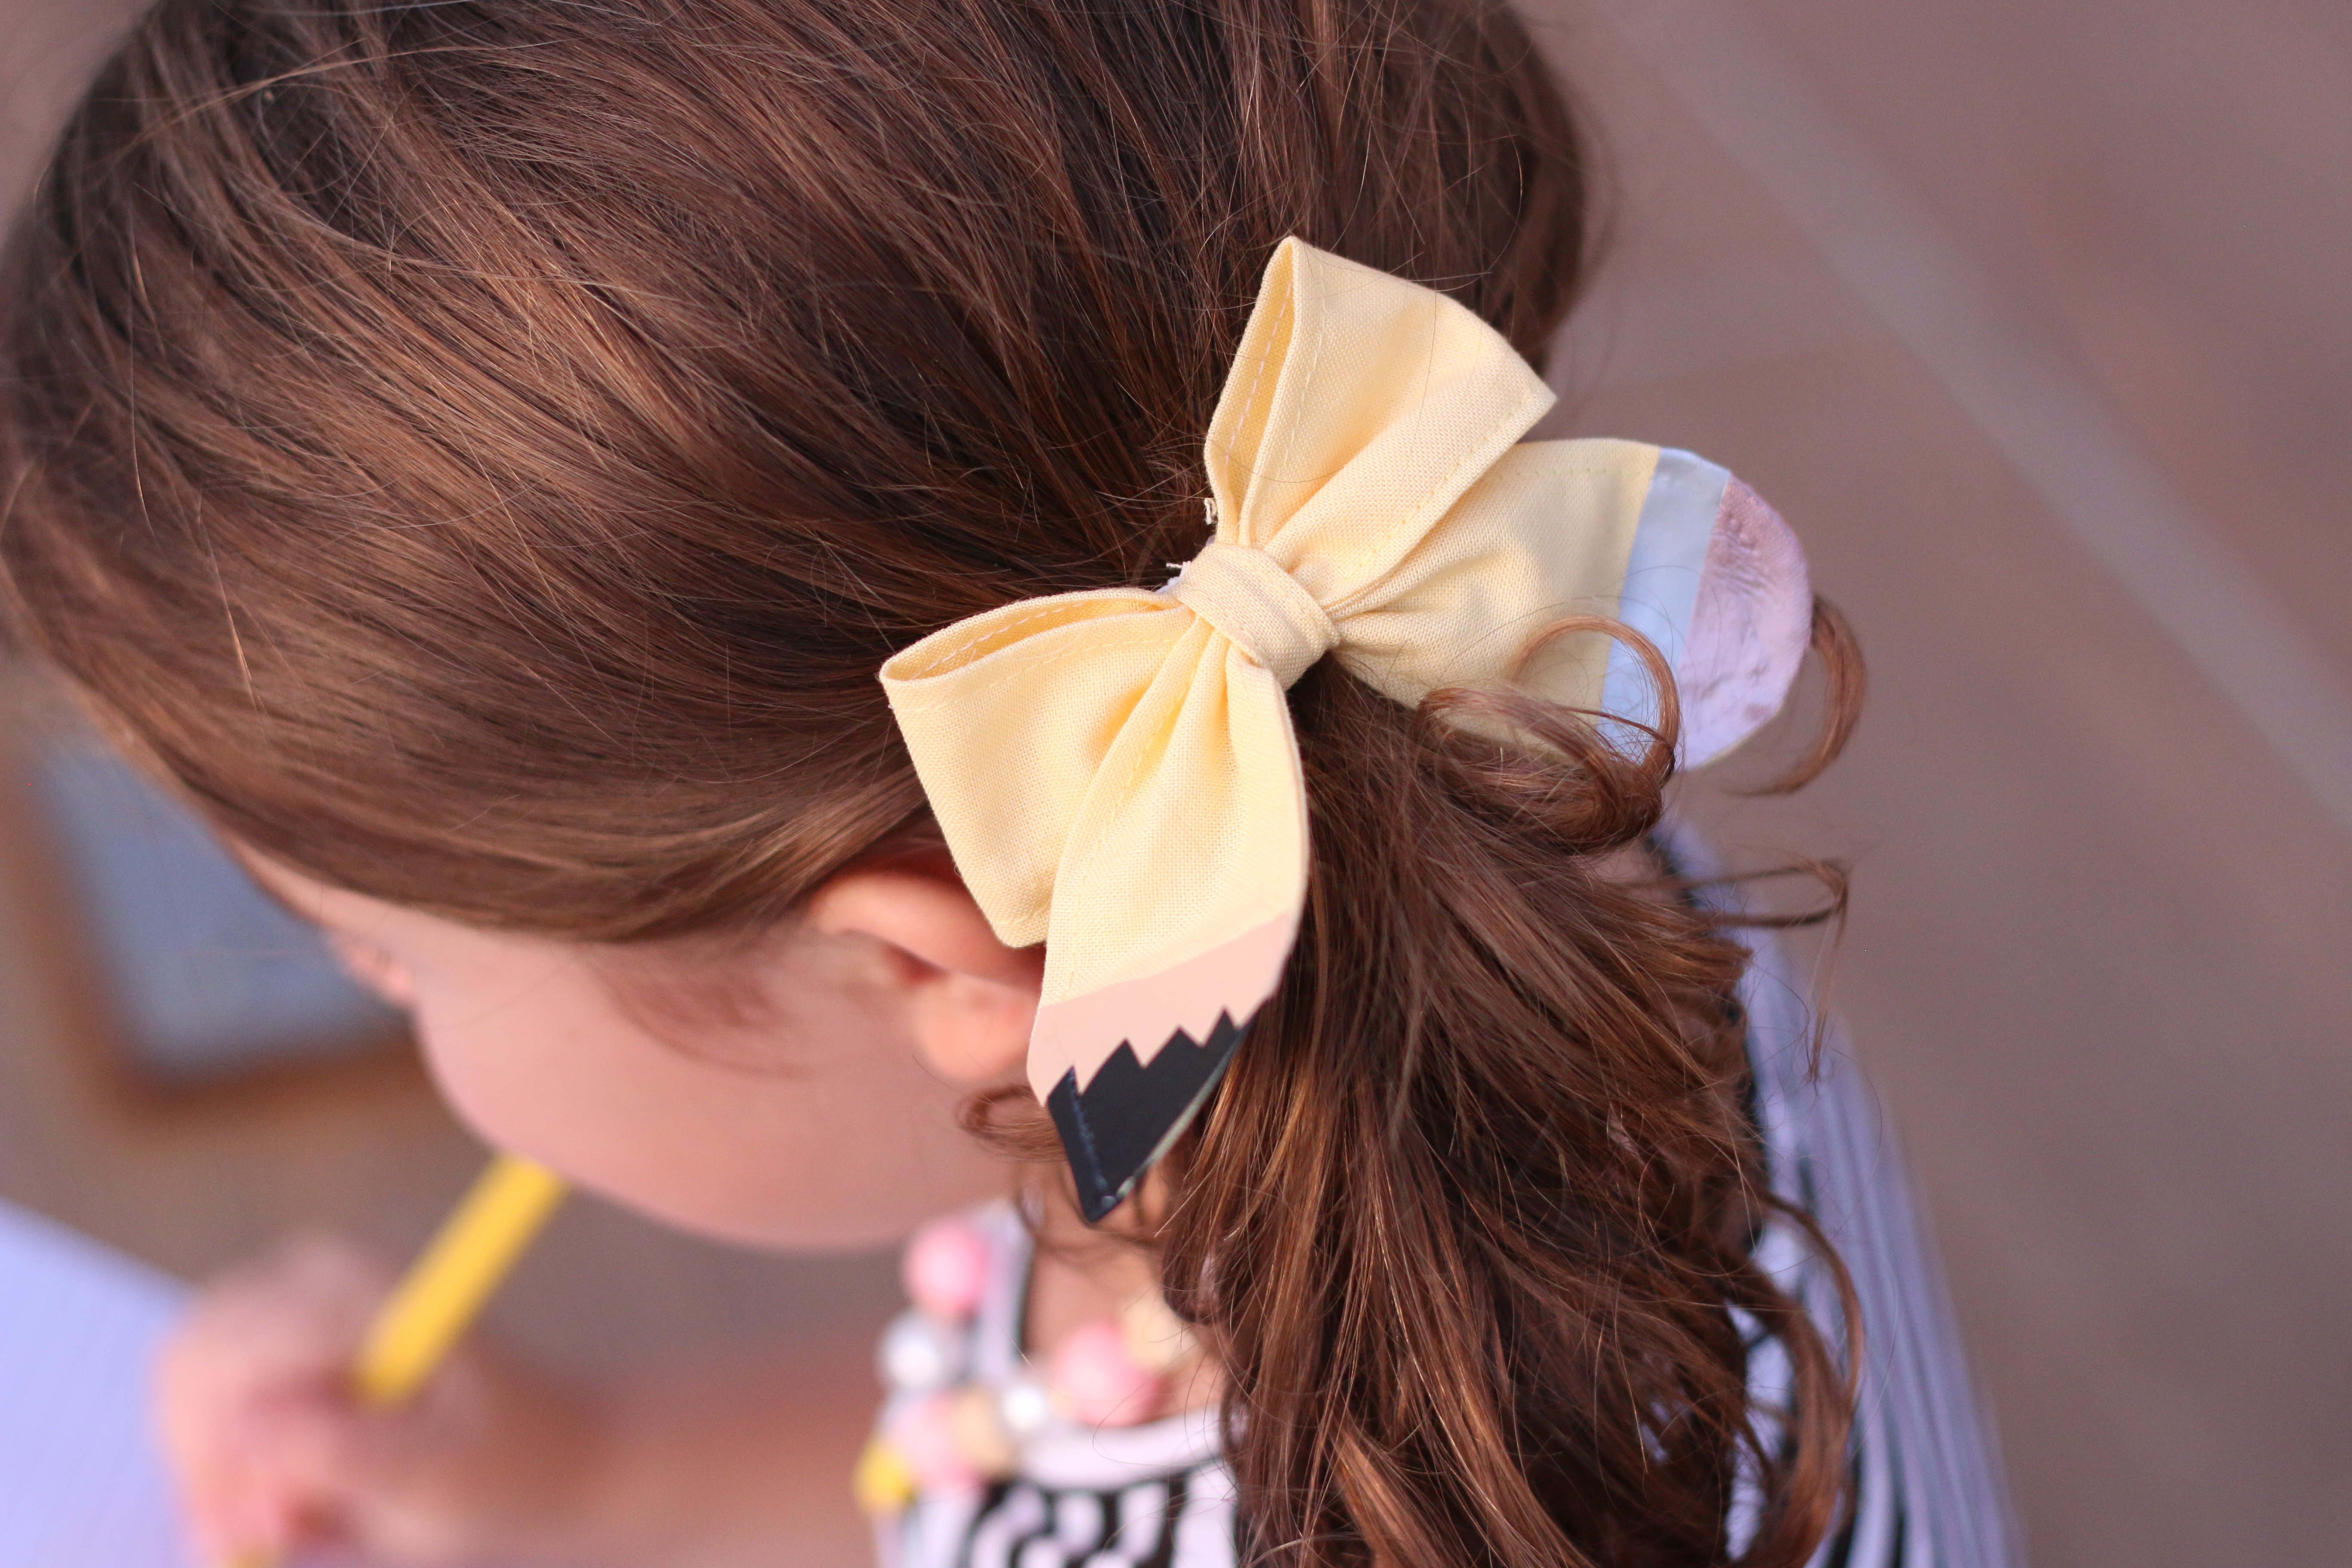
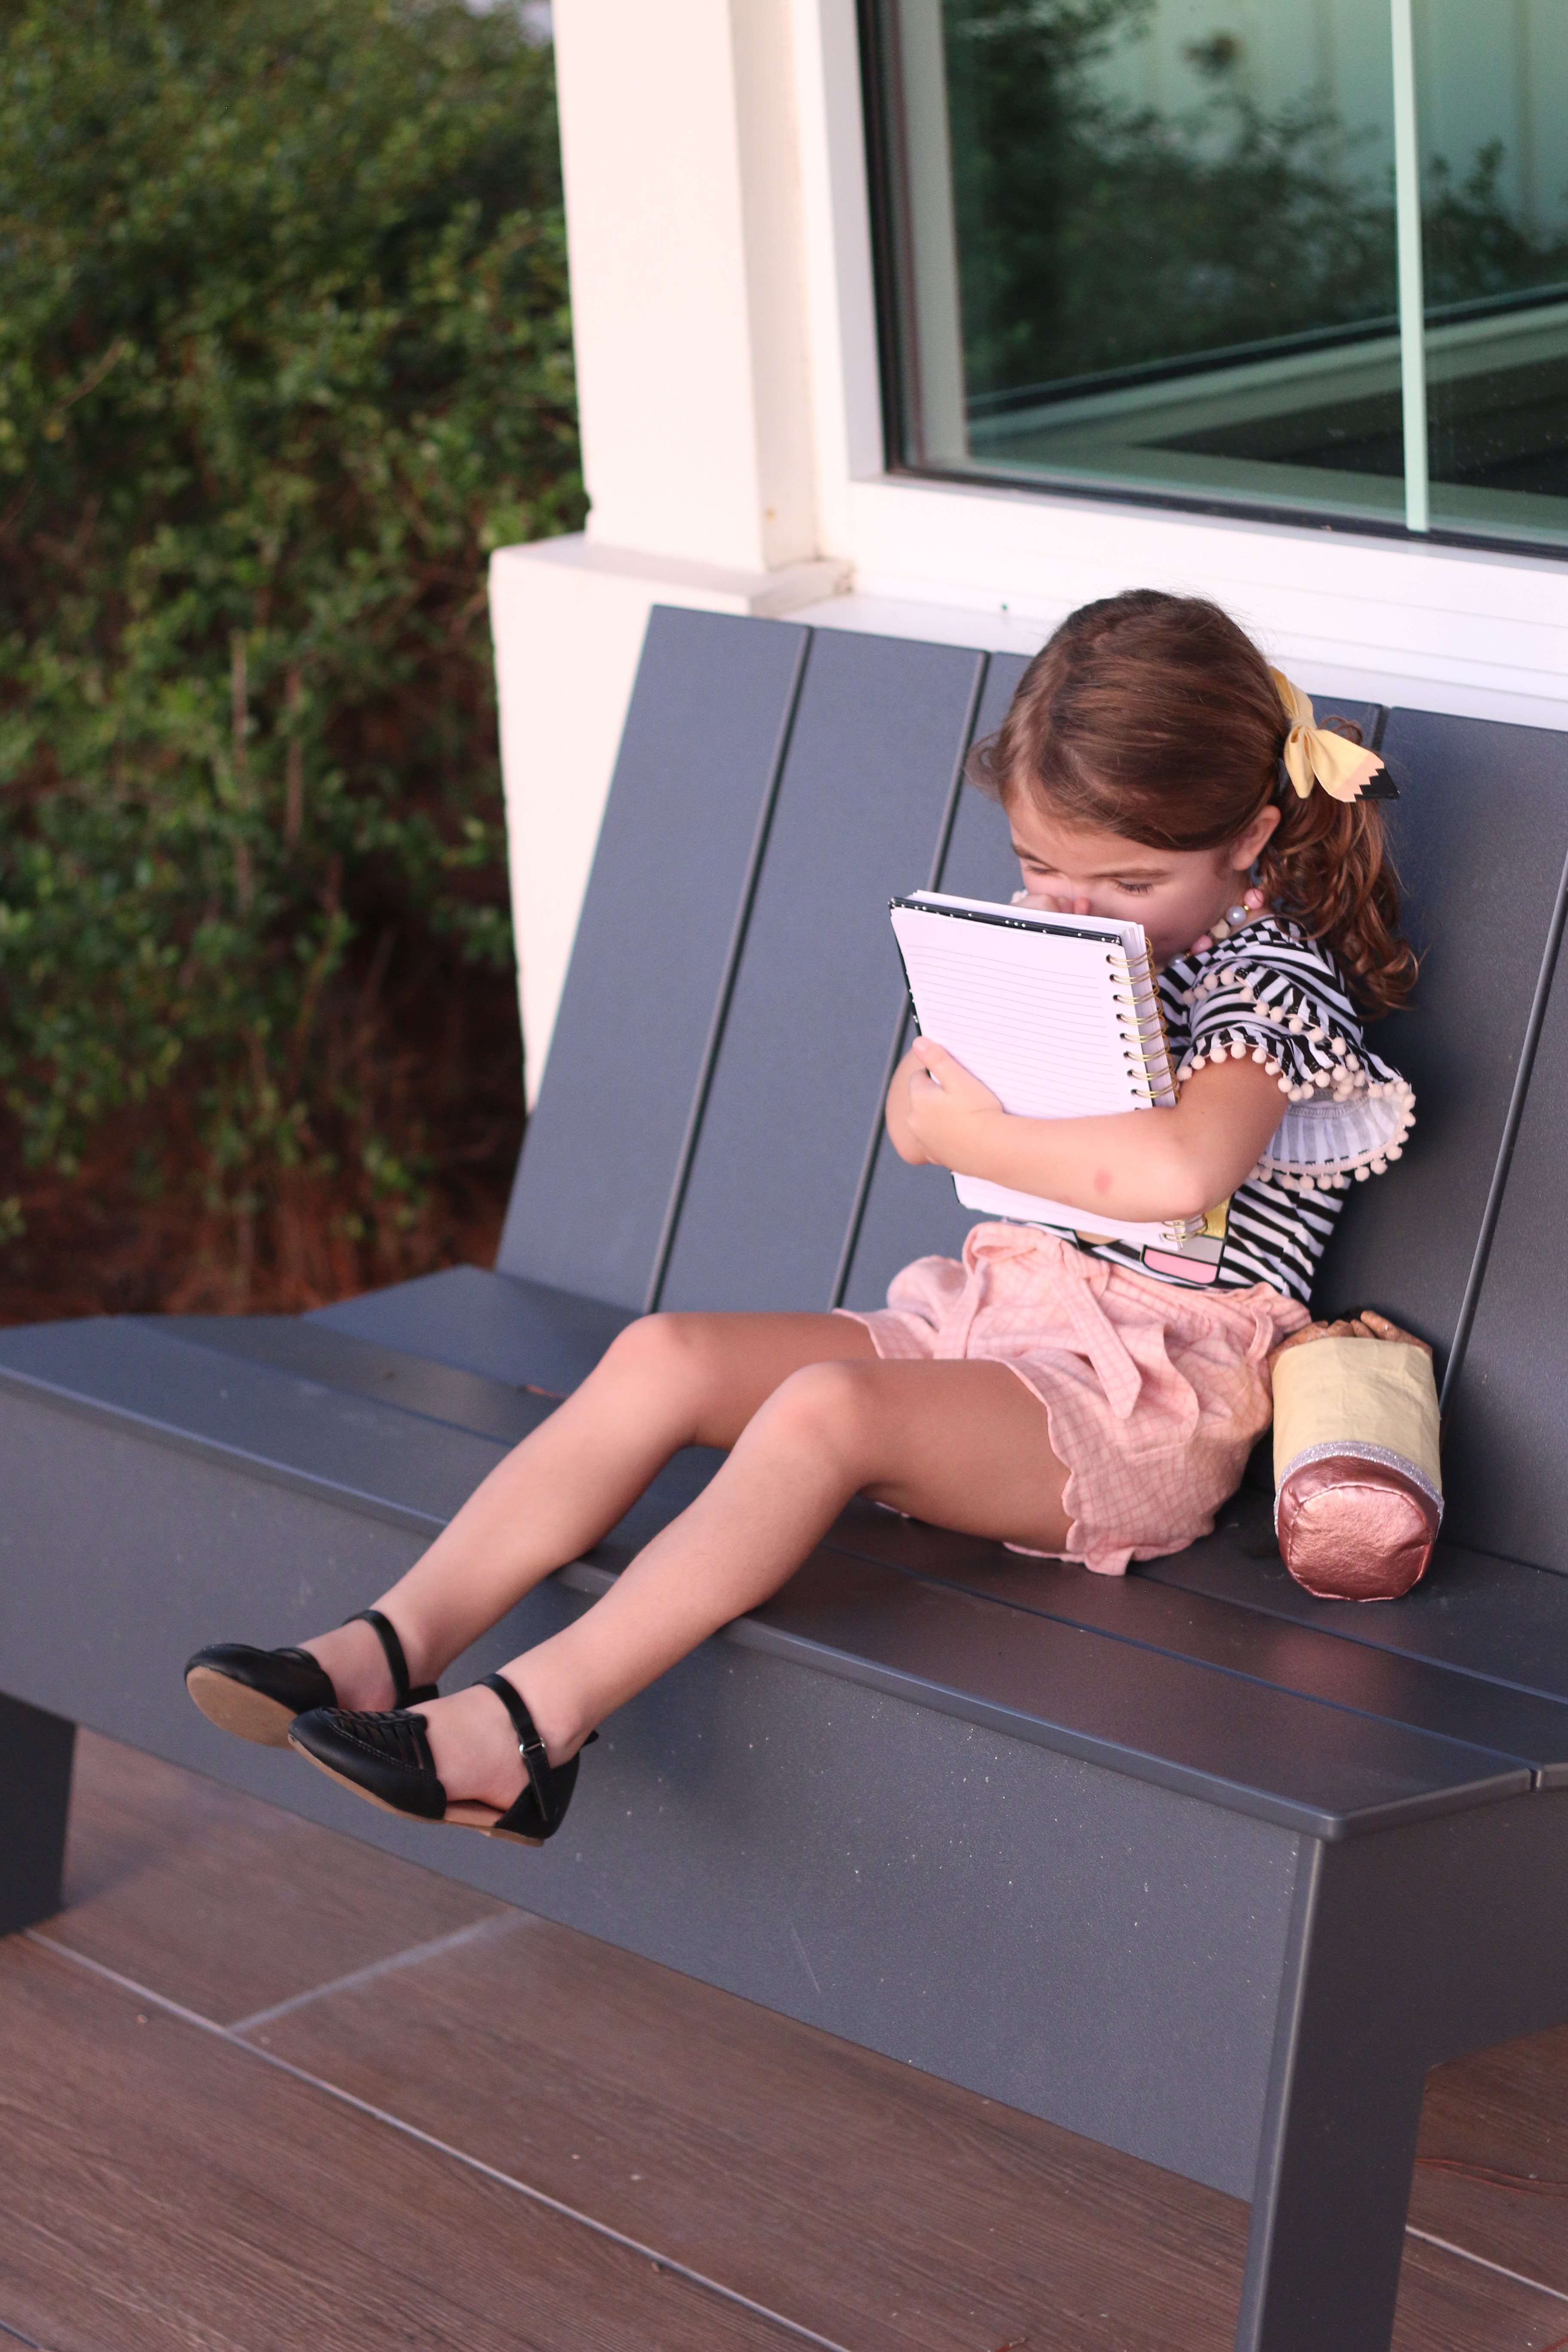
Next, the BOW! I started with Tully from Little Lizard King and before I sewed up the bow body (which is from one strip of fabric folded rst), I carefully drew in all of the seam allowances. Next, I drew in a point on one end, centering it and a curve on the other. I sewed up the bow as usual and added heat transfer vinyl for the pencil details and an alligator clip. I did make a second as well but she only wears one bow if any so left it off the final look.

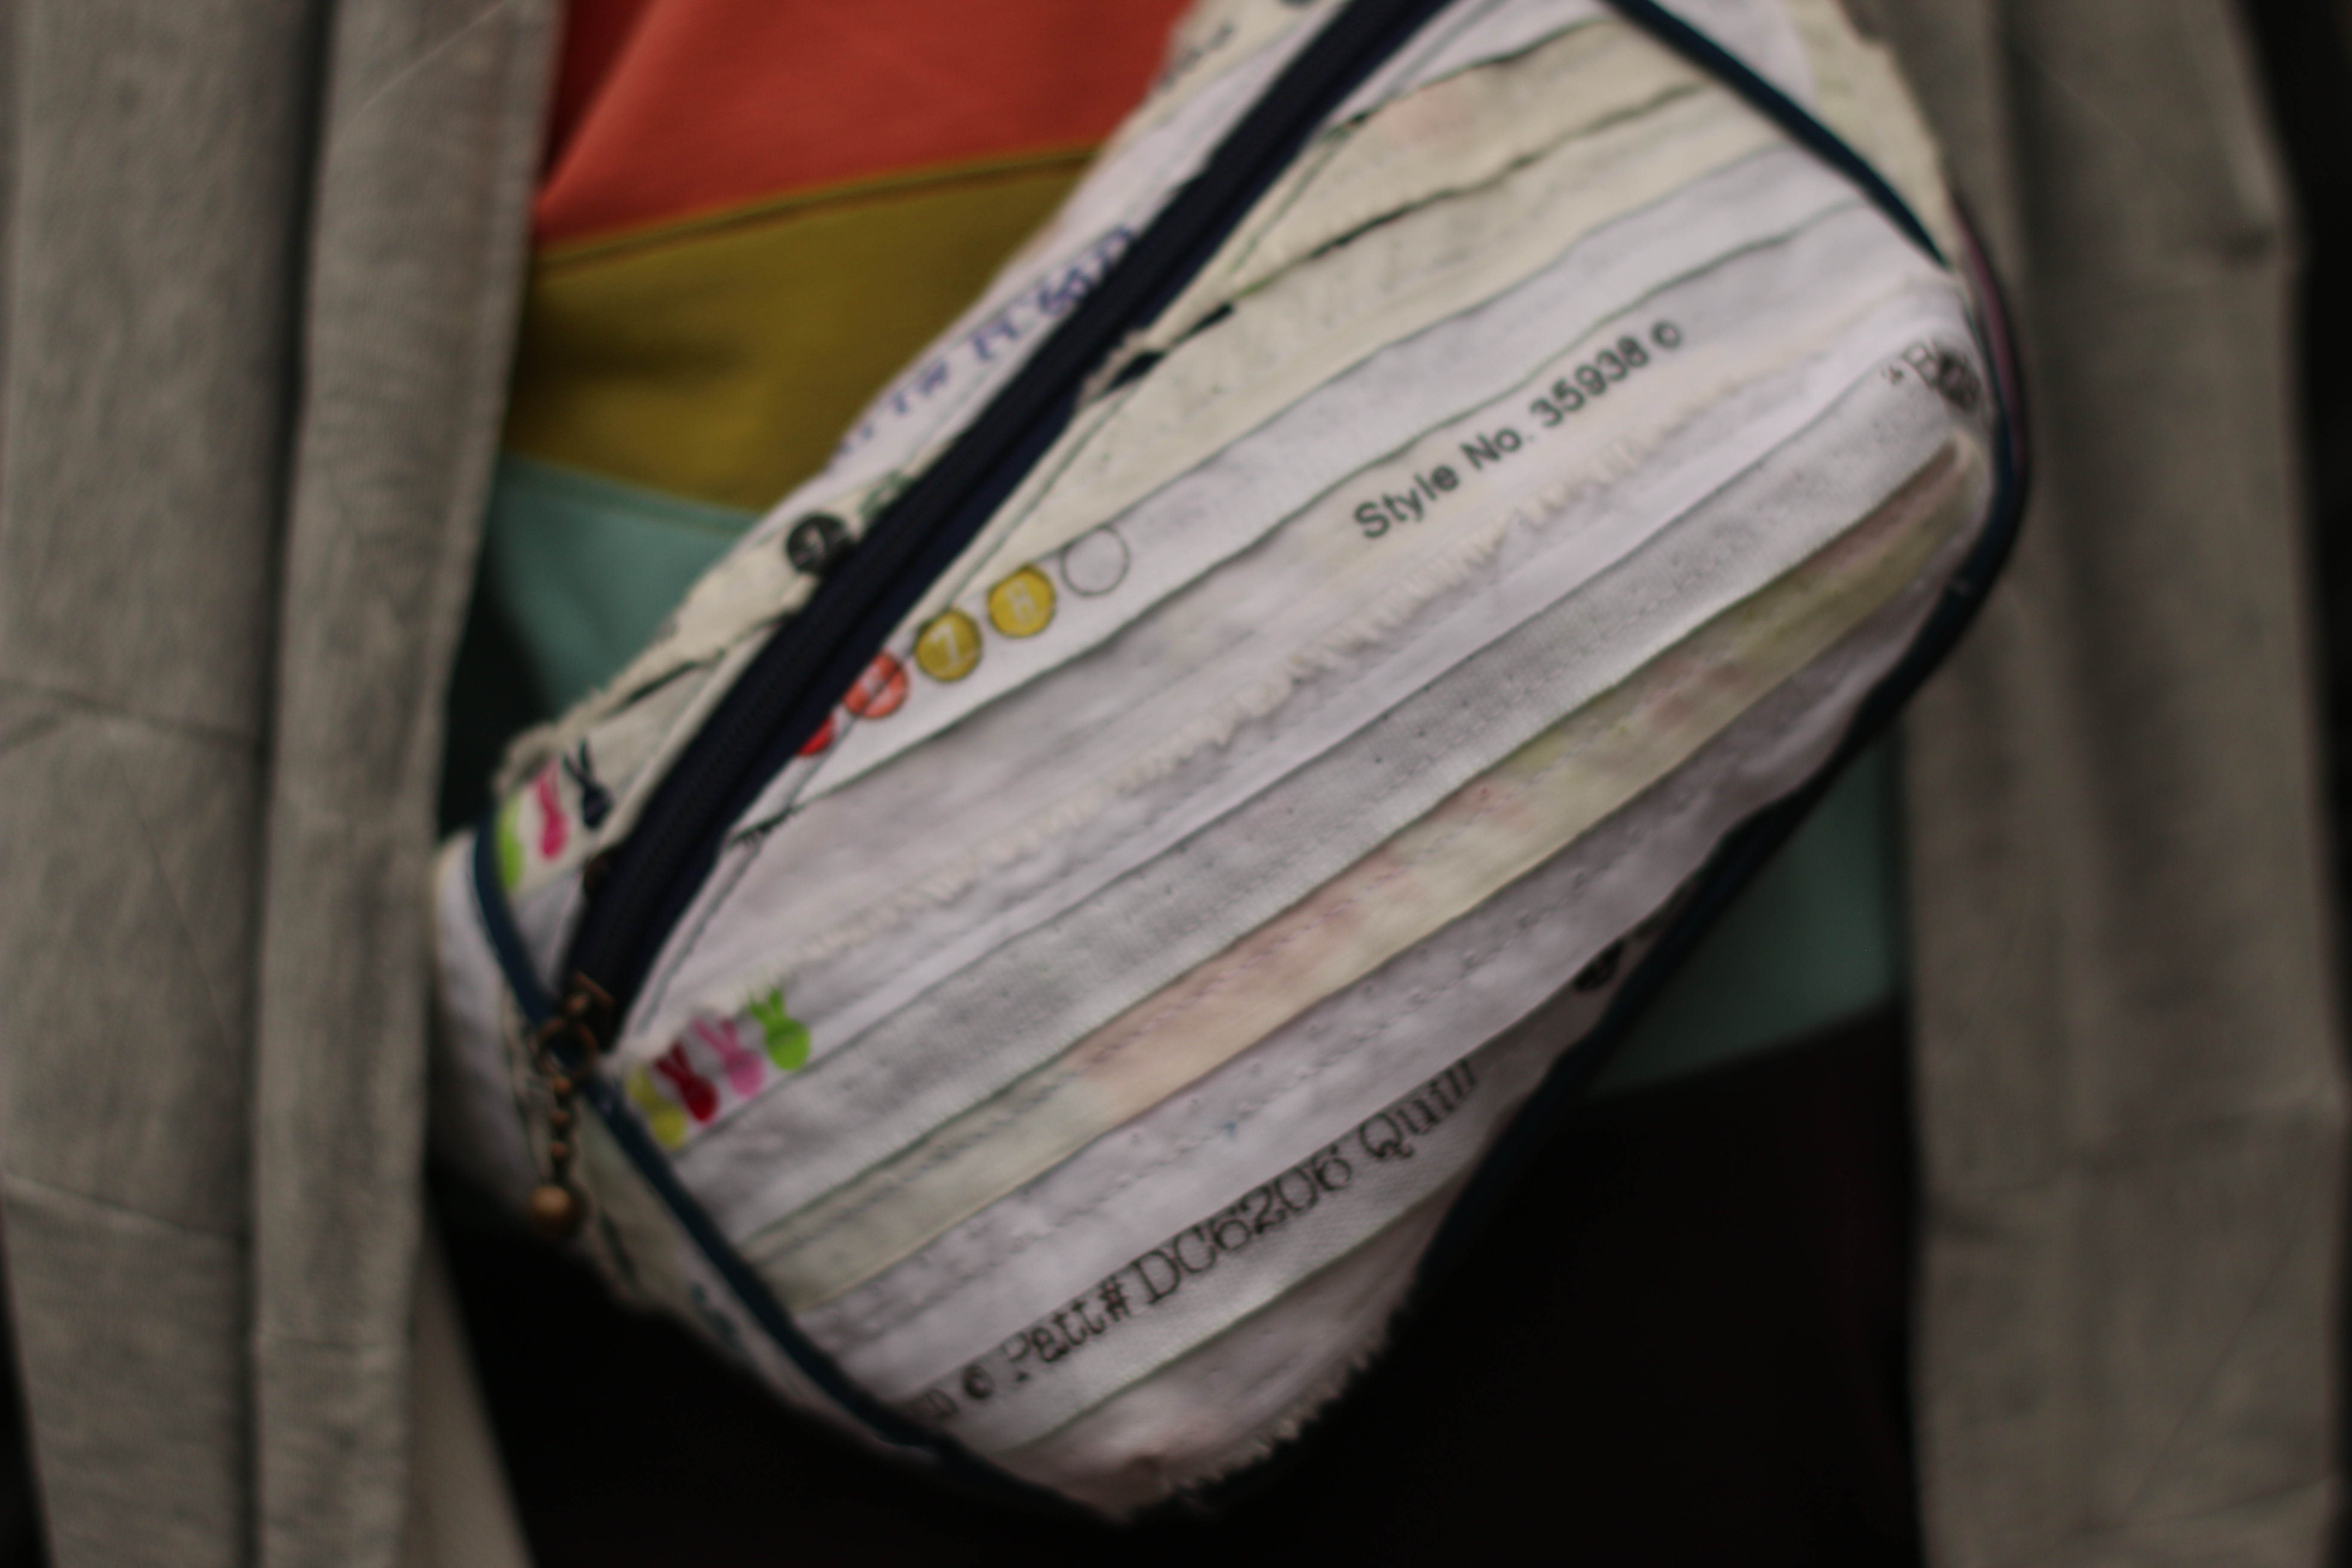
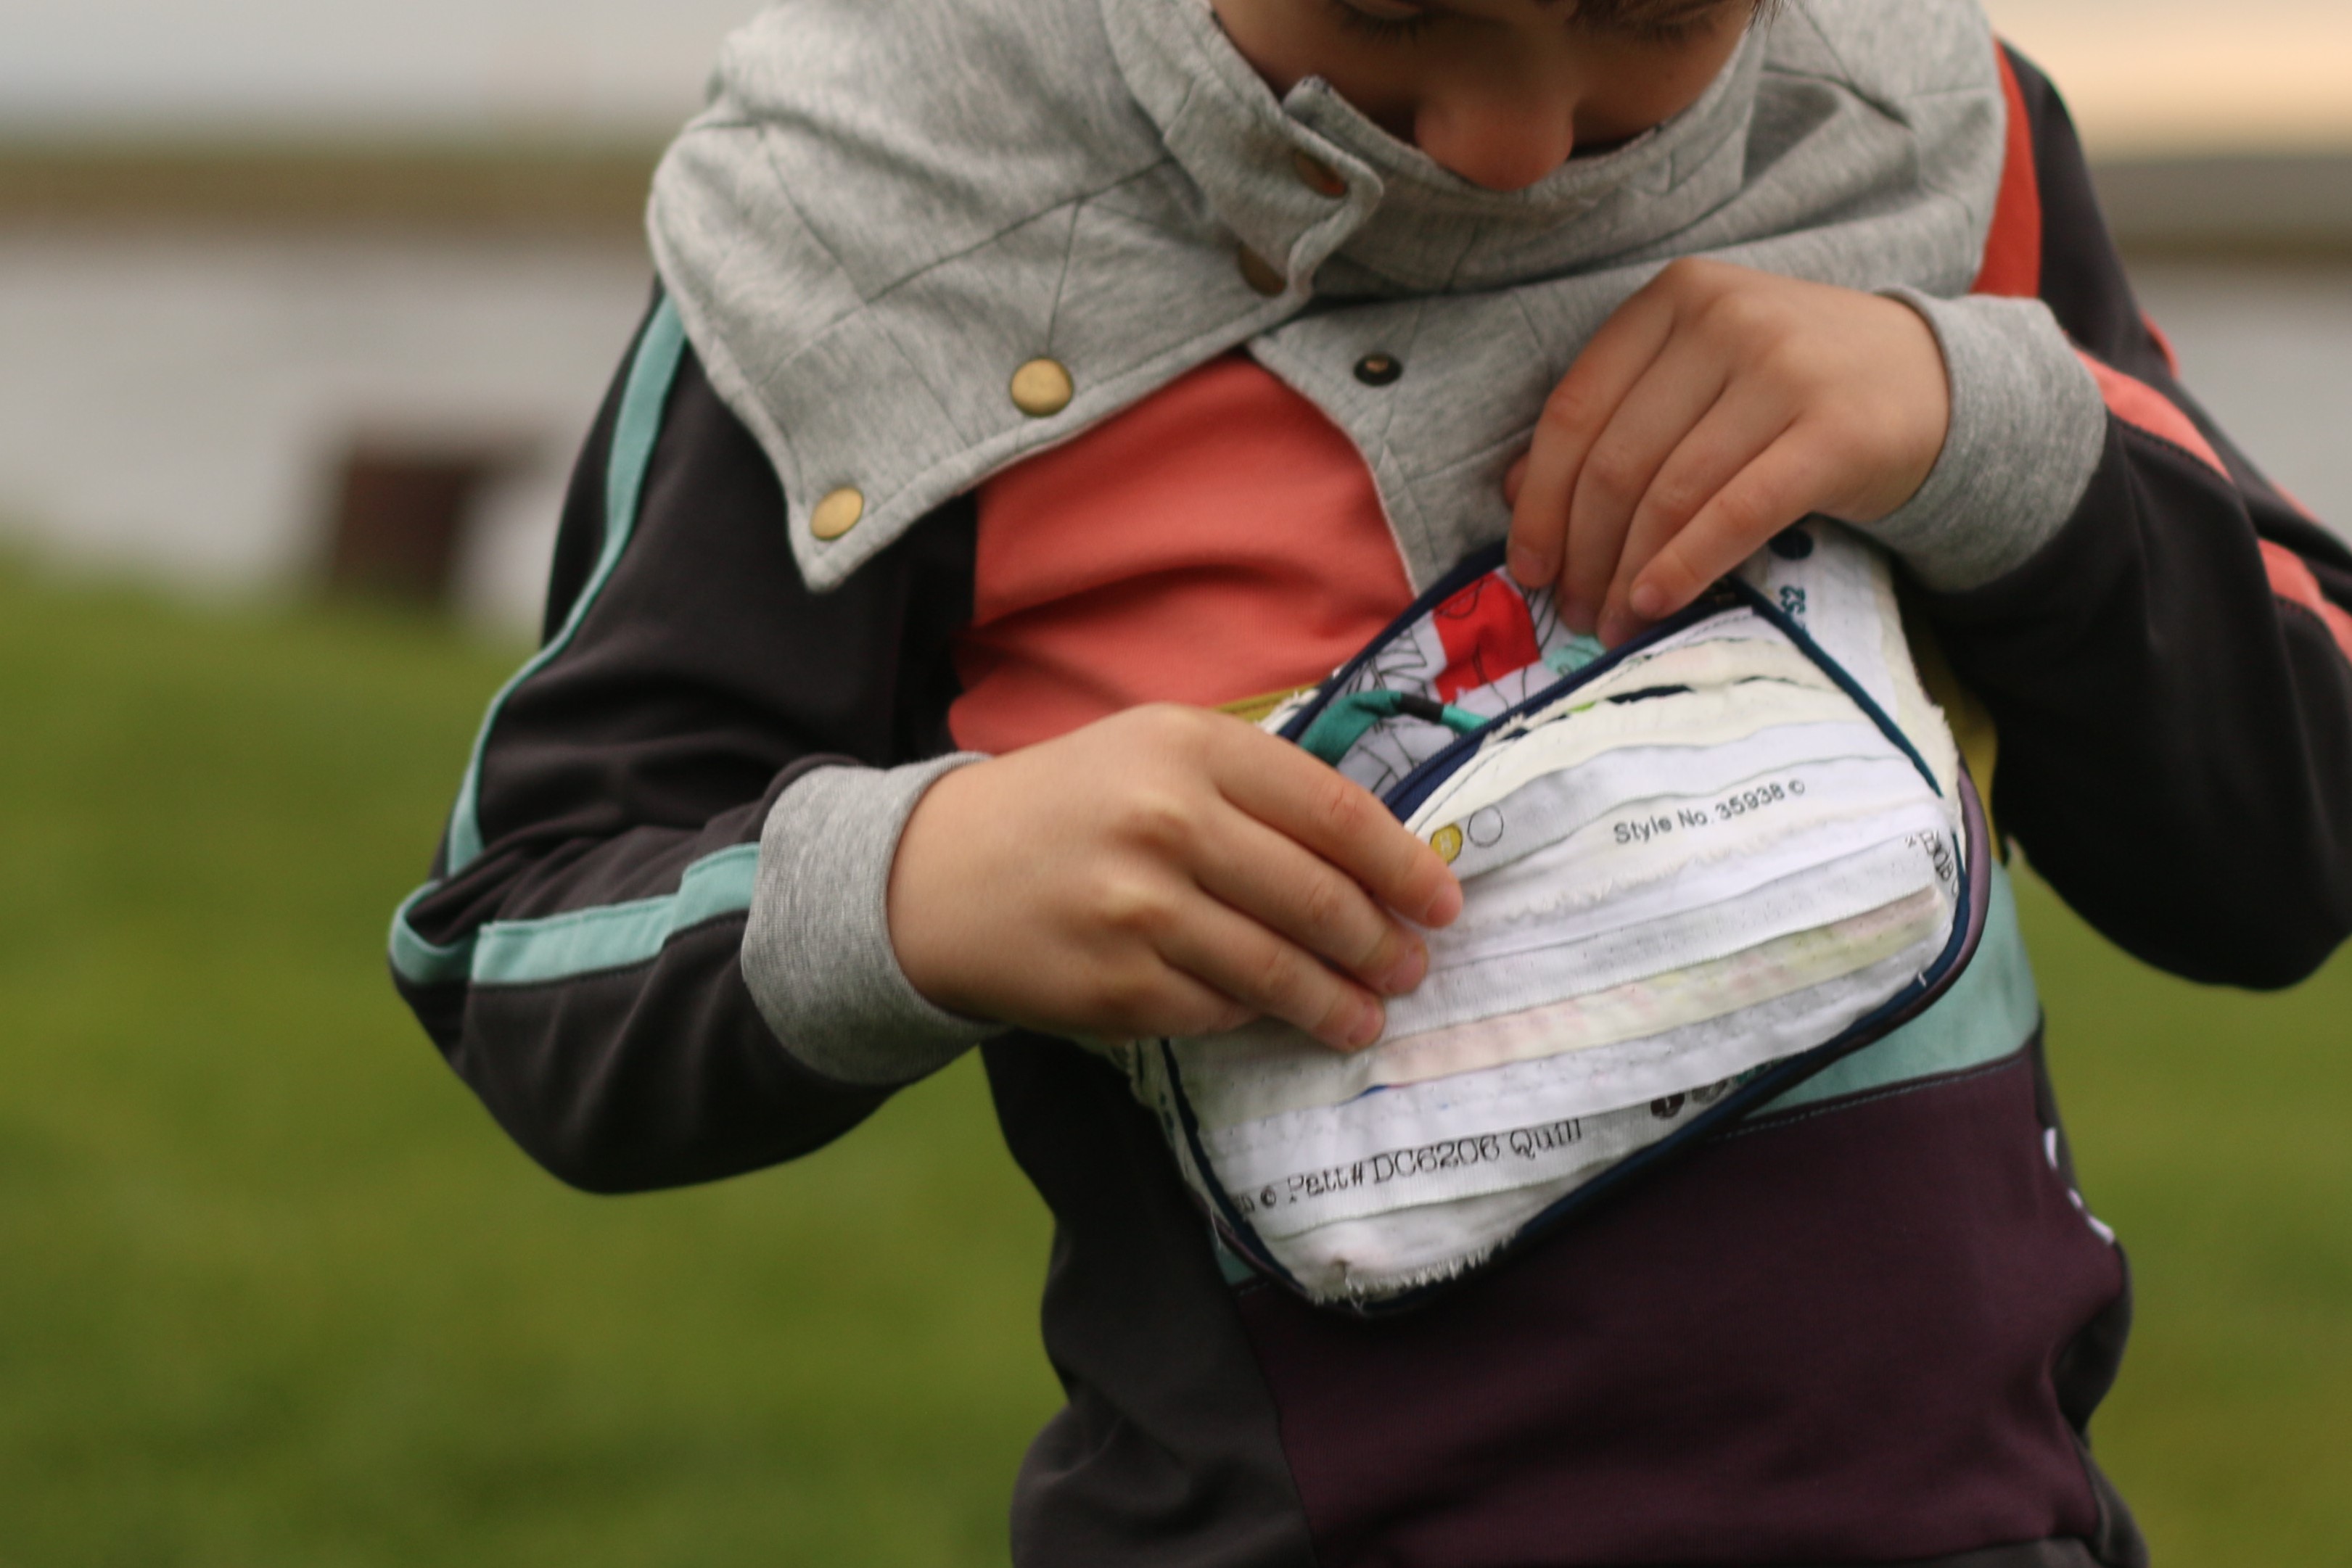
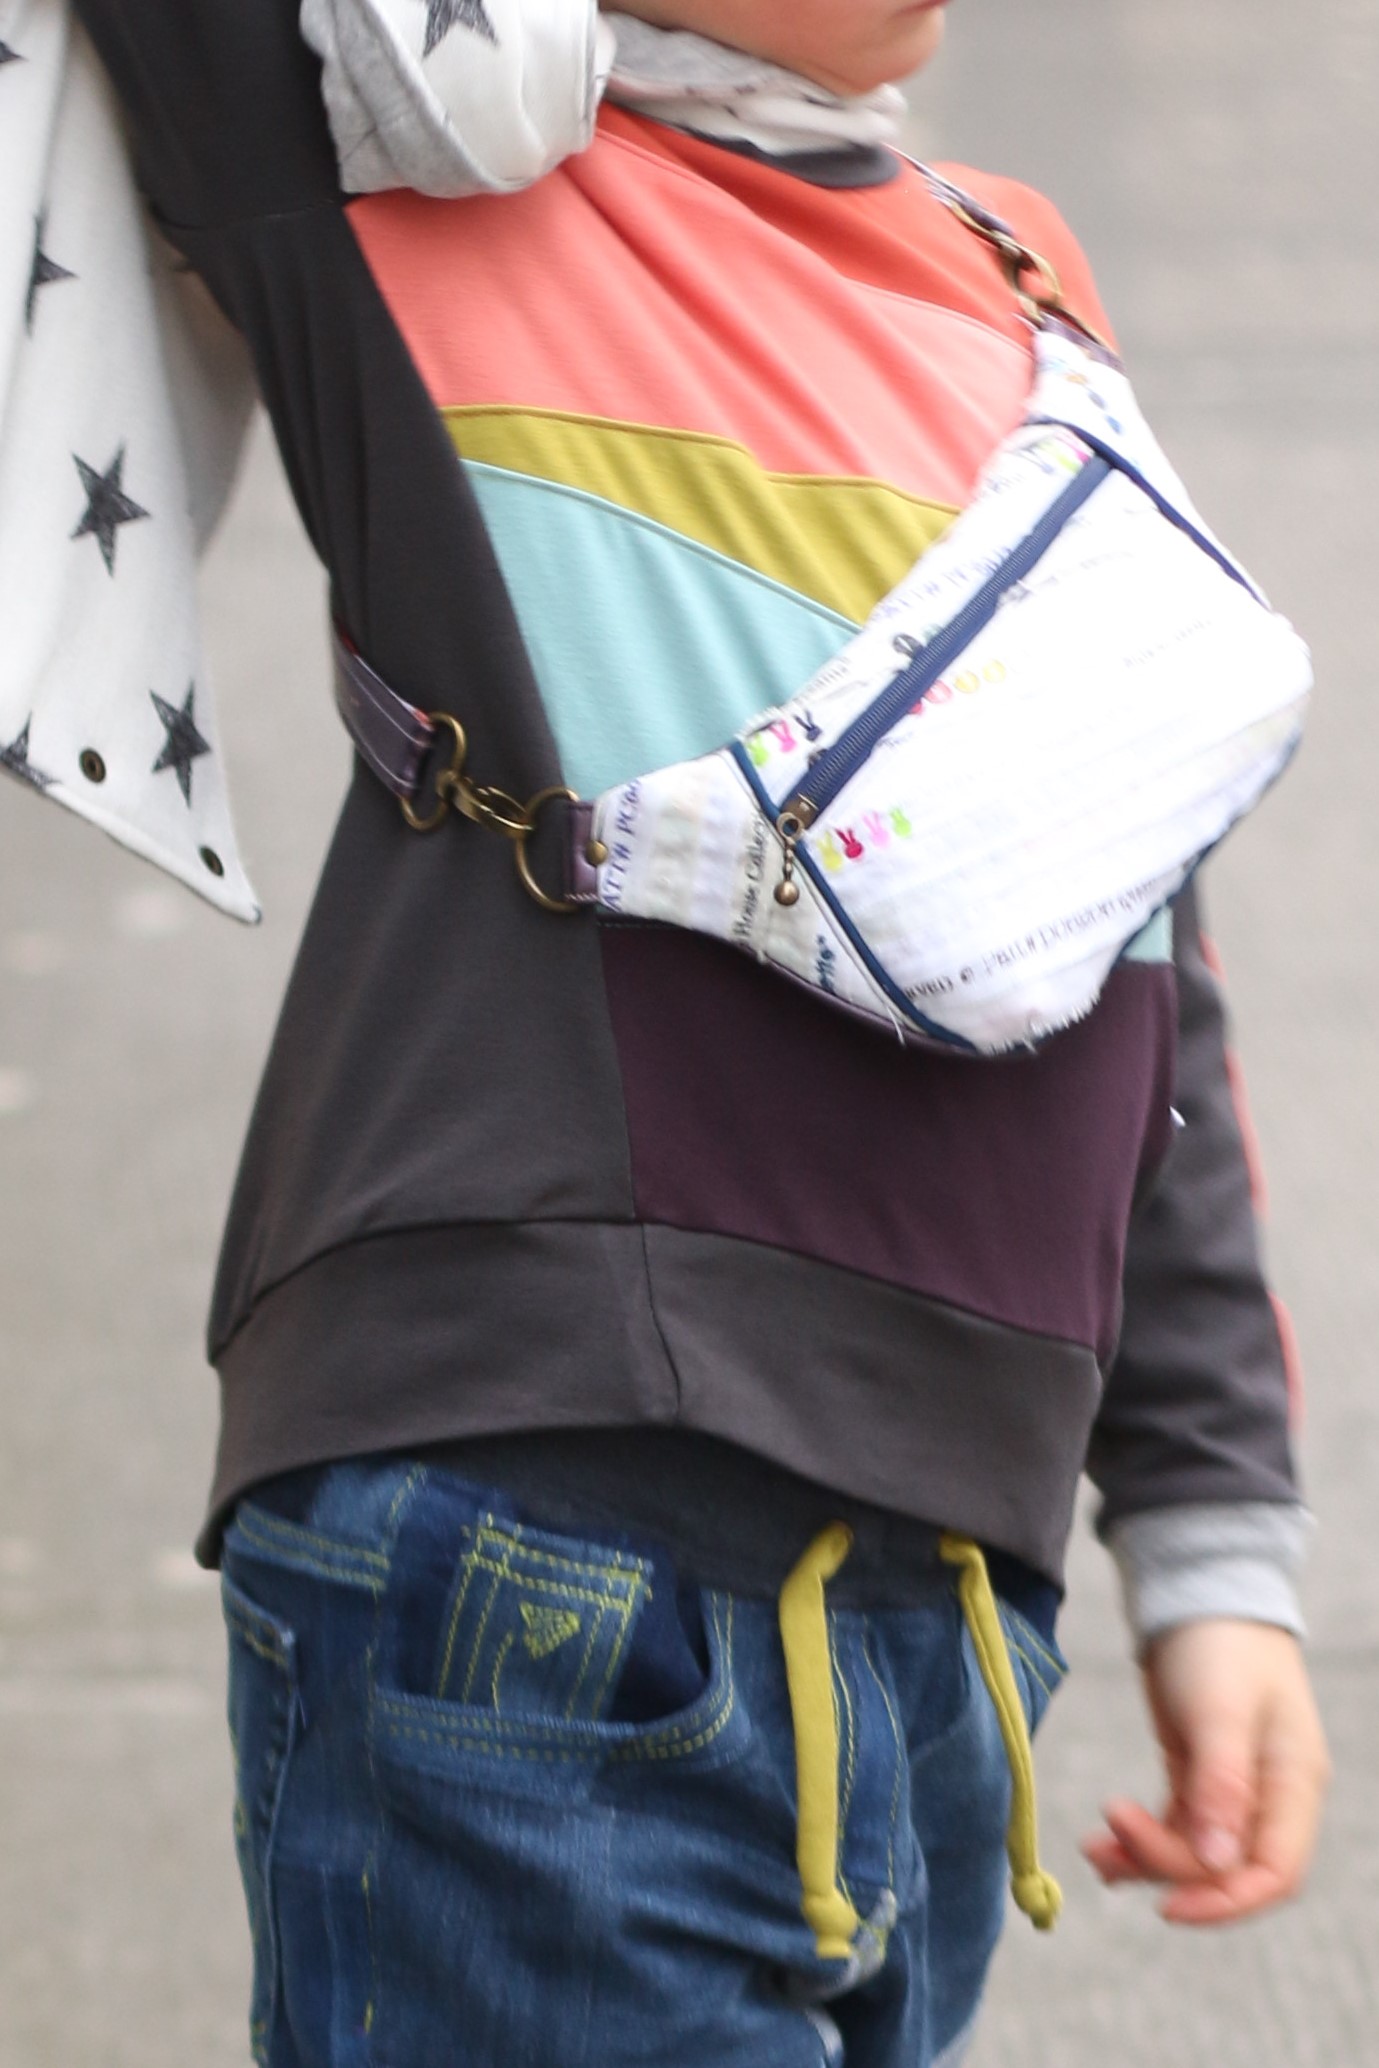
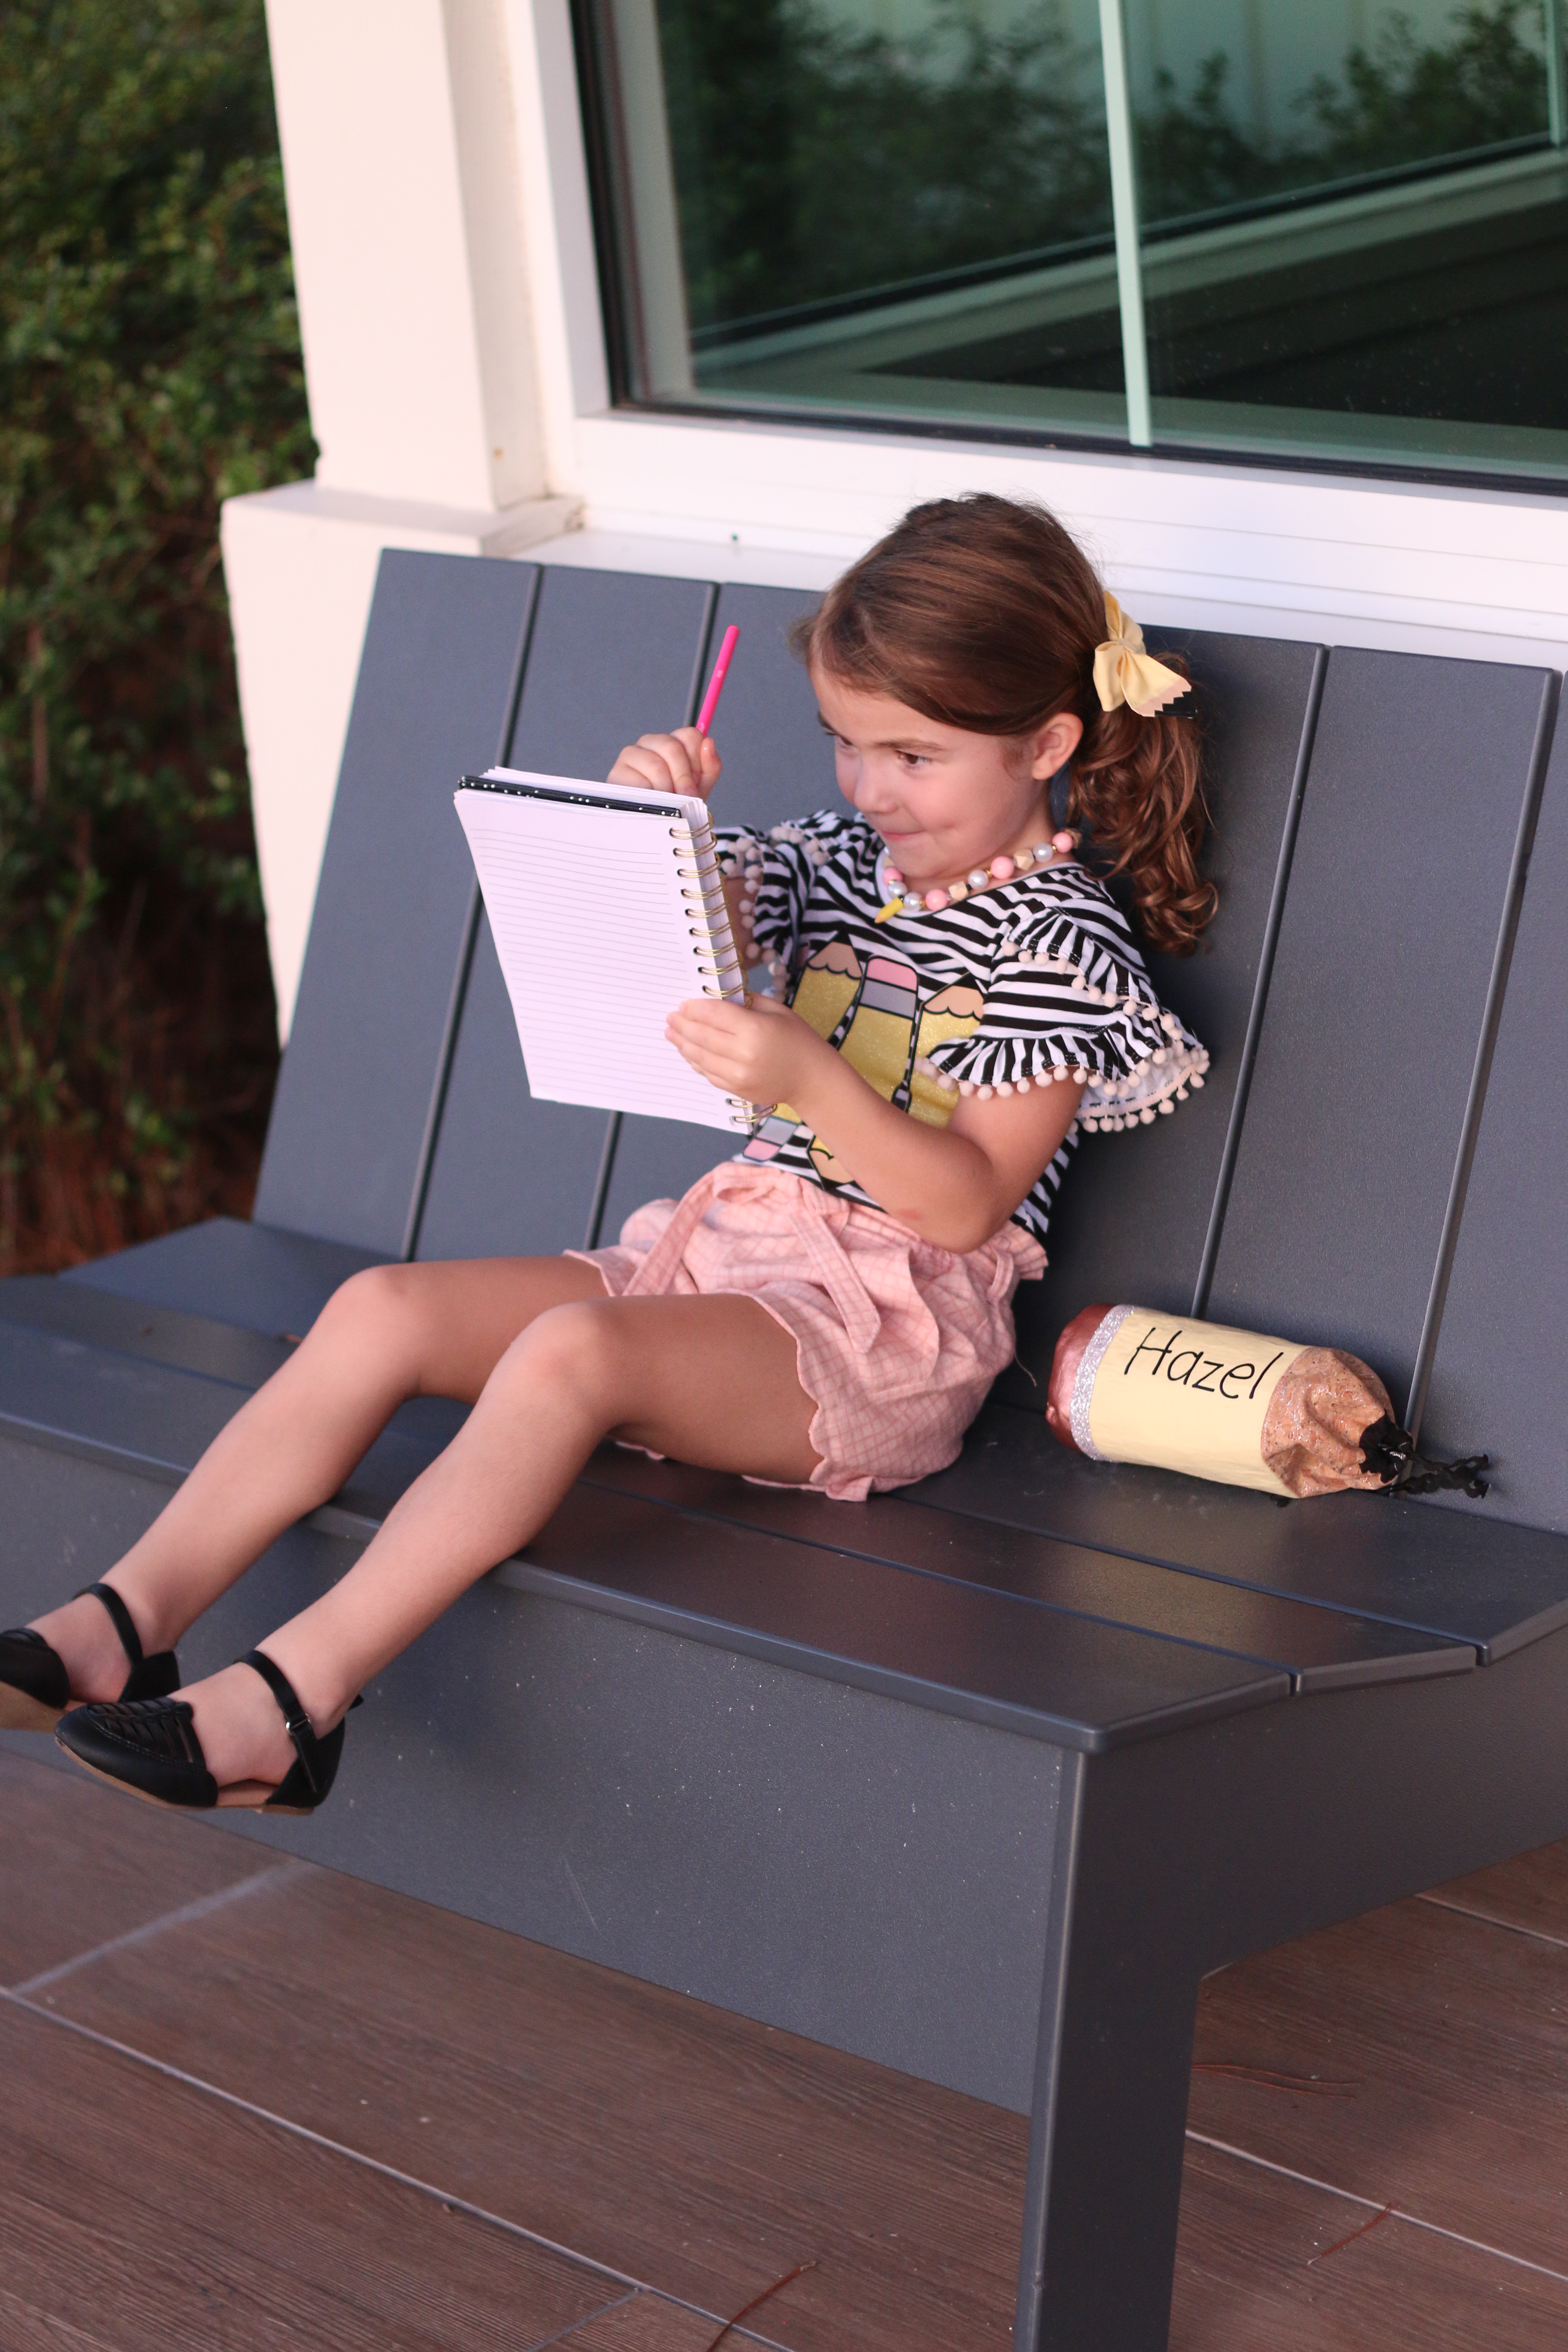
Last up….the inspiration flatlay has that big prop pencil so when I saw the Pointillism Pencil Pouch in the Project Run & Play store I knew it would be a perfect addition!! I struggled with how to mix this one up and change it to be my own since….A….I’m not a bag maker and B….it’s so cute already….that I basically just sewed it as is. I added her name down the side before sewing it together and used ricrac for the tie to make it look like scribbles. For the actual pouch, I mixed rose gold velvet for the eraser, glitter fabric for the metal band, quilting cotton for the main and lead, and cork for the wood. I love the combo of all those together and am really happy with how it turned out. The lining is quilting cotton covered in letters as it seemed appropriate.

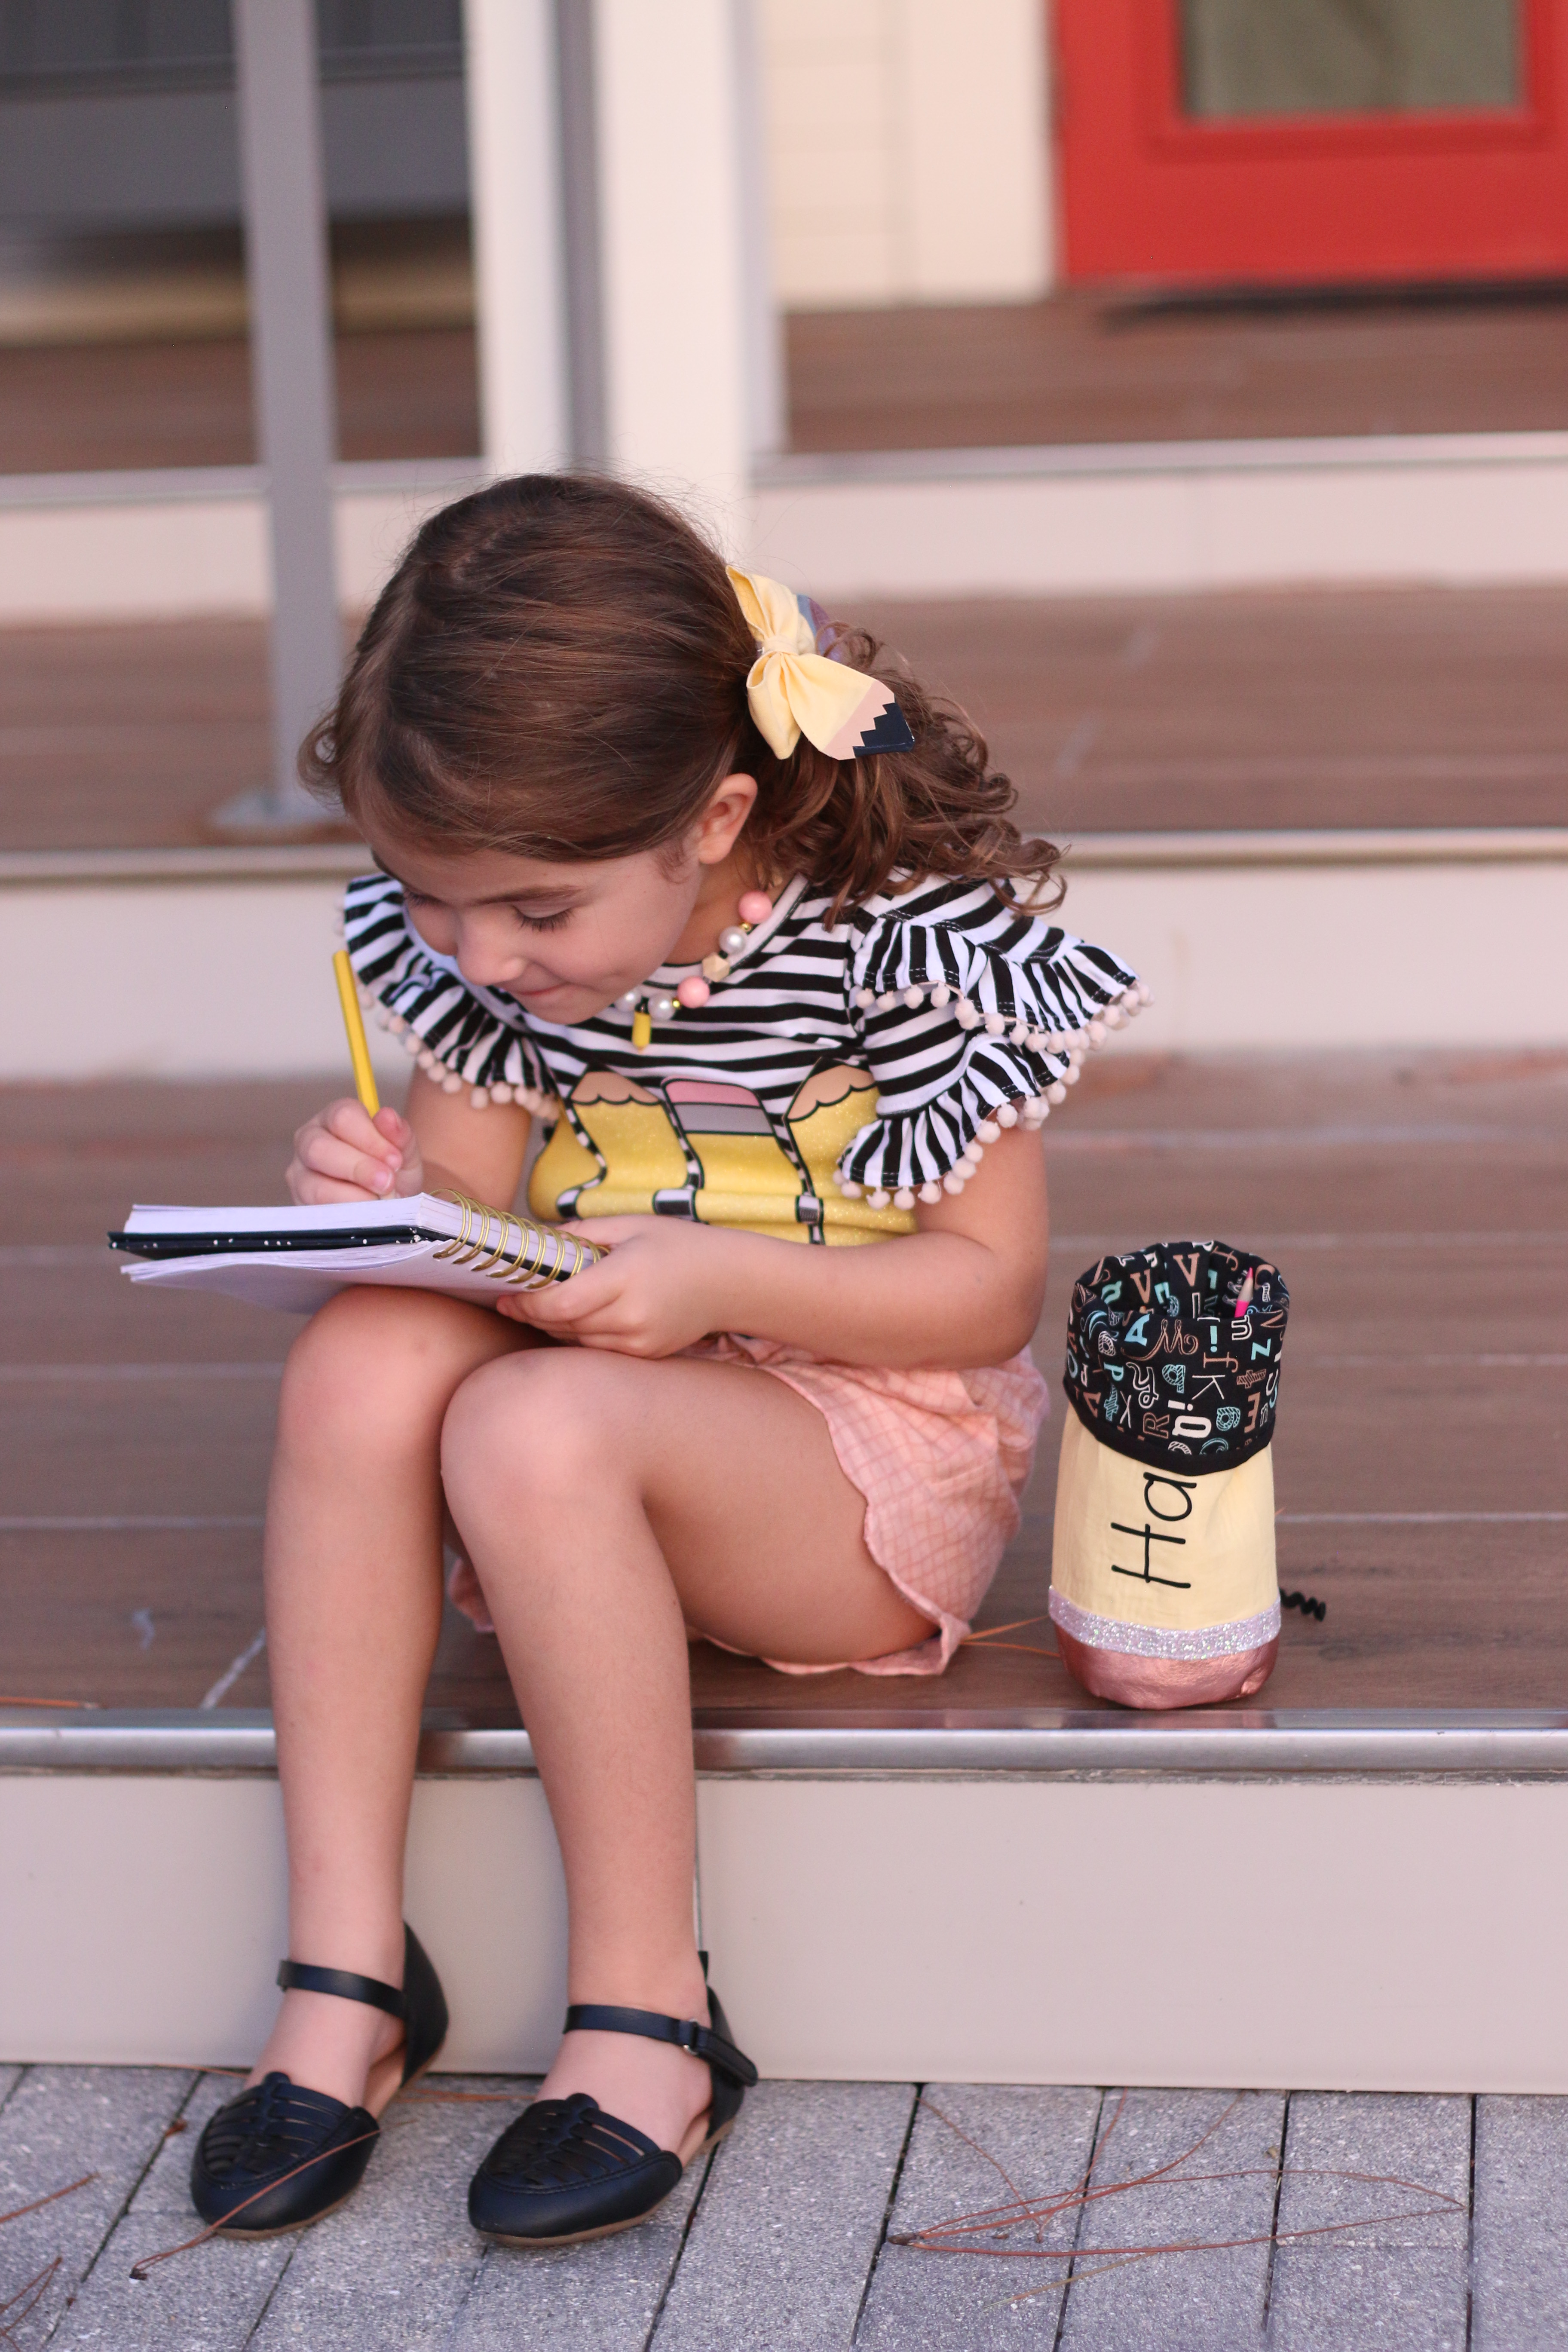
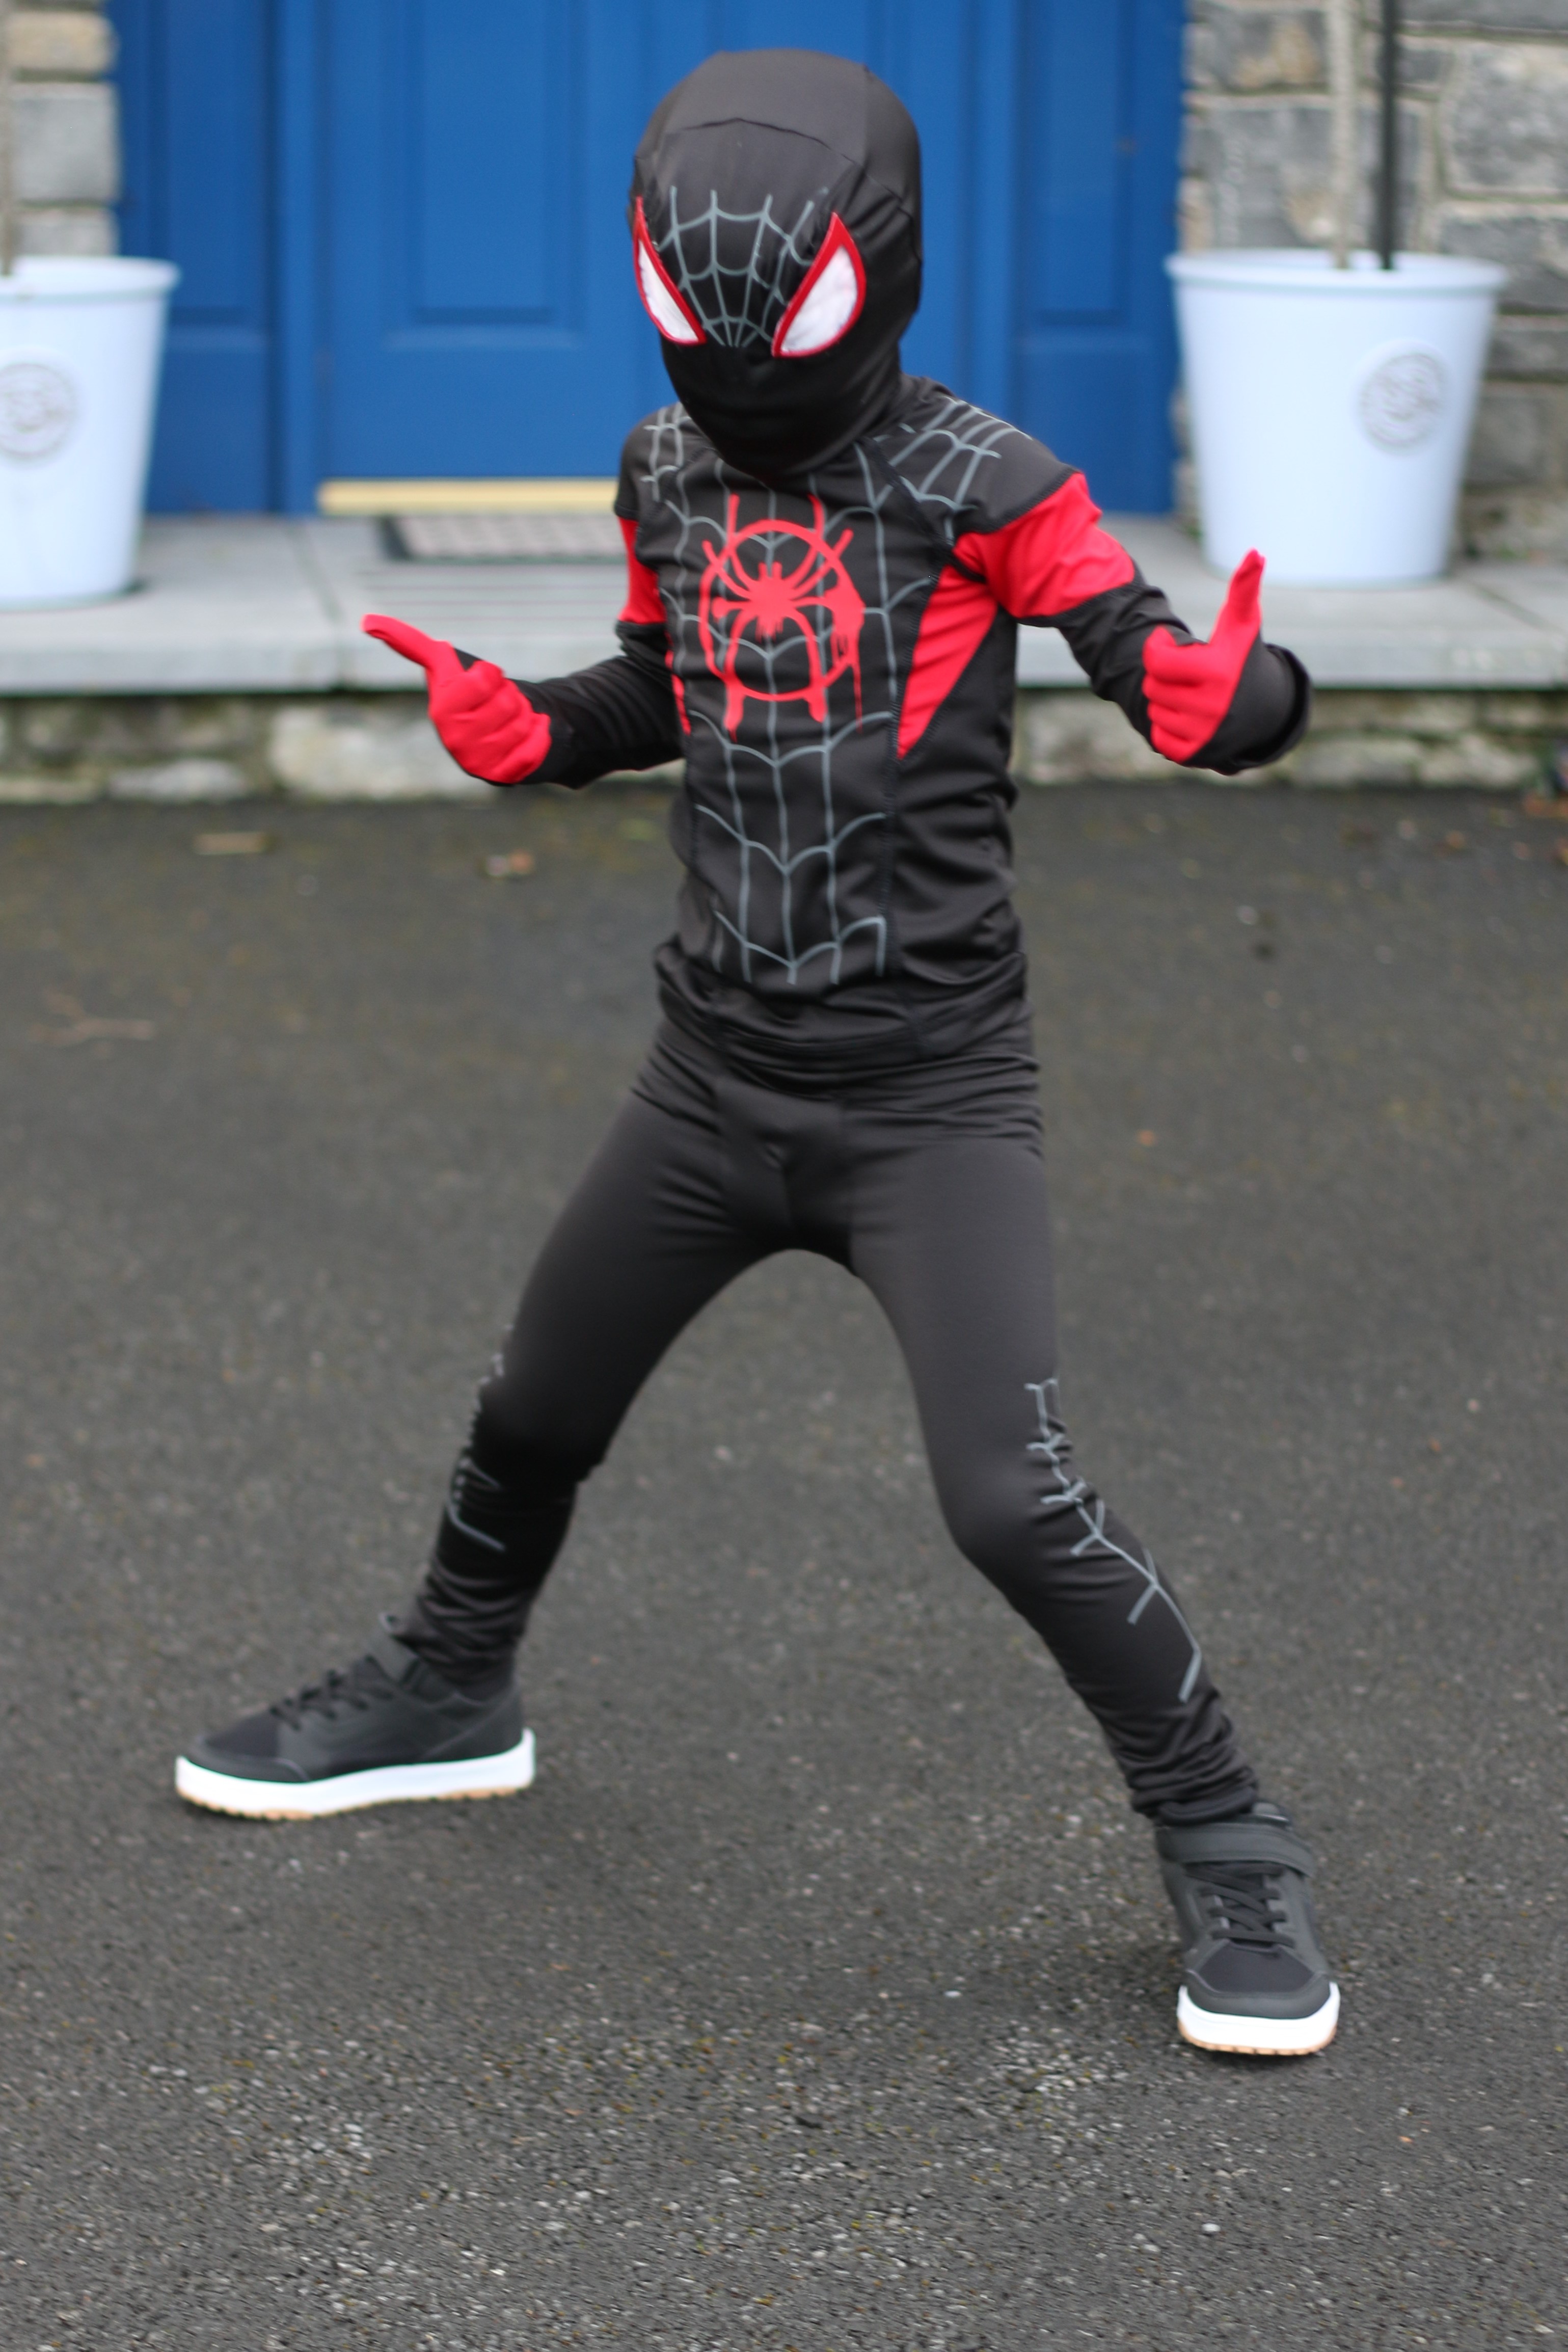
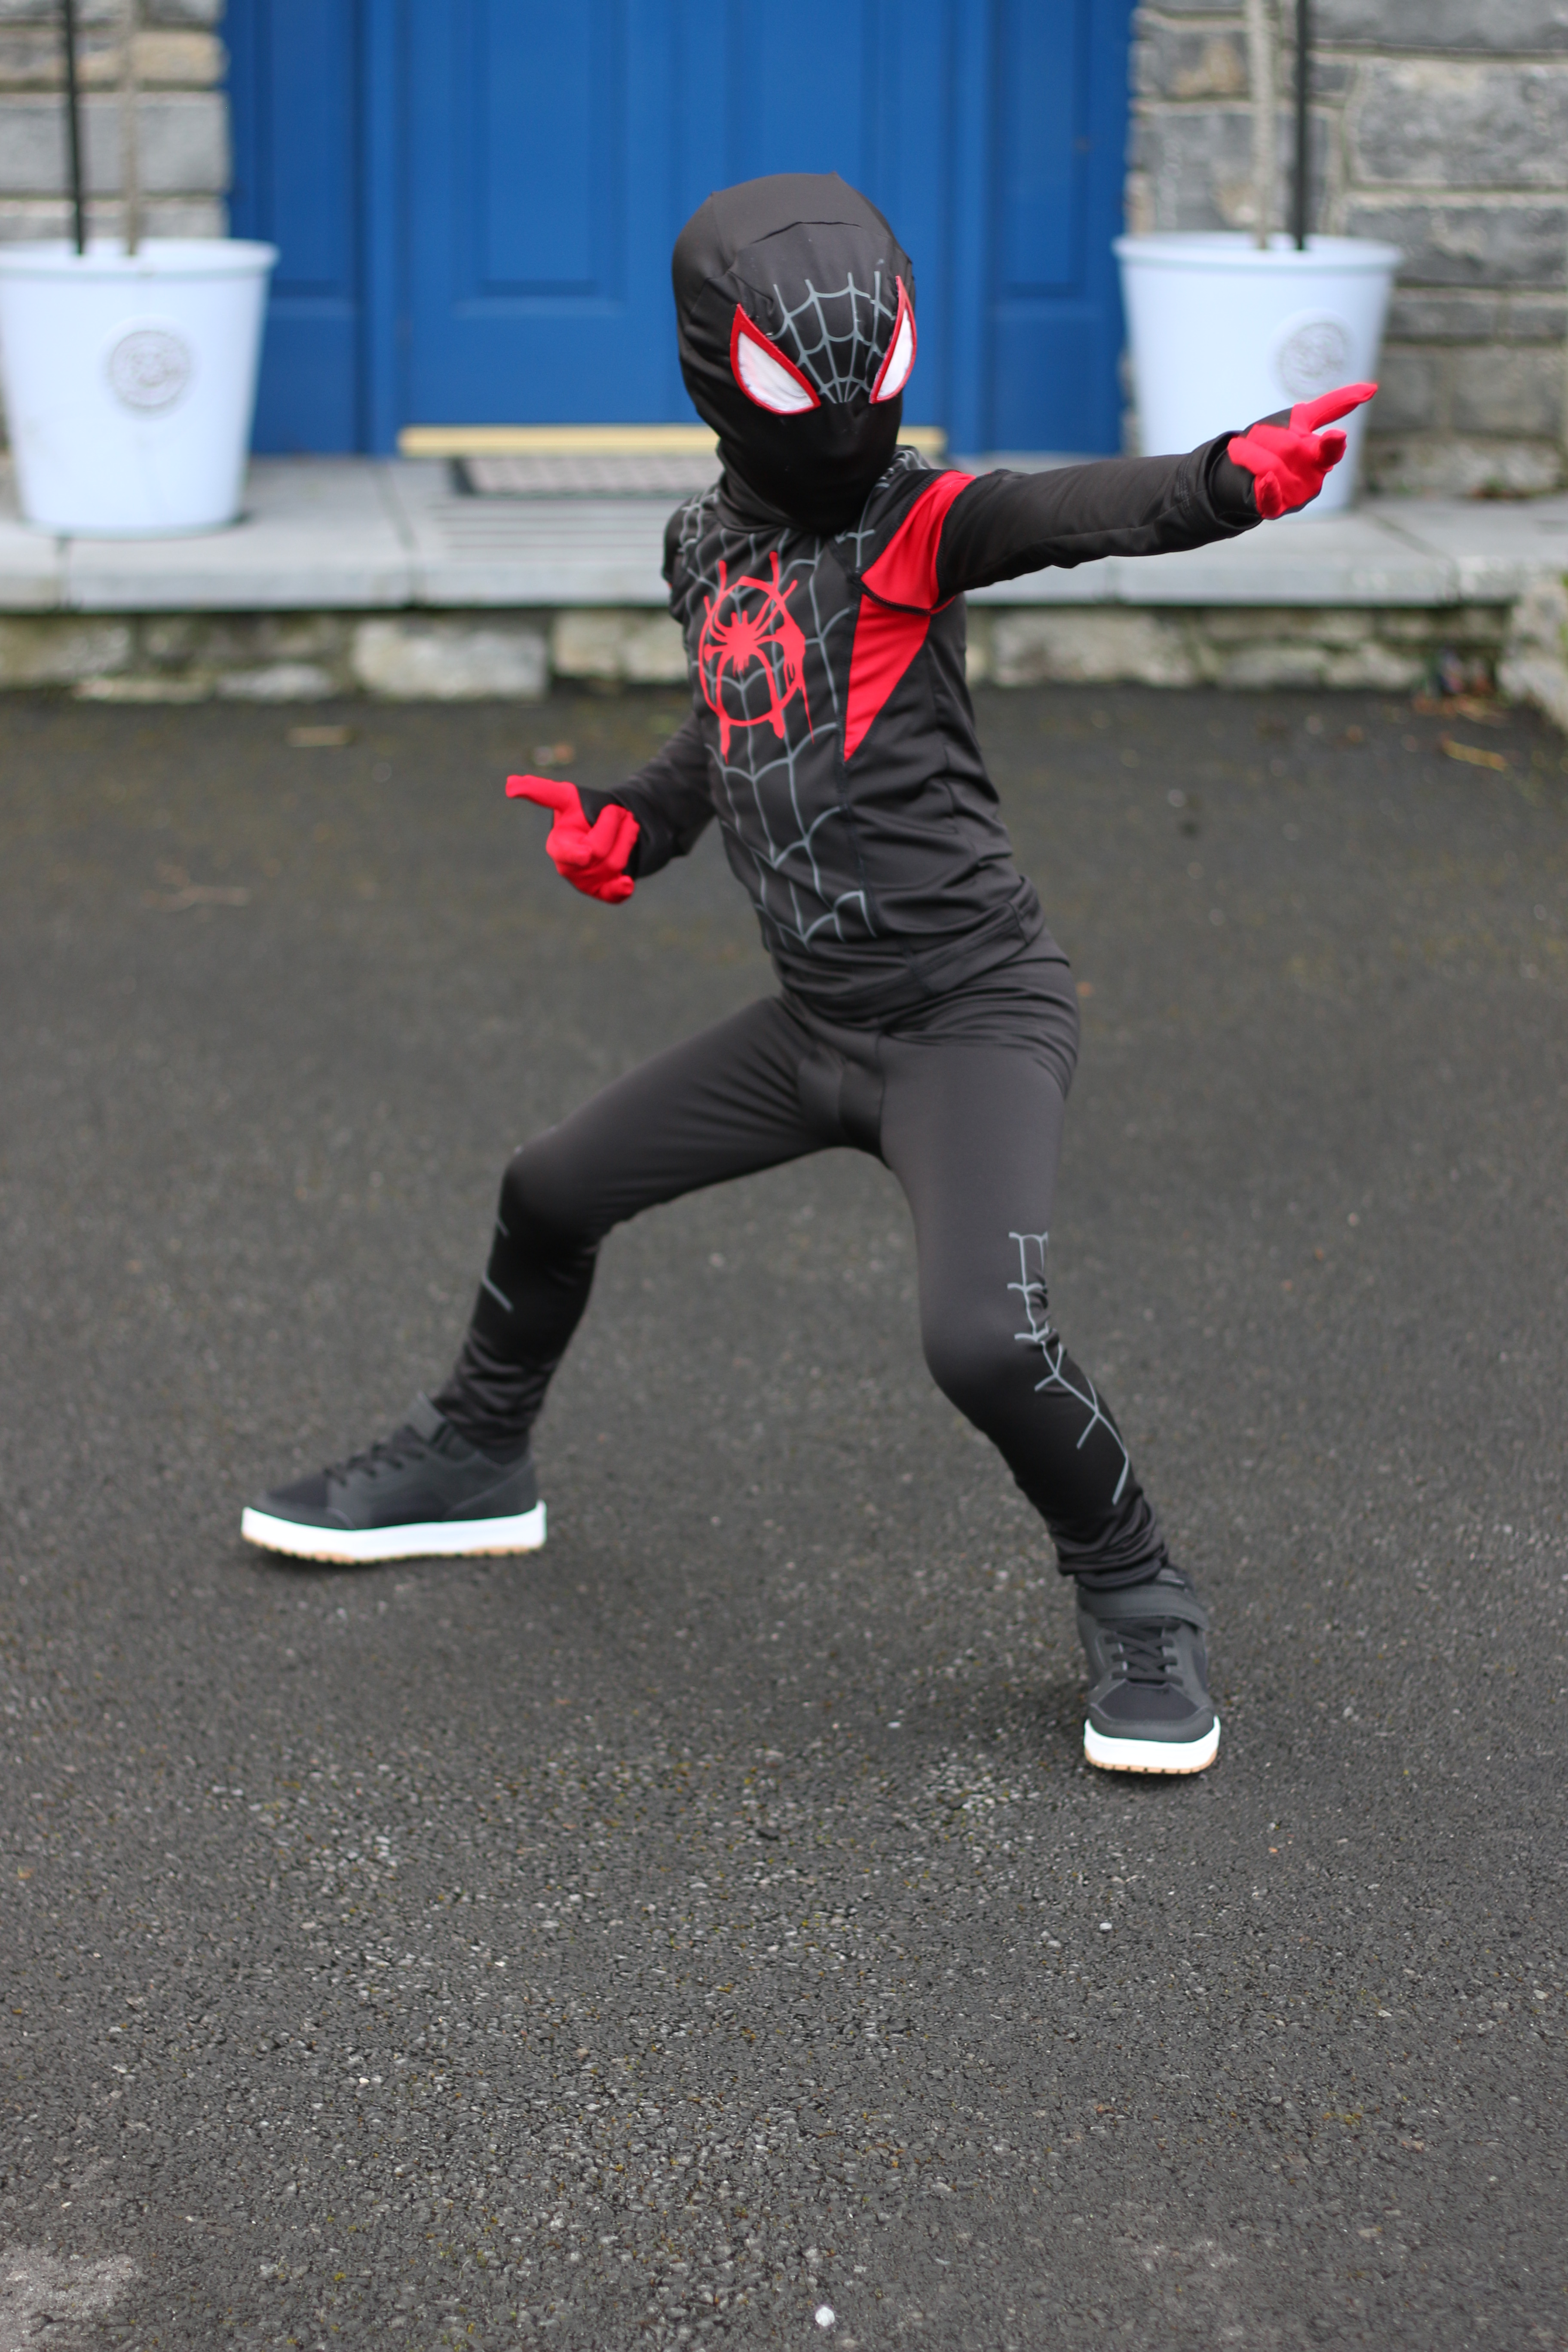
I didn’t have black glittery sandals laying around to style it with but her simple black Old Navy ones I think coordinate quite well.

She proudly wore her look to school immediately….only styling it with knee high striped soccer socks. Because they match, obviously.

Happy Back to School!! Hope you enjoyed my inspiration vs. reality….I think I nailed it, what about you? Vote for your favorite here!!

I was excited when I was asked to participate in the Pantone Party over at Project Run and Play again!! This year’s color of the year is Very Peri, and it’s a soft purple-y blue shade that has spring written all over it. I immediately set to work shopping the Project Run&Play website for looks with my browser open to Raspberry Creek‘s offerings at the same time, and am so excited to share what I came up with!!

First, I knew I needed to use this gorgeous oatmeal floral with shades of very peri along side so many other gorgeous colors, printed on the softest stretchiest oatmeal french terry base ever….I need so much more. I paired it with lilac stripe on white cotton lycra, and some gray chambray. I have been enamored with the Tintin Trousers for awhile and this was my chance to actually make them, so they were the launching point for this capsule.

I used the gray chambray naturally and it was perfect for them. I did the cuffed version with the ruffle waist and belt (plus beltloops) and they are beyond adorable and look so comfy. I do wish the pattern had layers, but it sewed up so quickly that it was easily forgiven….plus maybe I want it printed in every size ever anyway now that I see how well they go together!!

Next, she needed a shirt of course so I went with the Banana Boat tee. I love the little cuffed sleeves and cinched up sides. Such a quick and satisfying sew!! It is finished with a facing at the neckline and so I knew it would be harder for her to find front and back while dressing herself, so rather than a tag on the back I went with an iron on decal for the front chest that brought in some of the colors on the floral.

I used a little bit of the chambray for the sleeve tabs as well instead of more of the stripes.

Next up, I wanted a sweater for it all….and this is probably where things got a little out of hand. I was going to hack the Story Tunic and Dress into a little cardigan….but I was staring at my odd scraps of fabric and thinking how much I really hate storing scraps, and decided at this point to turn it into a capsule and keep sewing until every last bit of fabric was gone. Rather than making a Story cardigan, I went straight for the Story in tunic length as is, save the drawstring I added to the bottom to cinch it up to top length or leave it as a long tunic by adjusting that tie.

After my three main pieces were created and done, I started seeing what I could make from the rest as well as thinking what she could use most. Joggers are always a good choice, so I used the Jingle joggers out of the floral with cuffs and waistband in the stripe, plus more of the contrast stitching. I love how comfy her upscale sweats look!! All the floral was exhausted at that point, it was a sad but satisfying moment.

For the chambray, I went with the Novella Pinafore as I had just enough for the a line version. I lined the pocket and waistband in the stripes as well and did some more contrast stitching. It got finished off with nice big polka dot buttons.

Last up, a simple pair of leggings….I branched out a teeeeeeny bit from project run&play and used my tried and true Sofiona Rocky Shore pattern….Sherri, half of the genius behind Sofiona, is a former PR&P winner and her Aurora Raglan pattern is on the site, so it’s PR&P adjacent, right? But the Frances leggings would be an amazing choice also.

Three yards of gorgeous Raspberry Creek Fabric.…all sewed up without a bit too spare! Love her new mini capsule!! Thanks so much to Raspberry Creek and Project Run and Play for providing fabric and patterns to make this happen.

I MADE IT TO WEEK 4!!!!!! I was simultaneously elated and stressed when I found out though, because sewing to these deadlines has certainly been a challenge! I am beyond excited to share our final look(s) though as I am in love with every piece I made.

Voting is here

Signature style is so vague….i’m fairly eclectic so I tried my best to really focus and think about the essence of my creations. I like making things that are classic, yet edgy. I like contrast and lots of solids but love a statement print. I love working with denim, but also love cuddly soft knits… and leather. Oh and metal details? Divine.

Ultimately though, I love making collections. Mini capsules. Whatever you want to call it. Maybe it started because I made lots of matching family looks and I spent a lot of time creating things that coordinate more than directly match? Or maybe because every time I made myself something I love, I felt like nothing else I had matched….so I started making this girl capsules when she was about 3 or 4. Mix or match, coordinating pieces.

I also really love finishing details. I like for a garment to pretty inside and out. It makes the piece last so much longer, and able to be passed down. Some of this girl’s clothes have been worn thoroughly by her, passed through two cousins, then come back to be worn by little sister so I love things that can last.

So I’ll explain each piece in the order I made it. You can read into that however you’d like. First up, this colorful top. It’s this gorgeous stretch chiffon from Joanns many years ago that has a geometric floral…it’s like bridging my love of design with my mathiness, so makes perfect sense. Plus, there’s so much vibrant color to play off of. I started with the Juniper from Sew A Little Seam as I needed a basic block that would work with wovens. The pattern has the option for a front or back placket but I chose instead to leave both off and do a keyhole back for her to get in and out. I used a facing to finish off the back keyhole and narrow self made bias for the neck, that extends to form a tie. For the shirt itself, I used French seams to enclose the shoulders and sides, as well as sleeves. Warning, French seamed sleeve heads take some serious patience. I cut the sleeve pattern piece down the middle and added hem allowance so that I could do a split sleeve since she loves dramatic sleeves in every form. The sleeves are connected at the sleeve head, then split open, tacked at elbow, and flare out at the end (I also straightened the sleeve piece out so that it would flare out). I had originally planned to not tack the elbow and instead have a tie at the wrist but she was insistent we go this direction. For the bottom of the shirt, I used a narrow rolled gently curved hem.

Next up, she needed jeans. Off the rack jeans do not ever fit her as she has a super narrow waist, curved hips, and long legs….such problems to have, right? Anyway, jeans never fit both her hips and waist, and never are the right length. I started with the Avenue Flares from Stay + Stitch to make a wide leg tailored jean. I redrafted the front completely to have a sailor style button closure, and straightened the legs so they were fitted through the hips but wide below and less flared at the bottom, plus made the hem a bit deeper. I used satin facings (from Minerva) for the top, adding pockets below the buttons and leaving them off the back for a cleaner look. I also finished some of the facings with narrow bias (but not all so as to not have them be too bulky and show). I used some gunmetal grey tack buttons with a rose motif for the closures. The denim is this stunning stretch denim I picked up from the Paris fashion district….shopping there was amazing.

She absolutely loves long skirts, not caring how impractical they can be for playgrounds as she’s more ‘tea in a castle’ style most of the time. I knew I wanted something full and spin worthy, so I started with a half circle skirt, and slashed and spread to add knife pleats around one side. I had it be a wrap style and created closures from leatherette scraps (fairly certain those came from a shop in Munich?) and purse hardware. The ‘rivets’ on the leather are actually small snaps that help stabilize and close the skirt. The waistband itself is a slightly contoured rectangle, lined in soft brushed athletic. I enclosed the entire top of the skirt inside and topstitched all the way around. The fabric I used is random stuff my husband bought for me in Thailand (once upon a time, he traveled a lot for work) and I *think* it’s most likely refined ponte….but who knows. It is fairly bulky though so I mitred the hem corners.

Next, she saw a top while we were browsing pinterest that she needed, so I set about making a sweater to go with everything else. I used French terry provided by Minerva for it, and the Knoxville pattern from New Horizons Designs as it has good ease for a sweater. I redrafted the front to take out the knot and add a curved placket. I interfaced those placket pieces, understitched, then added grommets down the length. Those placket facings also made the split hem be nice and tidy inside. For the tie, I sewed a long fabric tube from the fabric to lace through. As I said, she loves a fun sleeve so I couldn’t disappoint here and chose to mirror the knife pleats on the skirt and slashed and spread the sleeve head to add three pleats. I love the subtle detail they give!!

Last she needed a layering piece to stay warm, so I had my heart set originally on a leather moto jacket but it just didn’t make sense to use that with a split sleeve, so I made her a lush wool capelet instead. I mean, how can I be living in Ireland and not include some wool in our final look?? I used fab wool blend coating from Mibs Fabrics, and drafted a circle capelet so that it would be nice and full and seam free. I cut the neck off-center for a high low and added a funnel collar in the style of the Violette Field Threads Alba. I finished the keyhole, neckline and hem in satin bias binding (I cut my own from more of Minerva‘s bridal satin). For the collar, I finished the inside edge and narrow binding and stitched in the ditch to catch it. The hem has wider bias as it peaks out thanks to the high low shape. I added another rose tack button to the neckline and then added rows of snaps both as a visual effect (mirroring the jeans) and to snap it under the arms if she chooses to have sleeves. Bonus, it’s easy to get on over all of her statement sleeve tops!

Now, the photo shoot. We are in phase 5 lockdown currently, and weather in Ireland in October/November….let’s just say it’s not a strong tourist season. So might as well go signature style there, and take pics right on the street outside our house. Seeing as we cannot go more than 5km away right now anyhow…and weather has been very wet and windy so we needed to time things just right between showers. Of course, I have to throw some sheep, cows, and stone walls in though. Just to give you a true sense of our home.

Hope you’ve enjoyed following me with this competition. I’m happy with what it’s pushed me to create, and really enjoyed thinking beyond the pattern to make truly unique things. I have valued this experience so much!! Don’t forget to vote though if you haven’t already!!!

Oh, and Happy Birthday to this girl!!!!

First things first….thanks for your support for weeks 1&2! Excited to sew for week 3….well, with some reservations. Voting link is here, too.

I love a good cosplay. I’ve spent nearly a decade perfecting our family costumes and have really pushed my sewing abilities doing them, from my youngest son’s first halloween that was mostly glue gun to today. However, since moving to Ireland that has shifted a ton. There’s a lot less costume parades in nice sunny weather here, and the holiday is much more to it’s macabre roots and much less Disney Princess. Not to mention that it’s super cold and rainy in October, trick or treating is a little different than Florida.

This year, it’s even harder since Ireland is on full lockdown so there’s just that tiny extra added layer of apathy from me. My older two refuse to family costume anymore, so the weight of my Halloween love is on my younger two. The littlest has declared her love for Elsa, so that leaves this guy who is still OBSESSED with dress up, and I was willing to make it magical for him. His current favorite movie is Into the Spider-Verse, since what is better than one arachnid related superhero? TONs of them, so I set to work on making him the best Miles Morales I could.

Now, if you read all that you know by now that this costume needed to be one part fun but all the parts wearable beyond this slightly non-existent holiday, so my goal was to create durable, long lasting clothing more than a costume.

Let’s start with the jacket. I used stretch twill in petrol from Dress Fabrics, adding fusible fleece for some puffy loft. After fusing it, I added some subtle horizontal quilting stitches. I used the Ollie Bomber Jacket from Sew a Little Seam because it is a near identical match to the inspiration, but went up a size since I was using bulky non knit fabrics. I did the welt pockets and collar version to keep it close to the look, adding the lining fabric inside the pockets to peek out ever so slightly. For the lining, I used stretch jersey in a beige marl provided by Minerva. I love how the petrol and beige look with each other, super smart. I went ahead and fully finished all inside seams, adding a little red hanging loop as well. Now, to take it up a notch I decided to make it have a zip out lining like so many of their ready to wear jackets. I started by cutting the lining down 1.5″ to add a strip of the main fabric as a facing, then added another zip between the lining and that facing. I switched the orientation of that zip by flipping around the slider so it is ‘backwards’ from the usual. I also made sure it was shorter and was above the bottom binding. On the sleeve cuffs and back neckband, I added twill tape strips (also from Minerva) with snaps to hold the inner lining in place.

For the zip out lining, I used brushed back sweat in red from Dress Fabrics. I constructed a basic hoodie by combining a few patterns (New Horizons Designs 11th Hour Gear tee for the basic shape, shortened and sized up wit a raised adjusted neckline for a hoodie shape, Ollie Bomber hood since I wanted a 3 piece hood that was nice and full, and the kangaroo pocket from the New Horizons Tami Hoodie). I added little twill loops on the cuffs and behind the hood to attach it to the outer shell. I also used ribbing on the inside neckline of the hood to make it more finished, plus another hanging loop. The zipper was a little complicated again since it needed to be able to zip from the outside when wearing as a hoodie and the inside when it zips into the jacket, so I had my husband take apart a zipper pull and solder an extra pull to the inside of the zip I used for the hoodie. Last, I used more of the twill tape to finish the inside of the zip.

Next up, a solid pair of twill shorts. I wanted a basic pair that he can wear again and again, and wanted lots of clean finishes. I used the Grady pattern from Sew a Little Seam for these, doing all the options–front slant pockets with facings, fitted waistband, back welt pockets, fully functional zip fly. I added a few of my own touches, changing up the belt loops a little, adding flaps with snaps over the back welts (because if you’re going to take forever making welts might as well cover them, right? haha), and I used french seams on the inseam and red bias tape on the outseam so that I could do a little roll cuff and have a tiny touch of the red show to coordinate with the rest of the look. The outer fabric is more stretch twill from Dress Fabrics, and the lining is a basic cotton I stole from my mom’s stash as it reminded me of preppy spiderman for whatever reason.

I made a super quick belt out of some cotton webbing (thanks, Sarah!), adding eyelets for holes. I had the husband help by 3d printing a belt buckle that I spray painted in silver and riveted on to the webbing.

Now those are my super tailored touches, but it was still a super hero costume deep down so I had to break out some spandex. I used black and red sports lycra from Dress Fabrics to make the undersuit. Let’s start with the leggings since those were the fastest part of this costume. I started with Jalie 3242 as it’s my go to for his top drawer, with some slight mods that I do like using a dart instead of a full seam on the front panel. I lengthened them to leggings length by laying them over a legging pattern (I don’t even remember which…) and then added a basic yoga waist rather than exposed elastic that I’d usually use. He got a hint of htv spider webs on the thighs too to make them a little more exciting. They will get lots of use as a base layer for outside play on a cold day or weekly cold Saturday Morning Soccer. For the top, I started with a basic raglan (streamline tee from New Horizons) and raised the neckline and added a mock turtleneck, plus some colorblocking to match the inspiration, and of course lots of htv webs and the iconic red spider.

BTW. I HATE spiders. It had to be said.

The top can serve double duty, both as a base layer like the leggings and as a rash guard for summer. Oh triple duty, since he can wear it for saving the city and all.

Last, the absolute least useful parts but the ones that were just totally necessary to make this guy’s day. Gloves were simple, I traced his hand, added seam allowance and a colorblock line, and made them out of scrap lycra. The mask, I took circumference measurements of his head and neck in a few places, and height measures, transferred it to paper to get a basic head shape, added seam allowance and darts for shaping. I cut a little bit of web vinyl for the front, then started on those eyes. I had the hubby step in again with his 3d printer obsession hobby and made the lenses. Those got a coat of red paint and then I sandwiched some white mesh between them and the mask with lots of different glues. When he tried it on he expressed distaste for the amount of glue so I of course added more glue to attach some craft foam on the inside for comfort. Last, it got a zipper up the back to make it easier to get on and off. Now, I am not pretending these pieces are for anything other than dress up purposes but they really do help complete the look.

note, the amount of time devoted to a piece is equal to the amount of wear I expect it to get….

So there you have it. If I had my way, and we were back in Florida I’d be making myself into Dr. Octavius….forcing the littlest into a a Spider-Ham and big sis into a SpiderGwen….making the oldest be out-of-shape SpiderMan, and then the husband could be Kingpin….but alas. Just Miles this year. So enjoy some costumes from year’s past since this era has come to an end for our family….and then don’t forget to vote!!

also, please vote
VOTING IS HERE

Thanks for all the support for week 1!! Glad to sew for week 2 (even if it is by default) and so so excited to share this little guy and his new duds!

That’s a Galway Hooker in the background, little lesson on ships for you.

I am so not a quilter. I tried it once, and learned I do not have the stamina for sewing tiny pieces together. I imagine I will become a quilter in my old age for some reason as by then I will have so much fabric that massive quilts will be the only answer, but for now, not my thing.

I started with the jeans because when I heard the theme, it reminded me of patchwork jeans I was obsessed with as a teen (probably something like these-cringe). I wanted it to be subtle and geometric, so started with two pairs of jeans of my own that no longer fit well and are not in style, but are near the same shade. I painstakingly cut them both into 4″ squares, then took about half those squares to make isosceles triangles. Next, I stitched all the triangles into new squares, sometimes using matching pairs, sometimes rotating wefts, some wrong side out, etc. Then I stitched squares together to make the textile I used. Each stitchline also got topstitched of course. I used the hammer A LOT to pound down seams to be as flat as I could, and offset rows of squares to help too. I really wanted a random and subtle feel and think I achieved it.

I cut my patchwork denim into Grady Jeans from Sew A Little Seam, lining them completely with cotton jersey (from So Sew English) for comfort and warmth. I used the method from the Cpt. Comfort Jeans from Patterns for Pirates for this, topstitching the inseam together so the lining does not shift. I love the clean inside finish.

I also gave them a ribbing and elastic waistband for comfort, adding a faux drawstring from scraps as well to tie in the lining. I did a cuffed hem for the bottom so he could let them out when he grows taller.

For the back pockets, I stitch ripped them off the original pair of jeans and added some freehand decorative stitching. He chose the design of course (I was voting robot, in case you were wondering). I went ahead and did lots of traditional jean stitching in the same chartreuse as the lining because green is his favorite. I skipped the flatfell seams I’d usually use for jeans because of the bulk, choosing instead to stitch as normal, serge edges, and topstitch the seams. Going over some of those seams had my machine wishing for a break for sure!!

Next, I made him a colorful top. He has been asking for a rainbow top for awhile, and even drew me this picture.

anyone else see the most fab choir robe ever?

I decided to tone it down just a bit and went with a more subtle rainbow, in muted colors (colorful jersey here is all from Mibs fabrics and Little Legs Fabrics, solid charcoal and aubergine from Dress Fabrics). I used the Dia Sweater from Misusu to start, cutting apart the plain front panel to create my own colorblock lines. He saw the drawing I had made to plan out the top and insisted on MORE COLOR (channeling his inner Christopher Walken from that cowbell SNL sketch, as I don’t think there could ever be enough color for him) so I used the shoulder seam line on the sleeve pattern to cut the sleeves in half and add a folded strip of fabric, topstitching the seam allowance and folded edge after constructing. I topstitched each panel on the front using the neighboring color, and also added contrast topstitching along the shoulder seams.

For the neckband, I wanted to do a clean finish inside so I added some bias tape made from the same fabric as the jeans pockets (Michael Miller Birds of a Feather from QuiltYarnStitch, it seems to capture most of the colors I used here). I went ahead and did the high low hem as well because it is just such a cool shape.

He has also frequently been jealous of his sister’s ability to carry all her things in a purse when we go to town, so a shoulder sling bag seemed like a great solution. His wallet never fits in his pocket and he likes to carry snacks (we bring snacks EVERYWHERE and not just because young kids never stop eating, this guy is celiac and can rarely trust food out and about)…he also excitedly told me that he can bring his own hand sanitizer and mask now….kids these days….so I set to work on my first bum bag.

I should mention that like I’m not a quilter, I’m also most definitely not a bag maker either. That is a whole other skill and I am in awe of the bag makers I follow. I made my own textile again, using selvages that I stitched together and then fused onto fleece interfacing for structure. I cut the pattern pieces for the bag on a diagonal for the textile to really shine, and added navy piping between panels to highlight the shape.

For the zipper, I wanted one with an interesting bronze pull to tie in the metal I used elsewhere and not just a basic navy dress zip, so I zipped the pull off of one of those decorative lace zips and added it onto my basic navy one. I made the strap to be the purple leatherette of the back of the bag on one side and the birds of a feather fabric from the lining on the other (same fabric as that bias and the jeans pockets). Thankfully, the bag made it to photos as he stole it the second I finished it and it was hard to wrestle back.

Last but not least, he needed to be warm as well since fall in Ireland is no joke for us Floridians, so a convertible scarf to the rescue. I started by determining the width and length that would make a good place to stick his cold little hands inside (all done through the highly technical ‘hold still while I measure you’ method) and then cut lots more squares (and triangles) to make sawtooth star panels out of marled grey jersey (more So Sew English), using this Flying Geese method since it seemed fitting at the moment. You know, the sleep deprived moment.

I added invisible zips at the top of the last panels and pockets from the same reverse french terry (stash fabric, think it was from Love Adore?) that’s on the back for a place for him to keep his hands nice and cozy. We learned during the photo shoot that he can easily hold hands with me without taking them out of the scarf pockets, and if he puts his bag of treats in there he can eat while maintaining the hand hold as well. Clutch. I used zips with the colors of his top for a little more fun, even if you only see a teeeensy bit of them. Next, I added snaps along the bottom edges so that it can turn into an infinity scarf if he’s moving around a lot, another reason I used zips on the pockets instead of just open pockets so that any tiny treasures don’t go flying.

My husband pointed out that I made him look fairly European….but….I mean…how cool is this kid? I assume that it was a compliment.

Don’t forget to vote for this week and if you made it all the way to here reading, congrats to you!!! Bonus pic of my cool six year old for you! Also, don’t forget to vote if you want to see me compete next week 😉

voting is here!!

I cannot believe it’s really here….after so many sew along shares, I’m actually COMPETING in Project Run+Play!! Week 1’s theme is Lovely Layers, which is absolutely perfect since fall here in Ireland came very suddenly it seems, and layers are currently a must.

I started off with C’s look, with the plaid as my inspiration as it just seems so fall right now. It is a rayon blend that I orignally bought for myself from Joanns a few years ago. I knew it needed to be a button down shirt dress, channeling flannels from years past. I started with the Sew a Little Seam Birch shirt for the basic shape, making it loose and dress length with a swing/a line skirt. I also made gathered cap sleeves that gather in at the wrist and billow out, as it’s currently my daughter’s absolute-favourite-sleeve-ever-that-needs-to-be-on-everything. I did pearl snaps for a little bling as well.

Under it, I made a basic fitted New Horizons Designs Key West Tank from white cotton lycra, adding vinyl on the front and down the back (she’s a HUGE Greatest Showman fan) because every loose flowy button down needs a fitted tank, right?

And every dress here always gets leggings, so I started with Rocky Shore Tights from Sofiona Designs out of my new favourite legging fabric (knit stretch denim from FabricRomance.ie). I made them higher waist and used the Tamarack Tights waistband, and also added functional metal zippers at the bottom (thanks, Minerva!) .

Next, instead of a jacket or coat I went with a gillette from this leather/fur fabric I’ve hoarded for way too long (also Joanns). I started with the Tanacross from New Horizons Designs, shortening the collar piece as well as the overall length and binding the front and armholes with leather bias from Minerva-gotta love a mitred corner! I used flat fell seams throughout on account of the fur shedding. I left off the sleeves obviously, and also left out the button as I liked it more as a cascading open front look, and she can belt it in if she chooses.

When she tried it all on, I decided it needed a belt to pull it all together, so I cut up a purse strap, added some snaps, d-ring and chain (the chain keeps the d-ring from falling off while also allowing it to be adjustable) to cinch it all in.

I love that she can wear the dress on it’s own, or as a duster cardi. And she can wear this look without the dress and it still rocks. Lots of options with some basic pieces.

Little sis could not be left out, so I started with a (self drafted) layered skirt for her from some poly cotton spandex from So Sew English. I made the layers assymetrical to give it a little more edge, and then decided it should just be a dress so added a basic bodice and long sleeves, using the Patterns for Pirates Boundless as inspiration with a few small neckline tweaks.

For her leggings, I layered double galloon lace over cotton lycra, using Rocky Shore tights from Sofiona Designs again for the basic shape. I made them more of a capri length to highlight the lace edge above her boots, hemming the lining above where the lace ends.

Next, she needed a cardigan that was a little sweet and sassy like her, so I started with the New Horizons Vermont Cardigan out of some mint cotton lycra (and altered it so it was assymetrical, as well as slashed and spread the top to have it gather (thanks, Pinterest for the inspiration on that one). I did lots of snaps so her look could be a little bit metal too.

Last, she got a beanie from brushed back sweat lined in cotton lycra (from Dress Fabrics and Quilt Yarn Stitch, respectively) with a fur pom on top. I used the Patterns for Pirates slouchy beanie as a launching point there, lining it, altering the shape ever so slightly and leaving off the bottom band.

I really love how it all came together, both girls look a little sweet and a little edgy and are snuggly warm for the cool weather 🙂

VOTE HERE!!

I first started blogging when I was very inspired by Project Run&Play and their challenges, and needed to link up while I sewed along. Now some of my favorite pattern designers are in the mix (including a couple I’ve pattern tested for) so I felt the need to sew along again!

IMG_6200

This week’s theme is Willy Wonka. We randomly just watched the newer version in the yard last week yet still, I went original for the inspiration. Just for the record, however, I’m team remake. Book loyalist that I am, I have to side with the Tim Burton version.

IMG_6216

For the big girl, I made an Andromeda top from Sew Straight (Terri’s competing! and it’s the first pattern I’ve ever tested!) out of some slinky gold fabric. Very golden ticket/Gene Wilder I think? The bottoms are crushed velvet Carita Joggers from New Horizons because she needed a touch of velvet to channel Wonka of course. And Carita Joggers are life.

For the mini, I went with Violet Beauregarde. Because this little round thing reminds me of a blueberry anyway 😉 I mashed the Olivia top and Cerena Romper bottom, both from Rebecca Page, and made it from navy liverpool. Somehow all the fabrics I used were from LA Finch. They are like the candy land of fabric perhaps?

IMG_6166

Anyway, hope you enjoy! The daughter is disappointed I didn’t make Charlie Bucket at the VERY least for her brother….maybe next time….


Have you ever found a pattern company, saw the options, and then immediately decide that you need to sew all of them in a day?

img_4374

I recently discovered Misusu and after making one pattern….I need them all. The patterns are so fresh and modern, and the directions are amazing. There’s a flow chart on the Piper top that makes my heart flutter.

I was invited to talk about some of the free patterns available…and most designers have a couple free patterns, sure. They are usually something fairly basic to give you an idea of what to expect before you buy….but these can easily get you a full kid’s wardrobe and I didn’t even include all the options.

img_4067

First sew was the Olli Lined Pants for baby girl. I went with a lightweight denim chambray lined with cotton lycra, and included lots of gold topstitching. I went with just one pocket because baby girl doesn’t really store much in her pockets these days. I love the gusset to give a bit more space for her diaper bum and the finises made me feel like a sewing rockstar.

img_4283

I went ahead and made the unlined Summer Olli shorts for the youngest boy next. They are drafted for wovens, but I used some plush back sweatshirting instead. The seamlines on these make them absolutely perfect for a little guy who cannot.keep.still. I left out the side pockets because the fabric was on the thick side already and also I am a little nervous about checking his pockets these days (frogs and nerf darts oh my….).

img_4078

Did I mention those patterns are free?!

On to make tops for both. For the little guy, I went with the Rowan tee (FREE too, and recently updated). I didn’t have enough of the whales so I colorblocked with some viscose stripe. I just chose a spot on the pattern (the pocket line actually) and made sure I added seam allowance to both pieces, cutting at the same spot on front and back.  The Origami Boat was a perfect little detail to add on – I included it at the pocket line marking. It helps him get dressed, too as the boat goes in the front! Oh, and boat pattern? Free, too.

img_4075

Baby girl needed a top too, and the Dia sweater had me at first sight. I decided to make it into a top instead of sweater by cutting the sleeves and banding them (I measured around baby girl’s biceps to figure out how tight to make the band). This is all lightweight cotton lycra. I love the little puff sleeves and the button collar option.

And then….of course…the older girl always has all the homemade clothes and the Doris Skirt needed to happen. I love how fun and different it is than other skirts out there. I made it from the same sweat as the boy’s shorts, and added in the cotton lycra I used for baby girl’s pants and sweater. For a top, I used the Piper tank that just released with the petal back.

To add some detail, I added the Flower Applique (another free pattern!!). It is for felt flowers, but I’m a rebel and just used knit scraps from the fabrics I was using. I wanted it to be subtle since there’s already a lot going on with this outfit.

Better yet? Not enough free patterns? Elles is giving away one Misusu pattern to one of my amazing IG followers…so click on over to the post for details to enter – instagram.com/derivingmommyhood. And go ahead and like Misusu for more info on the Freekin’ Sewing challenge.

….I’m literally obsessed with all of these looks. Can you tell?

Fabrics used: print cotton lycra from Jumping June Textiles (Basket of Wheat is Bloom Copenhagen and whales are Elvelyckan), ribbing from Jumping June Textiles, Sweat from Metre Rabbit UK, stripe viscose jersey from Dress Fabrics, marl cotton lycra solids from Mibs Fabrics UK

IMG_8171

I have an awesome Lisse Hoodie from New Horizons that I made over a year ago and loved the look of, and I knew it would be a great choice for postpartum wardrobe because the petals are flattering on a mommy tum….so I decided to hack the pattern to be slightly more nursing friendly. Remember this is my first cold weather baby so my usual Florida nursing wardrobe of tanks is not the best…so here goes.


IMG_8217 (2)

I didn’t take pictures of the process but I’ll do my best to explain anyway….

There’s only two small changes to cutting it out…one, for the front top bodice piece, you’ll need to cut it about an inch longer than the pattern piece. Also, you’ll need to cut a second front upper bodice for the nursing layer (this one does not need extra length).


img_9552-2

This is a picture from the Valencia nursing hack, but same idea

To construct it, I first layered the outer top bodice over the nursing layer, both right sides up, then but the back bodice right side down, lining up shoulder seams. I stitched the shoulder seams together, then flipped it right sides out. Next, I added elastic to the top of the outer top bodice. I measured below my bust line with a piece of 1/2″ elastic, stretching it to be snug (just around the front of me, from side seam to side seam). I serged this to the bottom of the top front bodice on the bottom so it was on the inside, then folded it under and topstitched it down.

img_9890

Next, the nursing layer. I used really lightweight french terry for this with poor recovery so I didn’t want to just cut holes because I worried they would sag….so I folded the bodice piece in half and cut curves from bottom through armscye, all the way through. img_9885.jpg

Risky move, I know. I serged clear elastic, barely stretching it, to all the cuts then basted it back together (very very slightly overlapping it).

IMG_8194

Next up, I basted the top of the front bodice pieces together and sides, making sure the elastic was just past the nursing layer so that it wouldn’t show the nursing layer when it was down. The rest of the construction I followed the pattern, except only attach the front lower bodice petals to the nursing layer only, leaving the upper top bodice free to pull up.

IMG_8189

Hope that helps! I’m here for questions if you have them.

IMG_8252

This post contains affiliate links to fund further sewing projects.

IMG_5685


Rebecca Page announced she was making a new trench coat pattern….with detachable hood….and I needed it. It’s perfect for Irish rainy weather. But, I didn’t want to tackle one for myself while pregnant….so I decided Charlotte NEEDED a trench coat. Plus, as of now she only has a puffy ski jacket and hoodies, so it’s nice to have something a bit fancier, right?

IMG_5667

I’ve paired it with the Arabella skirt, also from Rebecca Page

I had to make it red after seeing inspiration on Pinterest. Totally way less useful, but a red trench. C’mon. I went with red twill from Dress Fabrics, then decided the key to make her wear it was to make it cozy and warm (she takes after her dad and is cold ALL the time) so I got some thin microfleece from Joanns (back when I was visiting the states…ah, easy shopping). For fun, I used some polka dot poplin for lining pockets, hood and yokes (that came from my local store, Quilt Yarn Stitch).

IMG_5686

So I tackle this jacket, that has an absolutely ridiculous number of pattern pieces thanks to so many options, so printing and assembling the pattern alone took me a couple days…and try it on her, she says it’s too snug. Yeah, it’s fitted through shoulders and arms like a coat would be and all she wears is soft stretchy stuff, so makes sense that she is not liking the feel. Boo. So I decide to line the sleeves in poly lining fabric to make it easier to get on and off and less bulky. I should say that she measures a 3/4 in Rebecca Page patterns through the chest, but 7/8 for height. I cut a 5/6 though to give her more ease, adding the 7/8 length. If I had it to do over I’d do a 7/8 all over though for extra roominess, especially since I went with a bottom weight for the outer and heavier lining as well. Luckily she’s having a little sister. If you look at the fit on the shoulders, I’d say it measures accurately for the pattern…just a combo of heavy weights and her liking stretchy, loose clothes.

IMG_5663 (2)

All in all, I love it. I love all the details. I did both front and back yokes, welt pockets (was going to do patch but thought they were a little thinner than I’d prefer) and the hood of course for rain purposes. Also, the longest length (there’s a coat cut length as well).


The directions, as always for her patterns, were very easy to follow. There’s something like 100 pages so there’s no confusing steps at all for such a complex pattern. There are, however, so many buttons. So much hand sewing. Good for sitting in front of a movie to finish it off 🙂 Pattern is here and also comes in ladies and doll sizes.

IMG_5704